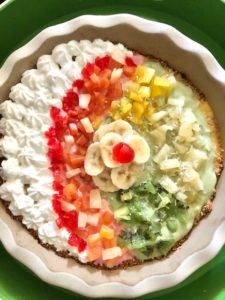
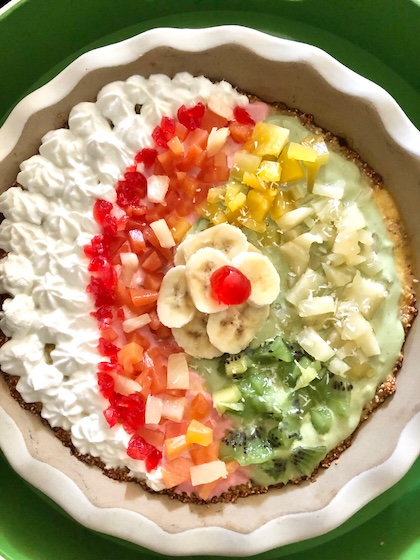
Pavlova fruit dessert is a delicious meringue based dessert with fruit. You usually see Pavolovas piled high with berries. But a hot tropical twist to that can be with fruits like Vitamin-C rich pineapple, kiwi, guava, bananas, mango, and cherries to make a rainbow effect as in eat-from-the-rainbow anti-inflammatory healthy. Recipe below.
You can also omit the sugar in your egg-white meringue base for a no-added sugar dessert that’s just full of juicy fruit sweetness.
If you’re feeling the dry air, then this is a good way to hydrate with food-as-medicine.
And instead of a traditional egg meringue base altogether, you can add a grit or oat pie base bottom. Save your egg yolks for pasta, curds, and ice cream.
Either way is a way to enjoy the tropics from home, and the healthy benefits of tropical fruits.
Loaded with Vitamin C and fiber, fruit also have minerals and are high in antioxidants and anti-inflammatory ingredients. Most tropical fruits are also very juicy to quench your thirst and cooling. Instead of reaching for a beverage with calories, eat healthy tropical fruits.
What’s fun about a Pavlova fruit dessert is you can make it your own swirls and patterns.
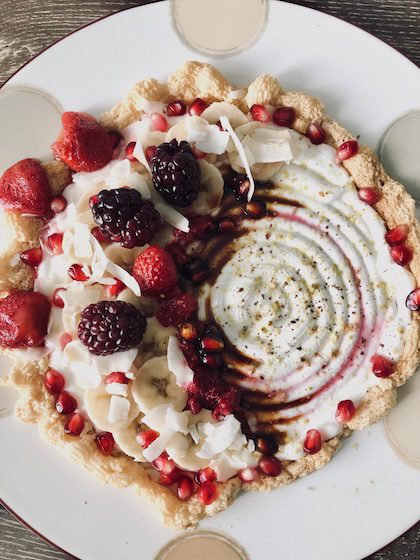
Like I did with this one leaning into dark color fruits like pomegranates that are fall fruits usually available around September.
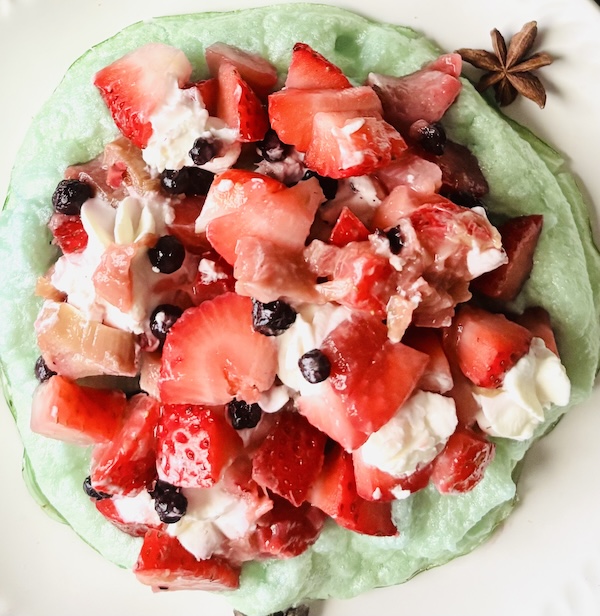
…Or a spring fresh fruit sweet-tart one. This is such an easy and great dessert way to celebrate seasonal fruits and zhugh up a breakfast or brunch.
This one has a no-sugar meringue base (egg whites only). And believe me the sugar was not missed… with strawberries and rhubarb that are fresh around May months. And added blueberries and Greek yogurt to lean into the healthy ingredients.
The dreamy meringue colors were made from plant-based natural food colors that contrasts well with red fruits.
Whatever you’re color-vibing on, you can make eat-from-the-rainbow healthy colors from natural foods (that I’m all about)! 🎉
This will make a 6-8" meringue base depending on how much you spread out. You can add a lighter pie bottom and add tropical fruits ontop that are high in Vitamin C. You can make this in under 2 hours.
Course Dessert
Cuisine American
Prep Time 5 minutesminutes
Cook Time 1 hourhour15 minutesminutes
Total Time 1 hourhour50 minutesminutes
Author Brandy @ Healthy Happy Life Secrets
Equipment
silicone mat
baking pan (optional)
Ingredients
Tropical fruits, chopped
2egg whites
cream of coconut or Greek yogurt
Instructions
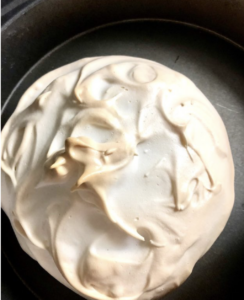
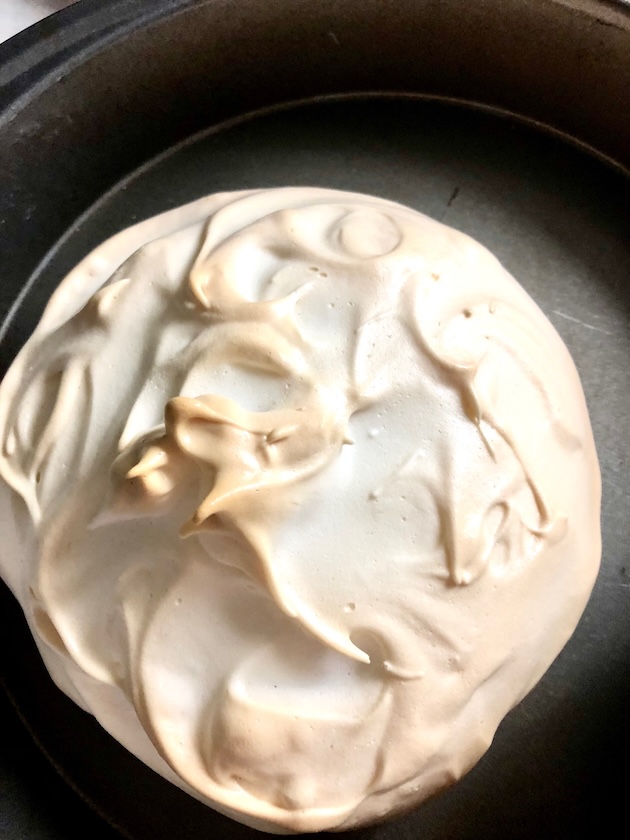
For Pavolva, whip at least 2 egg whites to medium peaks to make the meringue base. Usually 5-7 minutes with a mixer on medium to med-high speed. Add meringue shape you desire to a baking pan with a Silpat mat for easy intact meringue lift.
Bake in 200°F oven on lower oven rack until the meringue feels solid and formed (like packed snow) or edges begin to lightly toast, usually about 1 hour and 15 minutes. Let meringue cool in refrigerator for about 30 minutes.
You can use the meringue as a base or you can separately make a grits pie base that's quicker to bake, with grits, egg, coconut oil, and a little water or liquid that complements tropical fruit flavors. Add enough grits until the base sticks together. You can substitute grits for oats. Bake in slightly higher temperatures (e.g. 325°F) until pie base comes out clean with a toothpick. You can add to upper oven rack with meringue at 200°F and after you pull out the meringue, turn the heat up and leave the pie in the oven. Let cool. And then add meringue ontop.
Ontop of meringue, add fruits of choice or on-hand and make a pattern design or pile ontop. Layer or dollops of Greek yogurt if you like or pipe coconut cream (solid flesh of coconut).
Tropical fruits are great decorations as you can cut out shapes with cookie cutters. (e.g. dragonfruit, pineapple, passion fruit, and guava). If you want to keep it less fruit sugar, use berries and green bananas.
Notes
Do not add any fat (e.g. butter or oils) to the pan. I recommend using a Silpat or silicone mat (not parchment paper or foil) for easy meringue peel off. If you don't have a pan that it fits in, just use the silicone mat with the meringue ontop in the oven.
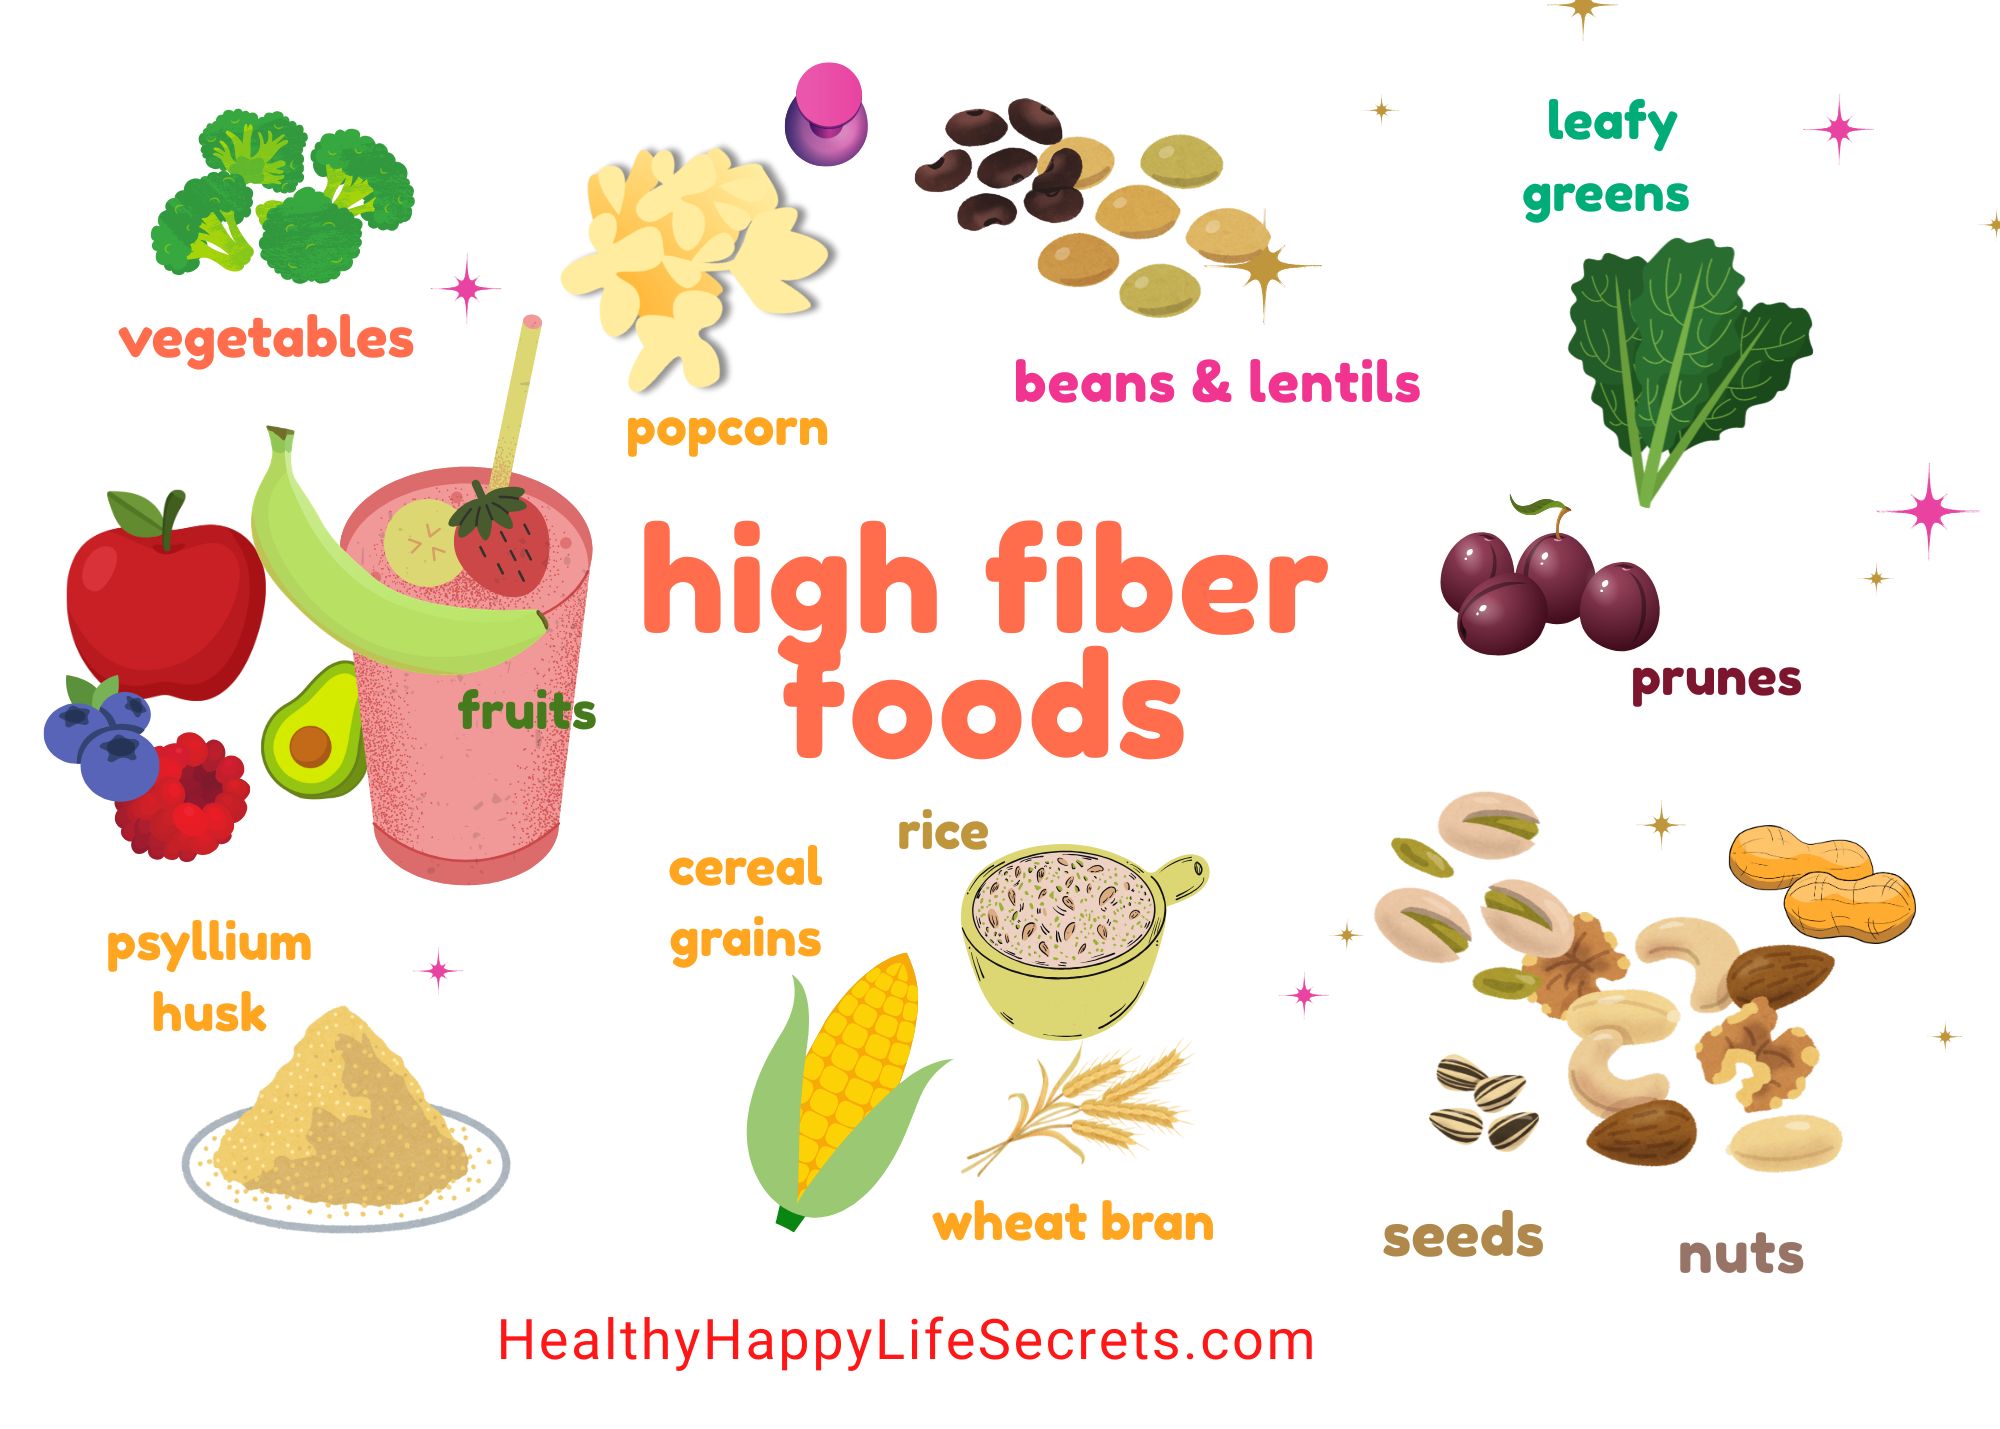
High fiber food helps you have a naturally gut healthy life. And if you’re fiber-maxxing these days, some foods are higher fiber in each food category.
Besides this printable graphic, check out the selected list below of highest fiber foods.
…Which btw, increasing fiber may be catching on as a trend, but it not a new healthy idea. Your GI tract has always loved you and those before you for increasing fiber.
…and it has been on a nutritional label for years, but is still often overlooked.
The dietary fiber line item is under the carbs category, but indigestible, unlike carbs (that are digested).
And the indigestible fiber supports a healthy gut life.
…Where the fiber we eat comes from foods that have outer plant-based fiber, such as wheat and fruit skins.
Wheat bran and prunes are good examples of the XX in fibermaxxing, as super fiber foods.
And basically, there are two kinds of fiber that make up dietary fiber count: soluble and insoluble.
Many plant-based foods have both, but when we think of fiber to help food passage, it’s the insoluble fiber kind that we need more of daily.
Think of insoluble fiber as a growing bigger tumbleweed in the desert.
And in the gut, that could be a wad of cabbage or popcorn moving through your body’s water channel tract.
…Or it could be other daily foods like leafy greens, nuts, lentils, beans, and plant-based foods that also have high fiber counts.
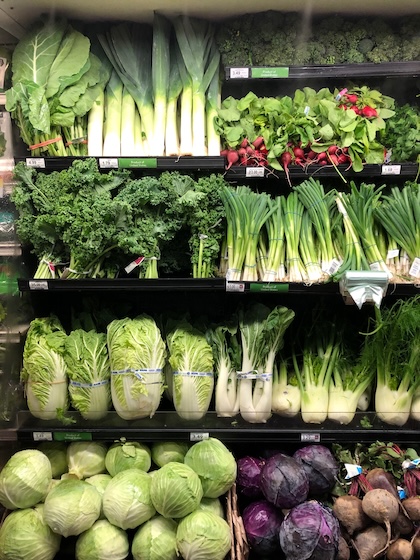
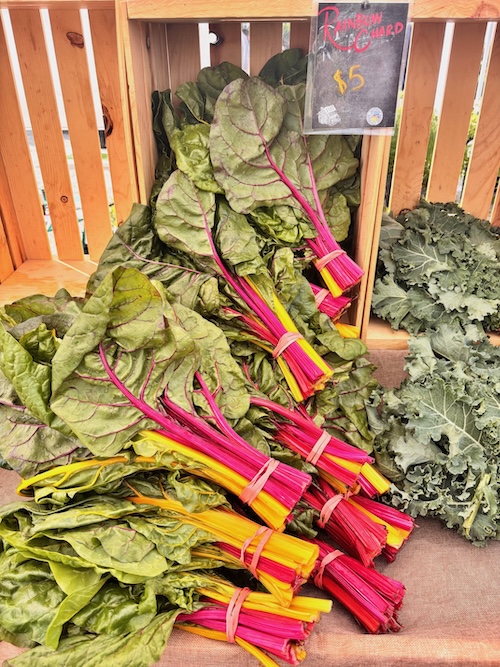
Fiber foods are usually affordable foods year-round at places like Aldi grocery stores… and you can find interesting fresh-off-the-farm grown seasonal foods at local farmers markets, such as different kinds of radishes and leafy greens.
The common mature version of these plants generally have more fiber than say microgreens that are the baby versions, and super healthy for other reasons.
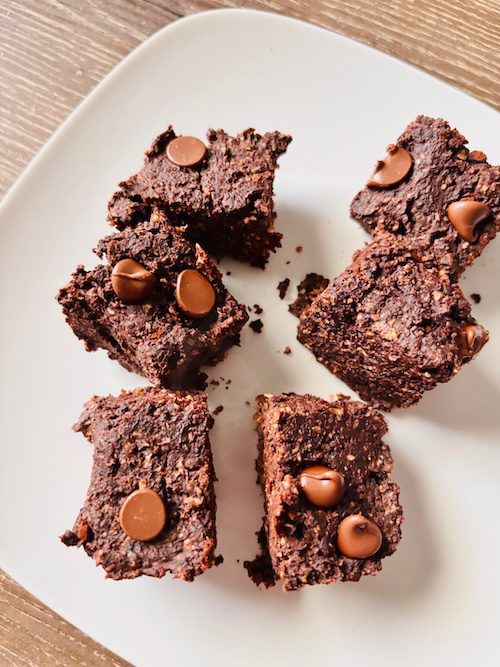
Then there are the cereal grasses with fiber, such as wheat, that can be added in your daily diet, like in a fiber healthy brownie recipe that you can make and even enjoy for breakfast.
…And another breakfast way to get in these fiber foods is from organic fruits in a smoothie.
Adding fruit skins to your blender helps you consume more fiber.
Today women are recommended to get approximately 25-30 grams, and for men, 30-38 grams of fiber.
And these are just a few high fiber food suggestions where you can rack up more gram points:
Smoothies – Fruit and veggies are good sources of fiber, and whether it’s a sweet smoothie or green smoothie, your body fiber benefits. Or a veg-fruit blend of the two like in a green mango smoothie.
Did you know cocoa powder has 7-9 grams of fiber per ounce? That’s double or more fiber than. in a medium apple. Finding an unsweetened and natural cocoa powder (not an alkalized Dutch processed) is healthier.
Green lentils – Peas and lentils are related, but from different plants or parents. They’re like cousins to each other. And you can make mushy peas with higher fiber via green lentils, that substitute green peas (that don’t have as much fiber).
Navy beans – The queen of high fiber beans are navy beans. Navy beans are also called pea beans (they have that in common with chickpea-garbanzo beans that also have both pea-bean in the names).
They may not be as easy for you to source as other beans, but are often found in a 15-bean bag. You can easily make this a healthy meal in a homemade bowl of turmeric soup.
And if you’re having a tough time finding these beans (vs cannellini or Great Northern beans that navy beans are often confused with), check out dry beans at places like Walmart markets that usually have a larger selection at lower prices. And you can’t go wrong with pinto beans either.
But if you’re hesitant about beans altogether, you can avoid the reason why many people sometimes stay away from the bean digestive effects…
Tip: And if that’s your bean experiences after digested, try a bag of dried beans. Soak the beans overnight or longer in a bowl of water. Absorbing the water, the beans will expand and grow in size, maybe as big as a lima bean, so add more than enough water to fully cover. Then low and slow cook the beans until soft.
Try them and note the difference for your body. Either way, it will be a different experience than canned beans.
Psyllium husk – This is one of those supplemental powders that has been around. It’s definitely an alternative, but one that often comes with additives and sugar. You can get enough fiber from your healthy food diet if you try.
…So maybe challenge yourself to get enough fiber from foods? Because then you’re eating more plant-based foods that also offer vitamins, minerals, and anti-inflammatory body benefits. Just a thought.
Artichoke – This a prebiotic food that feeds good bacteria (good for a gut baby). The common globe artichokes look more like pretty green roses with the concentric petals.
You’ve probably also heard of Jerusalem artichokes… that are tubers (like water chestnuts or potatoes) and not related to those artichokes. They actually look more like potatoes on the outside. But that’s okay if you get confused between the two, as both are fiber healthy.
Both artichoke types have prebiotic fiber (inulin) that feeds good bacteria, found also in asparagus, chicory root, garlic, bananas, alliums (e.g. onions and garlic).
Passion fruit – The passion fruit is also passionate in fiber with about 25 grams per cup compared to 8 grams in berries like raspberries, that are also considered high fiber fruits.
But passion fruit is great for people who don’t love sweet fruits, but if you do, you can pair with other tropical fruits in a smoothie, like sweet dragon fruit, pineapple, or kiwi that are easier to source. Or add in to coconut.
Avocados – You can find avocados on so many healthy lists, but as for fiber, it’s also a winner! It’s higher than many fruits. So add the superfruit in your smoothies, dips, and smears. You can try with coffee that’s a laxative, in a 2xx morning avocado coffee smoothie. 🥑 And then grow a little avocado plant from seed.
Prunes – These are dried plums that are good snacks that have balanced soluble and insoluble fiber. Plus you’re eating the skins that are mostly insoluble fiber (reason for daily fiber) and the flesh or pulp is soluble.
And they taste consistent. Because you probably remember the plum tastes from in season vs. off season where they can be sweet or sour.
For prunes, the natural fruit sugar in them act as laxatives. They make great home snacks (and not so much take-a-long-snacks). And you can try adding to your cooking, like pairing with meat if you eat.
Wheat bran – A wheat kernel has bran (outer layer), germ (inner seed) and endosperm (middle layer). Whole wheat flour has all, but the bran has the higher insoluble fiber, like most skins.
Flour is also more processed. But you can easily add wheat bran into your bakes like a whole grain roll or daily biscuit. You can also get this in your fortified cereals if you don’t like to bake.
Barley – Getting both soluble and insoluble fiber, barley has both like prunes.
To prepare, it’s easier than dry rice. It’s closer to quinoa where you can dry toast for a minute (optional), and then cook in water until soft.
It’s a good alternative to rice or oats. It’s a healthy ancient grain like buckwheat and amaranth where you can add a little into your bakes.
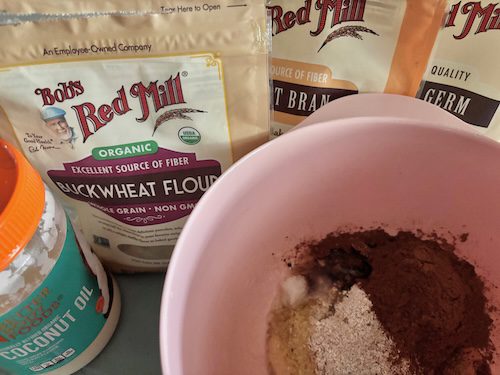
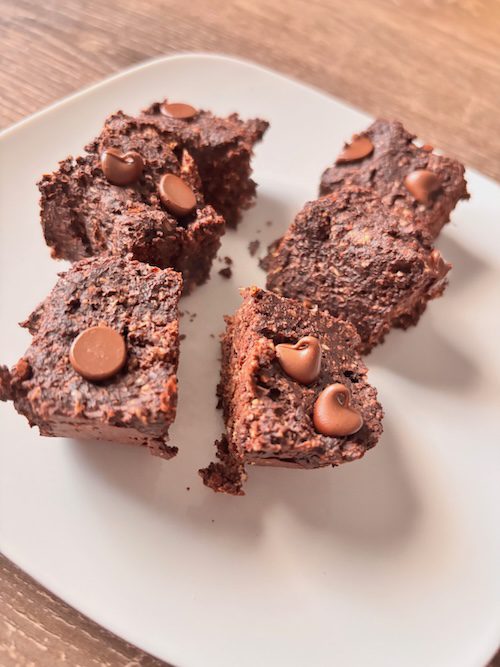
Healthy brownie with fiber (and protein) can be made with wheat bran and wheat germ. You can 2XX (and fibermaxx). And have a delicious dessert good for breakfast or anytime.
Oh, and healthy especially with buckwheat flour added that’s in this fudge-like brownie recipe.
Also, learn how each kind of flour impacts your healthy brownie’s texture, and which flour has the most fiber. So you can decide which fiber to add in this healthy brownie. I’ll help you below…
Fiber is plant-based indigestible food that helps digestion. Think of whole wheat and other insoluble fiber sources, like tumbleweed passing through and picking up particles that would otherwise stay longer in your body.
Soluble fiber is good for helping cholesterol and blood sugar. And supporting optimized weight below the belt.
And daily fiber helps you feel leaner and look your best in your jeans… and who doesn’t love that?
So a healthy brownie is a simple way to lace in healthy ingredients that help our health… and satiate a sweet tooth. And in the duo benefits, you have your choice of healthy ingredients.
Here’s the healthy skinny, so you can make your ingredient choice as to which ones you want to include for your brownie this time.
First up is is the wheat germ ingredient, that’s the seed. It’s where it all begins for a wheat kernel…
Wheat germ has more protein and Vitamin E that also is an antioxidant. And wheat bran has more fiber than the good germ which is good for weight management.
Wheat bran is also part of the wheat kernel, like the skin or outer layer that’s super high in fiber. When you buy wheat germ, you’re getting more vitamins and minerals that embryos carry. And wheat bran has more fiber.
Whole wheat flour is more common and balanced with germ and bran in it, but it’s more processed. It includes the endosperm, that’s the middle layer and starchy section that helps make more flour.
Think of whole wheat flour as the more healthy alternative with more protein and fiber compared to or vs. (white) all-purpose flour.
Then there’s buckwheat… that’s a gluten-free flour choice.
Buckwheat is a super food and is actually not a wheat. That’s why it’s gluten-free. It has an even higher amount of fiber for fibermaxxing if that’s one of your heatlthy missions. It’s a good add for most sweet and breakfas-y dessert recipes like a blueberry scone or buckwheat ginger cookie snap.
…So those are the wheat options (both gluten wheat and gluten-free buckwheat flour)… and then there are a couple other good healthy brownie gluten-free options, including coconut flour and oat flour.
Coconut flour vs. whole wheat flour vs. oat flour
For the healthy brownie recipe options, you can decide between whole wheat flour, oat flour, and coconut flour as the main brownie flour. And the others (germ, bran, and buckwheat) are healthy supporting adds.
If you’re trying to do a fully gluten-free healthy brownie, buckwheat, oat, and coconut flours or a combo of them would be good choices.
Coconut flour is super high in fiber with over 20 grams or more per 1/2 cup (about 100 grams). Coconut flour has more insoluble fiber (and more fiber than oats). Oats has more soluble fiber (overall 3-4 grams of fiber per 1/2 cup or about 100 grams). Whole wheat flour has 6-7 grams of fiber per half cup.
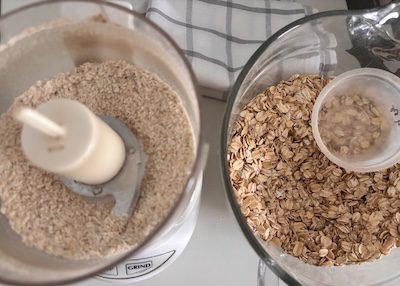
If you’re looking to control blood sugar or cholesterol, then oats would be a good brownie ingredient choice. And the best choice for a healthy fudgy brownie. You can simply grind rolled oats to make the flour.
And besides coconut and oats, another gluten-free alternative is black beans that will give a more lumpy brownie with 6-9 grams of fiber.
It’s a good option if you have extra bean cans around (or kicking the cans deciding which ingredients to choose 😀)… and you want to have a more balanced soluble and insoluble fiber eating experience. For a brownie with black beans, to enhance flavor, you can add black coffee as a flavored liquid instead of regular water.
Healthy Brownie Tastes and Textures
Adding or subtracting flours won’t impact the brownie taste negatively (as cacao powder or chocolate-y flavors is the main brownie flavor and another healthy ingredient).
Unsweetened 100% cacao powder (cocoa baking powder) is anti-inflammatory. It helps to make this an overall low-sugar brownie.
And for a healthier sweetener, honey is also used, but you can substitute for a smidge of healthy monk fruit sugar (that’s better for a cake-like brownie, e.g. with whole wheat flour).
For additional flavor pairing or for no-added sugar, you can use peppermint extract for a chocolate mint brownie or coffee to enhance the cacao flavor tastes.
And besides tastes, you can favorably change the texture of the brownie you choose by the flour choices you make.
Whole wheat flour (a fully gluten option) will help make your brownies flour-cake-like, and a smoother batter (less healthy bumpy or rustic). And if you add baking powder (and/or baking powder), that will help the brownie rise in the oven.
But gluten-free flours like coconut flour will stay about the same height before and after the oven bake. Coconut flour brownies will be more dry for texture: the coconut flour batter will be more dry and the brownies out of the oven will be too.
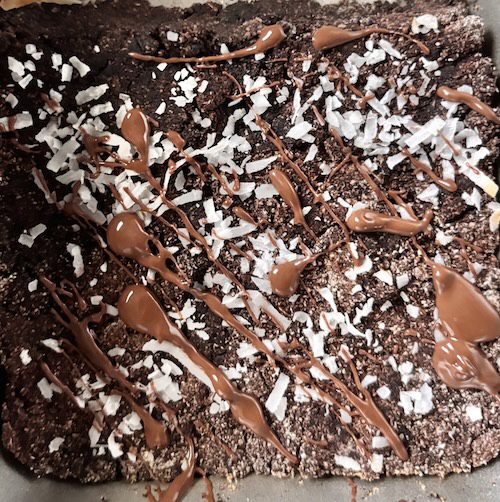
For coconut flour brownies, I leaned into coconut tastes with shredded coconut here…
…And finely ground oat flour brownies will give more of a fudge-y brownie (like a flourless cake). The baked brownie will look more like the batter, than not at all. Brownies are simple that way. You can kinda predict what they will look like on the other side of the oven. 😊
…Where the brownie batter will be more like a slightly sticky cookie dough with some grainy oat bits. And more like a store bought brownie mix than say with coconut flour.
So, weighing fiber types/amounts and brownie texture differences and what’s priority to you, will help tip the scale toward as to which flour(s) you choose this time for your healthy brownie plate.
And as you’re deciding flours if you haven’t already, this brownie recipe also has egg white and applesauce as healthy binders.
…Which btw I love substituting using any butter or egg yolk with unsweetened applesauce in a healthy brownie. And if you like applesauce in general, you’ll also like a fruit roll up or applesauce cobbler.
Longer Lasting Brownie
Applesauce will help your brownie last longer if you want to make a larger batch. And coconut oil will help that mission too.
You can use another oil like light olive oil or canola oil, but it will not last as long at room temperature. Those oils can grow rancid quicker at (warmer) room temperatures.
And the same goes for liquid choices. Milk (and liquids that need to be refrigerated) will not last as long vs. using water (or an enhancing liquid like black coffee).
…So now that you have all the brownie ingredient notes, are you ready to make this delicious, one-bowl batter recipe?
This is a 2X fiber brownie that has no black beans. It's fudge and less cake-like. This will make 6 small brownie bites or 2 regular size square brownies.
In one bowl, hand combine ingredients with a spoon.
Bake at 350°F/180°C for about 15 minutes. Do not overbake.
Notes
If you want to turn this into a cake-like brownie, add 1/4 cup whole wheat flour and 1 tsp baking powder.Oat flour is better at blood sugar and lower cholesterol and coconut flour is good for supporting regular digestion. Coconut flour will make a more dry brownie, and oat flour will give a more fudgy brownie.Add enough water (or liquid) to get a smoother batter that fully incorporates the flours of choice.
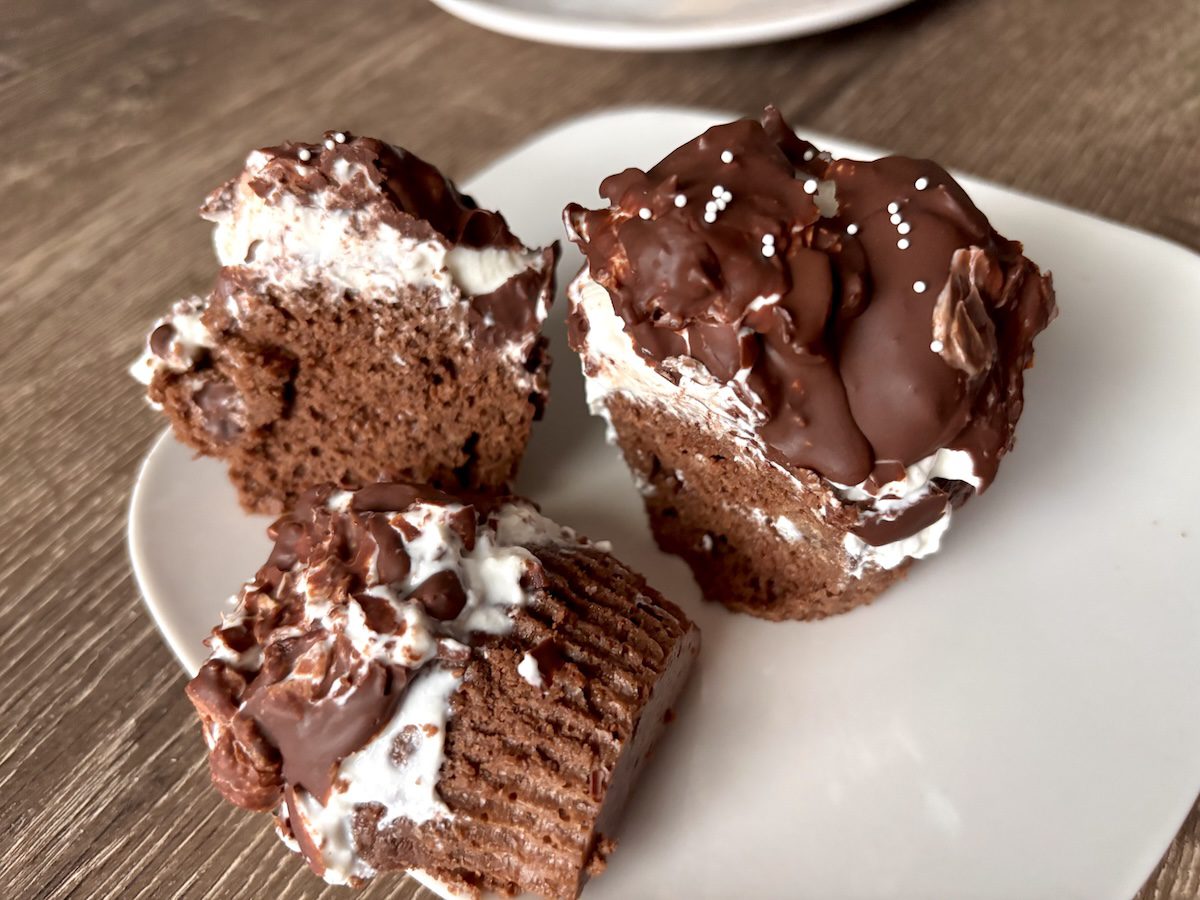
Hi-hat cupcakes are one of my favorites. My eyes light up in delight. A 3-step cupcake has everything to be a quintessential dessert staple… chocolate, frosting, and a cup-cake layer.
Who doesn’t like being greeted with this type of hat? Hi-hat back atcha!
And while the white pillowy cloud of goodness is usually made with meringues or marshmallows… this one is not. Because that usually equals a generous amount of white granulated or powdered sugar… and that adds up to high sugar in the body.
…And when sugar is high, then you want more to eat. Both you and your body crave more.
And those “empty calorie” sugars do you no favors if you’re trying to be healthier, low-sugar, are pre-diabetic, or trying to lose weight.
But this hi-hat cupcake recipe version is not that high (sugar) way.
It’s also full of healthy ingredient goodness mixed in to a delicious low-sugar chocolate treat..
If you use the ingredients and technique below, then you’ll bypass the high-way negative effects.
…See what I did there? 😊
Low-Sugar Points:
And knowing all this, as an intentional anti-inflammatory food and low-sugar baker, I used a smidge of monk fruit sugar for the cupcakes that won’t spike blood sugar like regular white sugar does.
Monk fruit sweetener is also super sweet tasting on the tongue, so you don’t need much. For all those good reasons, it’s added to the cupcake and also helps the cake texture.
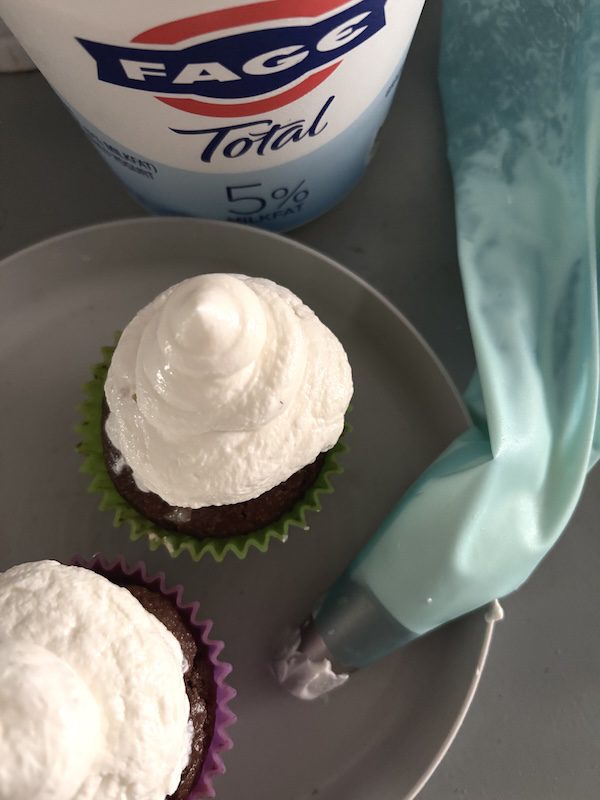
For the frosting, I decided to use the natural sugar already in Greek yogurt as the sweet ingredient.
Yogurt naturally has lactose that’s a natural form of sugar.
So there’s no added sugar… and when food shopping, you can look for those written Greek yogurt label confirming positives to see for your very own eyes.
A thicker yogurt (5% or whole milk) works consistently for a thick frosting, but 2% or reduced milk could work too from the many yogurt options out there.
The test is when you open your yogurt, if the yogurt slides off a spoon like most regular yogurts. If it’s thicker like many Greek yogurts, it won’t easily slide without your needing to prod it along.
And if it fails the spoon test, you likely will get an elegant mound cupcake hat (like a melting snowman or pill hat), but not a cone shape or an elf’s hat that you often see with hi-hats.
But either hat style will melt in your mouth or get gobbled up by someone. 😋
…And actually the less perfect it looks, the more likely that’ll happen quick… if you get my drift.
And I’m all about easy over perfection.
Then for the last part of melted chocolate, you have many options. Some chocolate morsels has monk fruit sugar as an ingredient if you want more healthy options. You can also choose dark cacao or regular dark chocolate morsels.
But now we’re getting ahead of ourselves…
Because.. first you have to make the cupcakes! And then you can assemble or put it all together.
And for planning, you can make the entire hi-hat cupcakes in under 2 hours, or in stages.
The cupcake itself from start to finish will take less than 30 minutes.
Ready?
To make the foolproof easy hi-hat cupcakes, these are the chocolate cake ingredients and steps:
-2 egg yolks
-1/2 cup milk + more (I usually add an extra few Tablespoons because that will yield a thinner batter… and that means more cupcake)
-1 Tbsp neutral oil or liquid form of coconut oil (if you want to use less healthy fat, then you can use 1/2 Tbsp and it will also work as cake is naturally a more dry texture to begin with)
-1 tsp lemon juice or white vinegar for acidity
3/4 cup almond flour
1/2 cup all-purpose flour
1/4 cup cacao (or unsweetened cocoa powder)
1/8-1/4 tsp monk fruit sugar
1/2 tsp coffee (optional)
1/2 tsp baking powder
1/4 tsp baking soda
pinch of kosher or coarse sea salt
Step 1: Measure your flour and dry ingredients and add to combining large bowl.
I have found gluten-free almond flour with a little all-purpose flour works best, and adds healthier vibes. So it’s the best choice all-around. But if you don’t have almond flour on hand, then you can also use full-on all-purpose flour.
I leave out the coffee for chocolate cakes but that’s a decision you make as some people love the pairing. For me, salt adds more of an impact in taste to a chocolate cake than coffee does. Another option is to add a little more cacao powder than the recipes call for to bring in more “chocolatey” vibes.
I like the dark, bitter unsweetened 100% cacao to be the star ingredient in the bake. But to each her own… you do you!
Then start adding liquid ingredients. Separate your eggs when they’re cold from the fridge (and you can save your egg whites for other recipes like baked cannoli shells).
Hand whip/loosen up egg yolks in a separate bowl (and reserve adding the egg until the end if you want to taste your batter before baking). But otherwise, you can add the egg yolks to one easy bowl along with all the other liquid ingredients. Use 1/2 cup of milk of choice
Any taste-friendly liquid would work. Even a little water would work, but it would be a zero taste add (and less fat and protein for the cake texture), so I wouldn’t recommend.
Oh and btw, it doesn’t matter if you add dry to wet or wet to dry ingredients. And in happy nostalgia, that’s what my favorite baking teacher Martha Stewart has said before. Her teachings have encouraged my hi-hat and cupcake baking to name a few practical areas.
And in my small kitchen box, the reason I add wet to dry (or add dry ingredients first to the bowl) is because then I now know how much actual liquid I would need based on the batter texture consistency (e.g. all milks and flours are not exactly equal). I find it easier to pour a splash more liquid than to go back and have to measure out dry ingredients..
But either way, combine by hand the dry and wet ingredients. I recommend with a spoon instead of a classic baking whisk because batter-flour pieces tend to stick to a whisk and you can lose half a cupcake that way… and we want all the cupcakes! 🧁
Plus, you’re not as likely to over mix or over combine your batter with a spoon. There is such a thing as having to0 much fun mixing… but it doesn’t belong in a cake. 😀
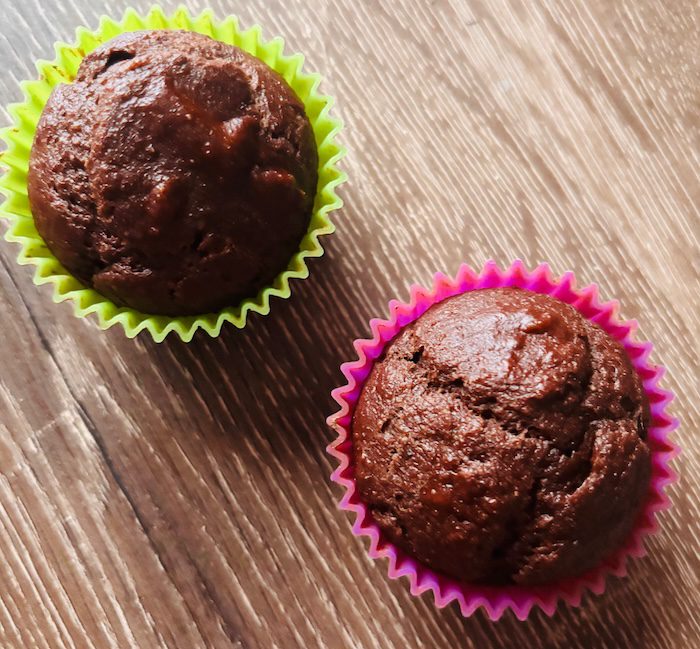
Then after a few magic strokes, fill your cupcake holders to almost full. I use reusable silicone cupcake holders but you can use paper or foil ones too. You can also spray your baking cupcake tin, but be sure it’s the kind that isn’t potentially dusting off metal glitter over time that can end up in your cupcakes.
Bake the soon-to-be hi-hat cupcakes at 350°F/180°C for 20 minutes. Don’t over bake. The cakes should be on the paler side with a little golden glow.
Pull out of the oven when time is up. If you’re not sure, you can test with a toothpick if it comes out clean.
And while still warm, pull the cupcakes out from the cupcake tin that’s still warm. You want to stop the baking heat that’s still coming from the cupcake tin.
And you can easily do this with a metal spoon.
…maybe the one you rinsed off that you used for combining the ingredients in the batter? As you bake more, you naturally get more efficient. 😊
Place the cupcakes on a plate. Let the cupcakes cool in the fridge for about 10 minutes. If you don’t plan on finishing your hit-hat cupcakes in one sitting, then cover the cupcakes in the fridge (I recommend) or you can leave out covered overnight at room temperature.
Make the frosting for the hi-hat cupcakes frosting:
Again, you can find no added sugar because it’s Greek yogurt that has lactose natural sugar (and win body points 💯).
It’s about 5-6 tablespoons of thick yogurt per cupcake. You can add less if you want to.
Use a piping bag to pipe on frosting with a large round circle piping tip. You can also use a thick pastry-type bag, snip a bottom corner, and use that as the round opening.
Tip: If you discover you have the wrong yogurt type that won’t work for frosting after you’ve opened the yogurt container (…that has happened to me as someone who likes food experimenting!), then you can keep your cupcakes in the fridge covered (to prevent drying out) for up to a week, and still make the frosted hi-hats and melted chocolate. They’ll still be delicious… and from the get-go, you let-go and let melt away all of your hi-hat cupcake worries!
Then when you’re happy with your frosted cupcakes, refrigerate them to let the Greek yogurt frosting set.
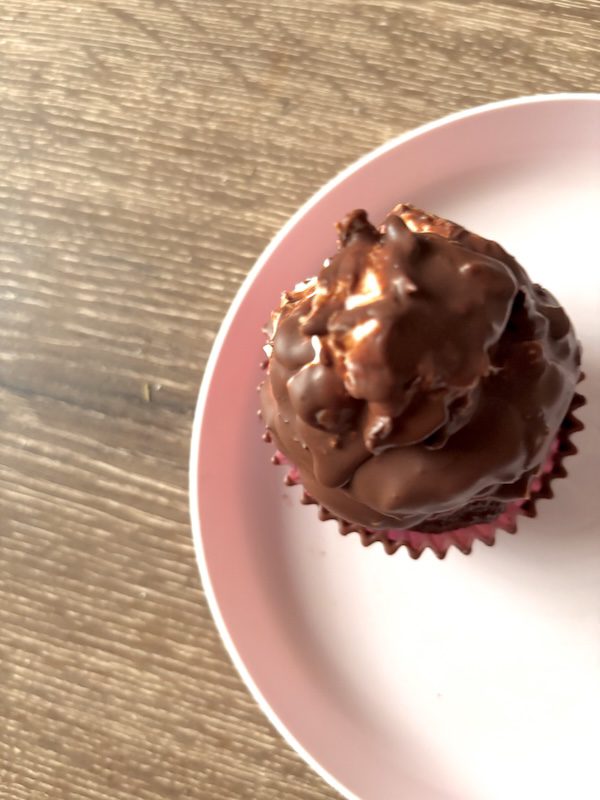
Next, make the melted chocolate. You can use a coconut oil melted chocolate recipe. And for this hi-hat cupcakes recipe application, you can use about half of a third of the coconut oil. And then let the melted chocolate get back to about room temperature (so you don’t melt the frosting and it slides off like Frosty ☃️).
It’s a little like tempering dark chocolate without having to be so precise in degrees, to get a shine.
Hold the cupcake at the bottom and twirl in melted chocolate. You may lose a little frosting in the melted chocolate that you can easily add back on.
Then refrigerate the cupcakes for 2-3 minutes to let the chocolate set.
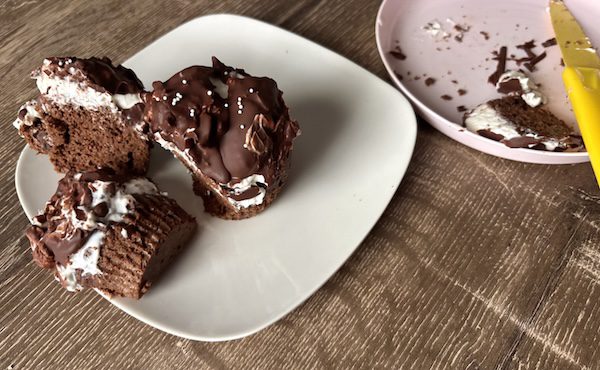
This is a moist chocolate cupcake with no-sugar added frosting and melted chocolate. If you make these for others, they will be a hi-hat-hit. This makes 4-5 regular size cupcakes.
Course Dessert
Cuisine American, new york
Author Brandy @ Healthy Happy Life Secrets
Ingredients
2largeegg yolks
1/2cupmilk of choice (plus more)
1/2Tbspneutral oil (light olive oil or liquid form coconut oil recommended)
1tsplemon juice or white vinegar
3/4cupalmond flour
1/2cupall-purpose flour
1/4cup cacao powder or unsweetened cocoa
1/8-1/2tspmonk fruit sweetener (depending on how low-sugar you would like to make this)
1/2tspbaking powder
1/4tspbaking soda
1/8-1/4tsppinch of kosher or coarse sea salt
4-6TbspThick Greek yogurt per cupcake (no-added sugar recommended)
dark chocolate morsels (for melted chocolate)
coconut oil (for melted chocolate)
Instructions
Pull eggs out of refrigerator and separate the egg yolk and whites (save the whites). Whisk the egg yolks to combine to cupcake batter. If you will want to taste the cake batter, put egg yolks in a separate bowl, otherwise they can be added to the combining batter bowl.
Make the chocolate cupcake batter in one bowl. Gently combine dry and wet ingredients. Tip: use a spoon to combine. This will be a wet batter that you can pour and spoon into the cupcake holders/pan. Fill the cupcake to about 1/8" from the top.
Bake cupcakes at 350°F/180°C for 20 minutes. Let cool in refrigerator. This will make 4-5 full cupcakes depending on how much total liquid/milk you add.
Make the frosting with Greek yogurt. Add to a piping bag with a round or star tip. Hold straight up on cupcakes and press the piping bag a few times and then pull up. Refrigerate cupcakes while making the melted chocolate.
Make the melted chocolate (see the melted chocolate recipe). Hold the cupcake bottom and sides, and then dip each frosted cupcake into the melted chocolate. Refrigerate to let the chocolate cold set.
Enjoy! Cupcakes will last for several days covered in the refrigerator.
Notes
Monk fruit sweetener is a healthy, anti-inflammatory sweetener. It is more sweet than granulated sugar, so you only need a little.
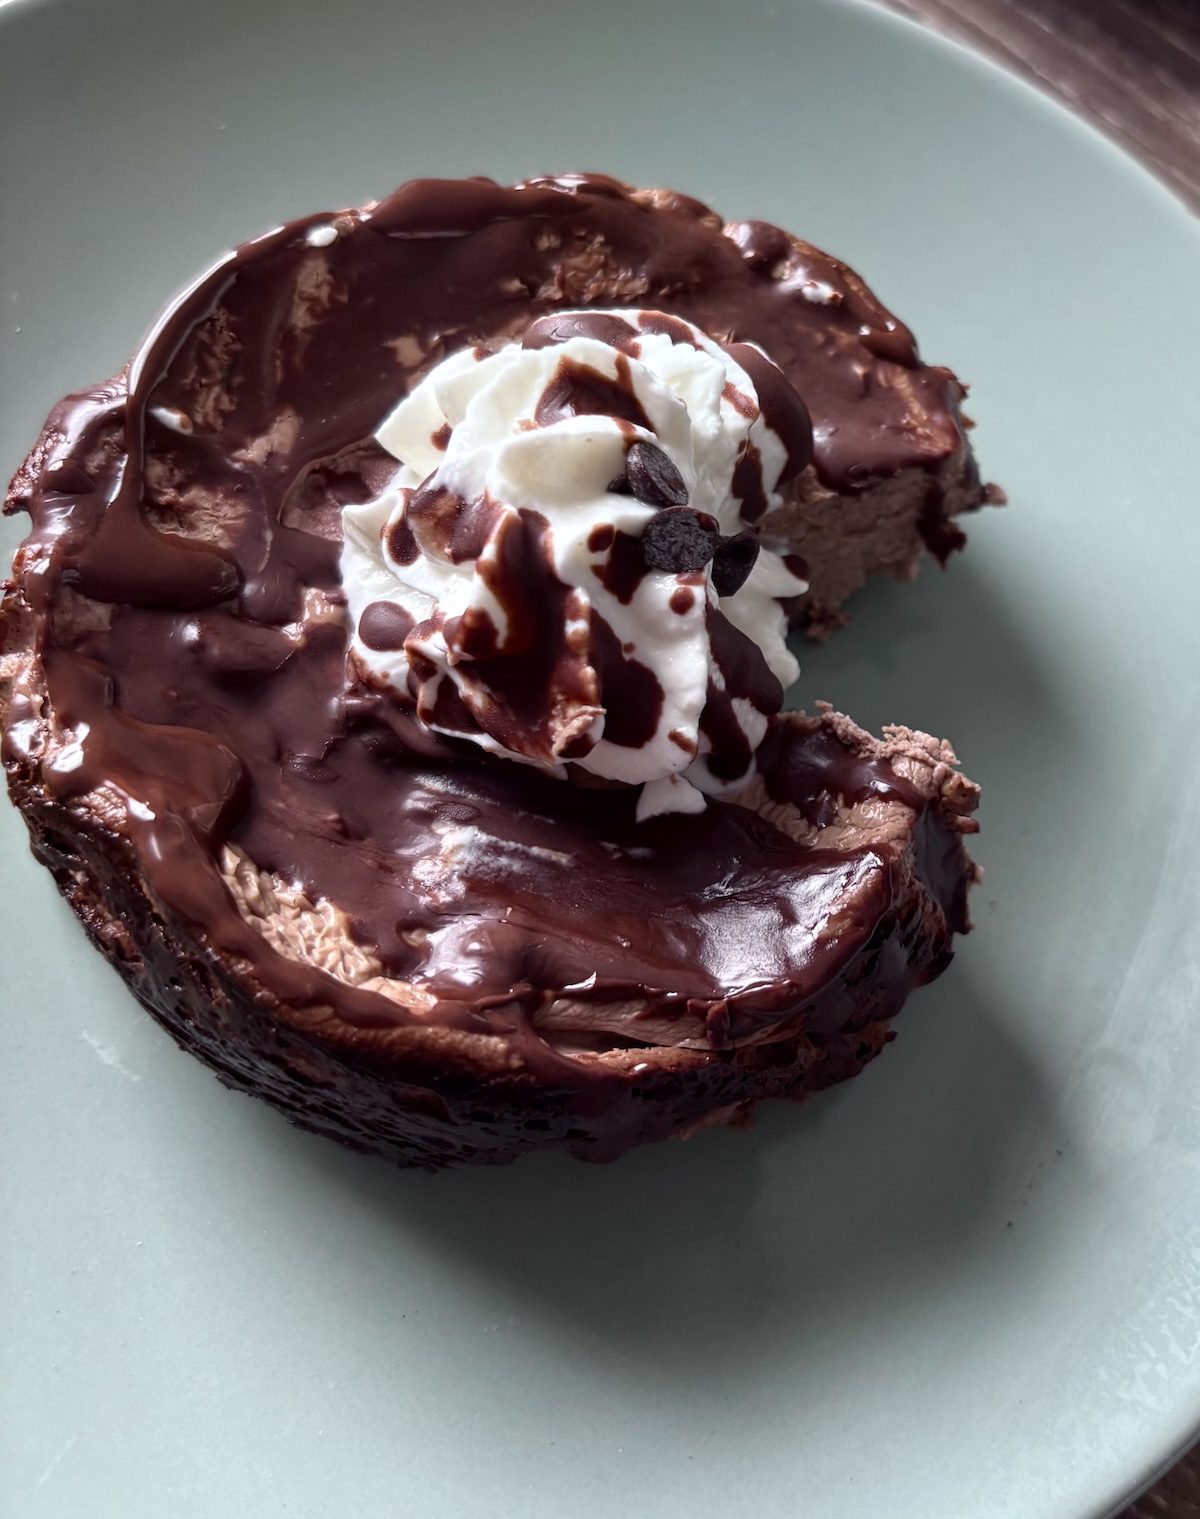
Goat’s cheesecake is one that’s so easy to make! And you win body points with a more gut healthy cheesecake, using goat cheese. Oh, plus the healthy probiotic piped topping. See the full notes and recipebelow…
…And I’d be remiss if I didn’t share the skinny on the healthy ingredients that make a healthy cheesecake difference.
…That’ll benefit your body and also help you be happy, feeding healthy vibes to your gut (where most happy hormones are made) and mouth (stirring up glee). 😋
With this cheesecake recipe, it starts with the ingredient choice of chevre or goat cheese, that’s higher in protein, calcium, and lower calories (about 25% less than regular cream cheese). Plus, healthy prebiotic notes as fermented cheese.
Despite a French name, chèvre is not to be confused with cheval that means horse in French. 🐐 Fun fact: Horses make milk too. 🐎
And goat cheese has a texture closer to cream cheese so it works great in a cheesecake.
Its calories and fat content is more like a Neufchâtel cheese, a reduced cream cheese, which is what I used to use for cheesecakes before I knew better. It’s French named after the town it comes from in Normandy…
But today, we have other available healthier options, like goat cheese…
And the Mediterranean region was one area of the world that put healthier (the real-deal) prebiotic goat cheese on the map 🗺️ straight from the farms, while cow’s cheese is still what dominates cheeses.
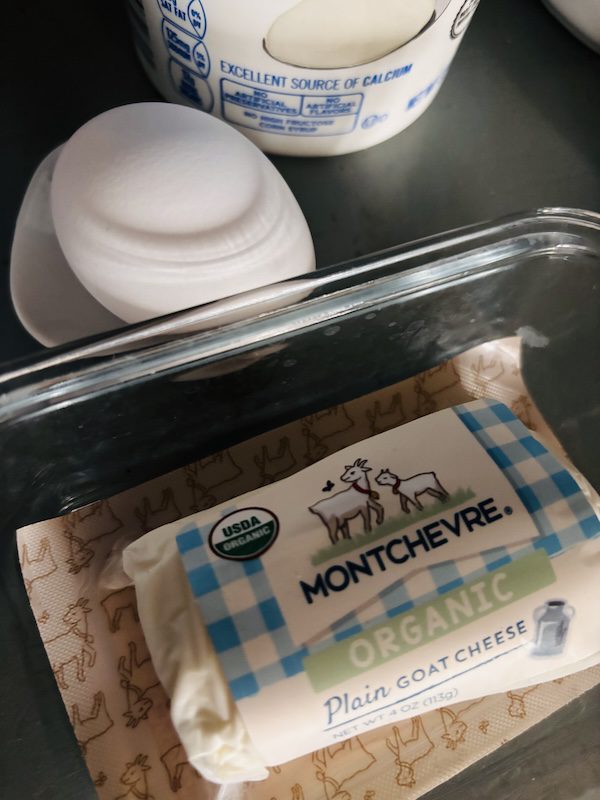
And we benefit with the arrival of goat cheese makers. Montchèvre is one organic brand made in the USA. Specific to Wisconsin, that’s also home to the Cheese Heads (America’s Dairyland).
Montchevre is the organic goat cheese used in this cheesecake recipe. It looks like a packaged small cheese log.
You can find it in many grocery stores that has a premium or specialty cheese section, like Harris Teeter or Trader Joe’s. So it’s easier to source.
…And even easier to find is a thick Greek yogurt for additional healthy probiotics (gut health), protein and B12 vitamins (good for energy), to name a few healthy body benefits.
All for the sake of being healthy (that’s a good cause)… and a tasty, nice textured smooth cheesecake.
Sheep’s cheese is another type of healthy protein cheese, like goat cheese, that is growing in common availability, thanks to places like Sardinia, Italy. The rural green pastures are known for the rustic and healthy cheese tradition.
And for cheesecakes, you can also make a delicious, high protein Basque-style sheep’s cheesecake. Keep in mind: sheep’s cheese 🐑 is generally more firm than goat’s cheese 🐐, so the sheep’s way makes a better rustic cheesecake shape.
But with Montchevre goat cheese in this recipe, you should get a smooth batter like mousse that makes a rounder shape. And this means you can use one piece of baking paper effectively (instead of cutting scrapbook strips like I did with sheep’s cheese in a cheesecake).
💡An idea for if you don’t have baking paper: if you use a small half-size 4″ springform pan where the cake pan sides pop off, then you can use one cupcake paper holder and it will fit perfectly at the bottom.🧁Flatten it out and that can be the baking paper you use.
And then to complete the goat’s cheesecake batter to pour into the cake pan:
Bring in the egg yolk that helps the structure in the recipe, and will add more protein/B12 healthy notes. But instead of probiotics (like in yogurt), it’s prebiotic to feed the healthy bacteria probiotics.
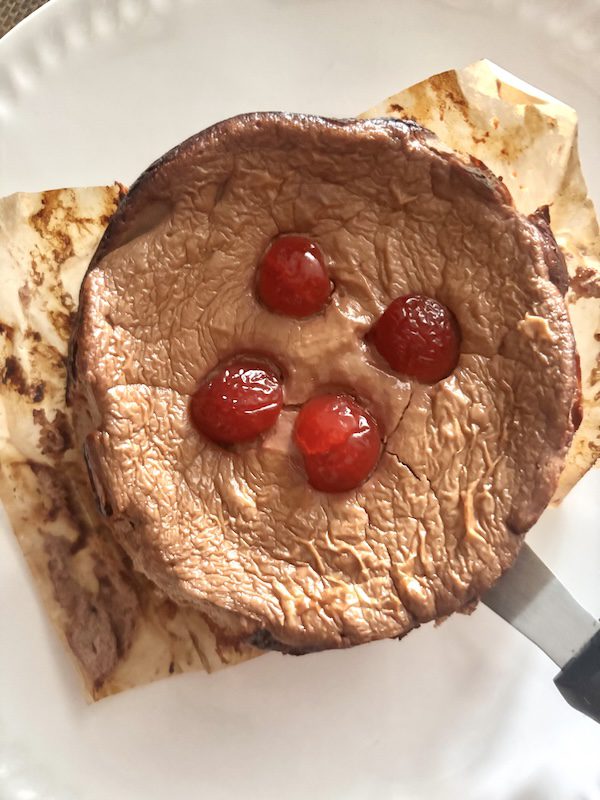
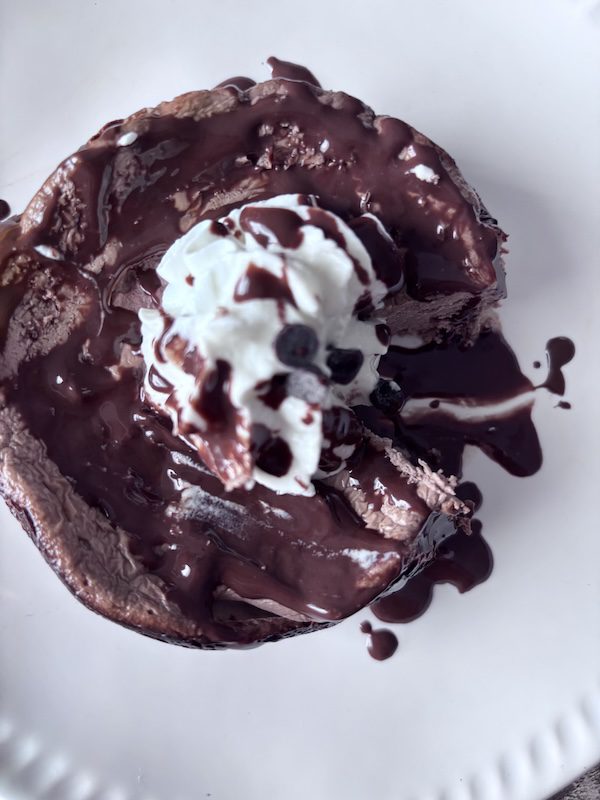
And for some FUN batter flavor variety, you can add easy flavors to your goat’s cheesecake like chocolate (via cacao powder).
…Or cherries and chocolate for a delightful pairing. That’s where the HAPPY dials up for me, but your flavors are up to you. You can also add in chocolate chip morsel bits for a little added crunch.
Then when you’re good with your batter in your pan, bake your cheesecake in the oven. It’s a timed event (and not one where you have to keep checking the oven).
After it’s well-baked, the goat’s cheesecake should come out of the cake pan pretty easily in one cake piece, after it’s cooled. The sides will shrink a little to help that effort, because a cheesecake usually sticks to the sides.
Tip: I have tested butter and oil directly on the bottom and sides of the pan before, and nothing seems to have worked better than baking paper and oil. Since this will be a smoother, less dense, and almost pudding-like batter you pour into the circle pan, you can use one piece of baking paper instead of little strips and pieces, and the shape of the cheese cake will remain close to a circle (without weird geometric angles for a rustic look).
And then for the final zhugh and topping (fun), I saved the best for last… where it’s thick Greek yogurt again!
Easy Goat's Cheesecake - Protein and Low-Sugar Cacao Healthy
This will make a 4" size cheesecake about 2" high. Double the ingredient amounts for an 8" cake pan.
Course Breakfast, brunch, Dessert
Cuisine American
Prep Time 5 minutesminutes
Cook Time 55 minutesminutes
Total Time 1 hourhour
Author Brandy @ Healthy Happy Life Secrets
Equipment
springform or cake pan
baking paper
Ingredients
3/4cupGreek yogurt, thicker portions (2% or higher/reduced fat milk)
1/4cupchevre goat cheese
1largeegg yolk
1Tbspcacao, unsweetened or cocoa powder (for chocolate cheesecake)
1Tbspcherries, halves (optional)
1-2tspmini chocolate chips (optional)
1Tbspadditional Greek yogurt (for piping on top)
1Tbspmelted chocolate (optional)
Instructions
Make the cheesecake batter: combine goat cheese, yogurt, and egg yolk ingredients in a bowl. Add in any flavors like cacao powder.
Coat neutral oil to the bottom and sides of a springform pan. Add a rectangular cut piece of baking paper to the middle. Two opposing sides should reach the top. Tip: if you don't have baking paper, an easy trick is you can use paper cupcake holders. Flatten out and add to the bottom of your springform cake pan.
Pour-spoon cheesecake batter to the pan.
Bake at 350°F/180°C in the bottom oven rack for 55-60 minutes. The cheesecake sides should be a little darker and slightly pull away from the pan that will help you to pull out of the pan.
Let the cheesecake fully cool (and firm up) before removing from pan.
Pipe Greek yogurt and melted chocolate if desired. Rounded star tips work best to make a "diner whipped cream" topping look.