UA-141369524-4

Rough Puff Pastry Bite – Low-Sugar

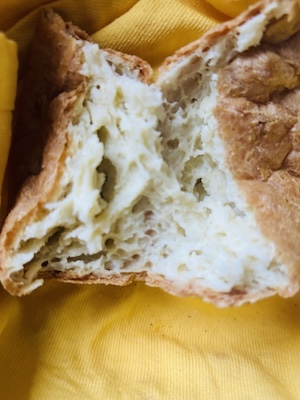
Rough puff pastry bite plates are great anytime as appetizers when you need a sweet or savory snack, or something tasty for guest plates. These lemon tart ones (but not tart tatin) are easy baked desserts you can make…

easy rough puff pastry bite plate.

And in one kitchen session. They can be made with no fancy tools, even though they’re a twist on a French classic puff pastry…

Vol au vent which means “fly in the wind.”

…Was someone baking and there was a swirling fly? Well, the name’s story origin is that the pastry is so light and puffy that they’d fly away with the wind.

…And hopefully straight into someone’s mouth. 😋

But with its fancy name, don’t let that fool you into thinking it’s complicated.

Because it’s as easy as dare I say premade bought phyllo sheets (that believe it or not, I’ve never used before, but I do know you have to bake them too!).

…Which btw, so easy to make your own phyllo dough for baklava.

…And easy to make your own pastry dough (that’s more forgiving than say cake or bread, so you don’t have to be fully ON and can make it before you finish your warm morning drink).

For starters, you just need 3 easy ingredients… flour, cold water, and butter.

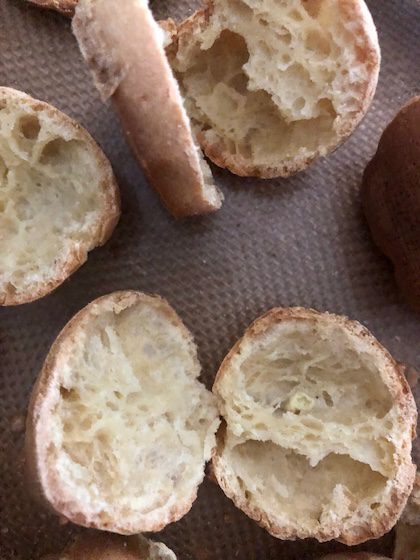
…that will make these layers.

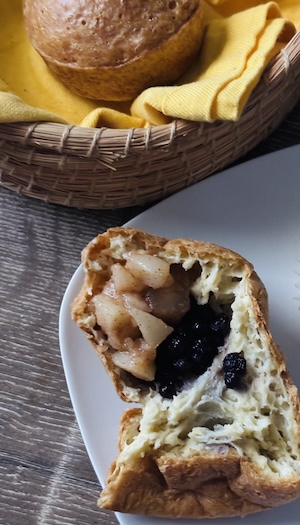
rough puff pastry bite layers with low-sugar lemon curd and blueberries.

…And my favorite part is you don’t even have to remember to take the butter out of the freezer in advance… yep, you read me right… take it straight out of the freezer and start prepping with your flour.

You can use a pastry cutter tool or knife to cut the hard butter.

Cold butter helps against have to fight a warming pastry dough that you would possibly need to refrigerate-and-wait for more than once.

Because besides for better bake texture, it’s also easier to work with cold or chilled (as in rested in the fridge) pastry dough.

And that’ll let you chill out. I like to relax in chair pose while waiting. 😊

Since puff pastry puffs are best when cold set in the oven where it warms and steams, you can take your freezer butter out when you’re ready to start. Yay!

Wow… that was a longwinded mouthful (like the blow away wind tasty pastries 💨) way to describe why you want to use cold ingredients.

And worth the describing effort as cold vs. room temp dough is one of the the differences between a flat pastry and a puff pastry result.

I found it’s not the amount of butter, if fat or calories matter to you.

It’s a couple pats of butter (2 Tbsp) that’s all you need.

You don’t need a stick for a cup of flour, in order for the butter tastes to come through and for your rough puff pastry to do its magic in the oven.💕

So in a few ways, this type of pastry is much lighter than a cookie (that relies on butter).

And this has one additional magical ingredient… cold water. 🪄

You gotta love ingredients that are 0.00 calories and zero dollars.

And another thing I love about pastry is you don’t need to add sugar (unlike cake) for it to work.

…Or you can even make savory puffs (or both on a plate)… I’m thinking mushroom or cheese puffs. 💭 Along with dessert puffs.

But you’re only as limited as your food flavor imagination and ingredients on-hand.

Tip: If you do decide to add a runny or wet filling in the hollow part of the rough pastry puff bite, keep it mind if it’s jam or a runny sauce, it will ooze out of the pastry in the heated oven.

An option would be to bake in a little in and then add more at the end or toward the end, if you want your bites to look full or gem-stone like.

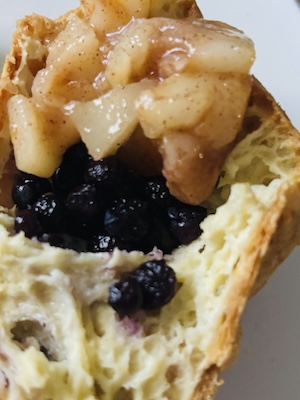
Like, I added ready-lemon curd to each blueberry rough puff pastry bite at the end.

That looks like an inviting nest or bright egg yolk.

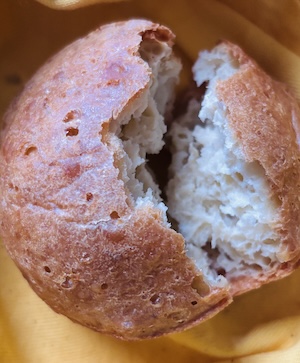
rough puff pastry bite layers.

But I added frozen (…there’s that magical word again. 🪄) blueberries for the oven. I didn’t drain them to keep them from oozing out.

Draining them and drying them still brings them to warmer temps that won’t work as well as frozen ingredients to preserve shapes.

And making this method of delightful pastry is more about discovering optimal temperatures for dough prep and oven rise, and temps for ingredients, and how they work in and out of the oven than say flavors.

…Because the refined buttery pastry tastes will be delicious with or without additional flavors. I mean… have you met a croissant you didn’t like?  It’s like that. 😊

And for an optional glaze finish, I brushed whole milk instead of egg that works all around.

You can also bring out the pastry toward the end and do this step. Or omit dairy and add honey. But first you gotta bake ’em!

…And before that, now you’re ready to make them!

Print

Rough Puff Pastry Bite - Low-Sugar

These are easy pastry bites where you don't need to buy premade pastry sheets.
Course Appetizer, brunch, Dessert, Snack
Cuisine American, French
Total Time 1 hour
Author Brandy @ Healthy Happy Life Secrets

Equipment

  • metal cookie cutters
  • small kitchen knife and/or small kitchen palette knife
  • rolling pin (baking roller)

Ingredients

  • 1 cup all purpose flour (add more as needed)
  • 2 Tbsp frozen or cold butter
  • 3 Tbsp cold water (add more as needed)
  • pinch of salt
  • whole milk or egg for shine (optional(
  • sweet or savory filling (such as lemon curd and blueberries, or vegetable and herb ingredients)

Instructions

  • Step 1: Make the pastry dough: Add a layer of flour in a mixing bowl to start. Use fork or pastry cutter to cut/add in the frozen/cold butter in small pieces. Add remaining flour and start adding cold water. Work in ingredients together evenly by hand.
  • Step 2: Make the lamination layers. This will give nice lines to the bake out of the oven. This is a dough you can work and not be shy with. and actually you'll want to roll out or use the palm of your hand to flatten out and then fold the dough into thirds (like paper or envelope folds).
  • Turn the dough 90° and do the same folds (they don't have to be exact). If the dough is too wet, add back a little (bench) flour on top and bottom of dough.
  • Step 3: Let rest/cool: Place pastry dough in a container with a top in the refrigerator and let rest for about 10 minutes.
  • Step 4: Bring dough out and roll out ontop bench flour to about 1/4" thick. Cut out 2 of the same shapes for each bite, creating a bottom and then a top that has a hollow (window) center. Easy tip for the top: use a knife and/or small palette knife and cut out a hollow rectangle, and from there you can shape with your fingers into a more defined rectangle, or even a circle. Or use small metal piping circles. They will puff up in oven and change shape slightly.
  • Step 5: Assemble the rough puff pastry top/bottom and add any filling(s) you want to bake such as frozen berries. You can add jam and curds after baked.
  • Step 6: Brush pastry with whole milk or an egg wash if you want a light pastry top shine.
  • Step 7: Bake at 375℉ for about 35 minutes on the lower oven rack until golden brown. If you want more of a dark and crunchy texture, bake 40-45 minutes total or until deep brown.
  • Step 8: Let cool and add any additional zhugh, glazes, or sauces to your pastry.

Don’t forget to eheck out more brunch ideas or low-sugar dessert recipes.

Apple Meringue Dessert (No-Bake Light and No Added Sugar)

Apple meringue dessert is a light dessert that melts in the mouth. It can be made deliciously satisfying with low calories (under 100 if you’re counting) and from natural tasty sugars in healthy foods.

apple meringue dessert

…Oh, and so easy to make and NO Bake. Its creamy texture is pillow dreamy to dunk into.

An apple meringue dessert with light and cinnamon flavors is great for balancing seasons, like in-between autumn and end-of-summer wanderlust when you’re craving fall vibes, but not just ready for pumpkin comfort season.

It’s got cinnamon that also helps with anxiety (…Vata feeling?) that flavorfully pairs beautifully with apples… any and all apples.

That includes your favorites.

Gala apples are the classic red apple to me and great for this.

But if you’re like me, you can be lazy, and ready-made 4 oz applesauce container cup will work great! And actually even better for a smooth dessert. And is light with around 50 calories. And a large egg white is about 18 calories so you do the light math (and light food math)!

Then it’s just a little mixing, spoon plopping, and folding in… 1-2-3 and you’re done! It’s a 5-minute prep dessert that makes me so happy when the season strikes!

And maybe you too?

Because Vata season is upon us in the Western hemisphere (as September approaches). And if you’re a dominant Vata, then this’ll help you calm too.

That’s when back-to-school or nostalgic moods can strike… where you may not feel settled in transition and you can’t put your finger on what it is.

And your moods can be all over the place… like you like comforting fall vibes and vibrant summer colors and flavors so you settle on mustards and burnt oranges.

But an apple dessert like this can be enjoyed year-round. 🍎

You can omit the cinnamon and add in lemon zest. Or do both. And if it’s winter (or you’re feeling Kapha), add a little allspice that has cloves and/or cardamom. That’ll get you movin’!

And if you’re feeling like doin’ it easy, grab a 4 oz applesauce that you keep in your pantry and comes in handy!

Actually applesauce sometimes taste even more pure with cinnamon. It’s important to use unsweetened applesauce because apples are already sweet. And use cassia cinnamon (which is the usual cinnamon you find in the spice or baking food aisles).

And if you want to do some cookin’ you can take whole apples, and cut them into chunks. Then heat in a pot until they’re softened and turn into apple “butter.” There’s no butter. But it’s a thicker compote than jam.

Let cool and then mix into your bowl. And you’re good to go!

Don’t skimp on cinnamon. When you’re needing the balance, it’s so calming! And it’s good for the gut. It’s anti-inflammatory and a great substitute for sugar taste AND helps lower blood sugar.

This is the dessert using applesauce that is less than 5 minutes to make.

cinnamon in egg white dessert

For more flavors (and fun), I can think of more than just cinnamon to dunk into this… how about you?

apple meringue dessert
Print

Apple Meringue Dessert - No Sugar and Low-Fat

This is an easy dessert that you can make no-cook with applesauce.
Course Dessert
Cuisine American
Author Brandy @ Healthy Happy Life Secrets

Equipment

  • 1 handheld mixer

Ingredients

  • 1 4 oz applesauce, unsweetened
  • 1 tsp cinnamon spice plus more for zhughing
  • 1 egg white
  • 1/2 tsp lemon juice
  • lemon zest (optional)

Instructions

  • Mix the egg white on a mixer on medium for 2-3 minutes until fluffy. Add in lemon juice to help stabilize.
  • Add in applesauce and cinnamon. Alternative: if you would like a chunky dessert, use a whole apple instead. If you would like a smooth dessert using whole apples, cook apple chunks on medium heat on the stove until softenedd and turns into apple butter (closer to applesauce consistency). Let cool and fold into the egg white.
  • Zhugh with more cinnamon on top and/or lemon zest.

Notes

Tip: Since it's often hard to mix just one egg white with a mixer, you can add two and save the other half for another time.


You can also check out other low-sugar sweets and lighter, low-fat desserts.

Potassium – Some Truths That Help You!

Potassium is a mineral that’s in most foods if you read nutrition labels. And in a lot of eat-from-the-rainbow and whole foods that have PLU stickers like avocados, potatoes, and bananas.

And usually we get enough potassium in our daily diet if we eat a variety of foods whether they come in cartons or bundled sacks. Sometimes you may think you’re getting too much, as it’s everywhere.

The mineral is even found in traces in spices and honey.

But because of the abundance, potassium is rarely talked about (…perhaps?).

Well, unless you’re deficient… which does happen in life, and even after hard workouts. Because you need quite a bit daily for a healthy body.

So for those simple reasons to make good choices, it’s good to get to know potassium, other than just knowing it’s a mineral you need.

First off, potassium is also an electrolyte.

Think of it like a battery charge in you.

If you’re lacking natural energy, then start with, and make sure you’re getting enough potassium in your day… that btw, caffeine can’t fix.

…But most foods can!

Potassium is essential for your body to function properly and without enough can cause you to feel lightheaded or dizzy spells (that’s more obvious than brain fog in our confusing world).

Similarly sodium as another mineral helps those symptoms, and is another battery charge you need, but is often touted as a bad ingredient (…maybe because we eat too much in Western culture?).

But both are daily essential for nerve and muscle functions in different ways.

And both minerals are electrolytes.🔋

We usually hear the “E” word associated with energy drinks. And to drink them if you’re feeling faint or dizzy, that can happen with overexertion.

…Where pushing yourself can be healthy. But falling down is not.

Especially in our less active times, like when we’re sitting down in front of the computer or standing in place where we don’t usually get the dizzy feels.

…Unless one reason is we’re lacking potassium. And that can happen if we don’t get enough in our daily diet.

And so important to know too…

Daily (potassium) is the important word because you can be depleted quickly and cause weakness.

Like when your body eats something unwanted and you have to go on a simple BRAT diet just to keep anything down. Or you’re just on liquids.

And if you go on a diet lacking in nutrients, then you want to restore potassium as soon as possible…

Because other body areas can tumble down as muscles and nerves don’t act properly. You’d know this in your yoga moves.

And drinking water only isn’t going to cut it.

Even thought most tap water has minerals like potassium. This isn’t the time to drink heavily filtered or mineral spring waters (that are more pure).

To restore potassium quickly, you can do that effectively with drinking electrolyte drinks and even pure coconut water (and why I love my VitaC… the other Vitamin C in my life 💕).

Some protein shakes or meal replacement drinks also have potassium (while adding more substances and nutrients than liquid sources). The healthier choices have low or no-added sugar.

But if you’re trying to get back to your normal body functions, food is needed. Food-as-medicine solids help your digestive body.

And you can resume potassium levels with foods and quasi-solid drinks around you like shakes and smoothies (one of my go-to ways!). Like, you can do with an easy yogurt smoothie.

If you look around your pantry and fridge, you probably have enough around for a potassium drug store. That’s also an important truth. 😊

Reading your labels is one way to get to know what foods have high potassium. That will stand out like bumper stickers… or PLU stickers.

AND potassium in foods is how you’ll help yourself bounce back to real life quicker… because healthy people eat solids.

Testing which foods work and keeping a food diary helps and is smart.

Adding 1-2 new food items per day to your body allows you to test if you’re allergic or foods are favorable at this time (because things can change in your body any season).

This is a much healthier way than going straight to medicine for new symptoms arising.

I used to do what many of us do. I would take pill medicine that would mask symptoms or drink a pink liquid for an upset stomach. While effective, those ways delay what the body wants to do to restore back to normal in a healthy way.

Healthy food and measures are the medicine your body craves the most.

And as the parent of my body, I’m not sure when my switch happened to a more healthy nut 🤪 but I can tell you I have learned so much in the education and research process…

And that has given me healthy body confidence from the inside out.

In today’s day and age, where you and I can look up anything without leaving our homes, we have the ability to restore our bodies that aren’t diseased or growing situation worse.

You can help fix and restore your temporary ailments with a healthy anti-inflammatory food diet that is helping your specific situation. And spend the money on healthy food instead of medicine.

That’s empowering, and I don’t know about you… but that makes me happy.

It gives me peace knowing I can solve some light symptomatic showings with food and healthy ways (that’s an investment in tomorrow).

That also aligns with preventative healthy Ayurvedic ways (spices, yoga, etc.) that I learned about in 2008. The more you know helps you in life’s tests with health, and then you can also share with others so they don’t have to go through the same battery tests.

It can start with a handed down healthy recipe that doesn’t have to be complicated to be good, like a potassium smoothie. If you love smoothies, you may want to try these healthy smoothie drinks too.

Print

Potassium Smoothie

A smoothie to help replenish potassium.
Author Brandy @ Healthy Happy Life Secrets

Ingredients

  • 1 medium ripe avocado
  • 1 medium banana
  • 2/3 cup milk of choice (plus more depending on thickness you desire)
  • 2 oz berries
  • 1 tsp seed of choice (chia, flax, sunflower, hemp, etc.) or oats
  • 1-2 tsps protein powder (optional)

Instructions

  • Blend and enjoy.
  • Optional: add seed as zhugh on top.


Cottage Cheese Chocolate Mousse – Easy and Light Dessert

Cottage cheese chocolate mousse is something that’s light and full of protein. How easy is this delicious dessert to make? …Easy to very easy.

cottage cheese chocolate mousse bowl.

And these are the easy steps:

Step 1: Blend up cottage cheese (to get rid of the soft small chunks). You can use a Magic Bullet blender that’s easy. Add a little milk if needed. I added coconut milk. Water will be too thin.

Tip: For individual mousse single portions, you won’t need to add as much cottage cheese or ingredients to blend. Blending 1/2 cup of cottage cheese will work in a Magic Bullet

But to make a 6 oz. or more, maybe you’ll need to do 1 cup of cottage cheese (minimum) in a regular size larger blender.

Step 2: Then take about 1 oz chocolate either from a pure chocolate bar or morsels, and place in a heat safe bowl inside a larger heat safe bowl (bain marie setup). I broke up a regular dark chocolate bar. In other words, you don’t need to go to the baking section of the grocery store for chocolate. 🍫

It all works the same for melitng chocolate.

I added in coconut milk that’s a great add to melt chocolate. it’s like a ganache finish, but without any heavy cream. You can also use your milk of choice. You do you! 😁

With a double broiler (bain marie) setup, the chocolate won’t likely burn and the milk doesn’t curdle. You can microwave or heat water in a bowl and then add a smaller heatproof bowl or mug with the chocolate.

If you use a ceramic bowl, the water shouldn’t be that hot. I usually hold the heated water bowl without oven mitts, just to let you know that it doesn’t need to be that hot. (Use heated tea in a mug as a simple comparison).

After the chocolate bowl bathes in the water bath for a few minutes, the chocolate should easily melt. You can stir with a kitchen silverware utensil to encourage the bigger bits to finally melt quicker.

I like to use polyphenol-full dark chocolate to melt so it takes slightly longer than milk chocolate, but we’re talking unnoticeable seconds longer.

Step 3: Incorporate in the cottage cheese, that should lighten up the mousse. Hand combine until the mixture is even and smooth.

You could stop there for more of a chocolate pudding texture. but for a lighter mousse, add in some of a whipped egg white. That’s extra protein too. 😊

Step 4 (optional): In a separate dry bowl, whisk an egg white for 1-2 minutes on high where it will fluff up looking like a pillow cloud.

No sugar needed (like in a meringue). Why add if you don’t need to for better taste or texture? Healthy is good. 👍

It’s easiest to use a machine hand mixer (instead of a stand mixer) as they can handle one egg whipping and quickly.

…It’s similar thinking to using a Magic Bullet instead of a full-on size blender. 💭

Then add a little of the  fluffy  whipped egg white (meringue) to the melted chocolate (ganache).  You will find that you can use 1/4-1/2 of the voluminous fluffy egg white. And then you can use the extra meringue egg white to layer your final cottage cheese chocolate mousse dessert if you like.

Like this…  it kinda looks like chocolate marshmallow ice cream, but we know that’s not what this is…

cottage cheese chocolate mousse.

Or…

cottage cheese chocolate mousse bowl.
Print

Cottage Cheese Chocolate Mousse

This is a protein version of chocolate mousse dessert that's easy to make with cottage cheese and healthy enough for breakfast.
Course Dessert
Author Brandy @ Healthy Happy Life Secrets

Equipment

  • Magic Bullet blender or regular blender
  • handheld mixer

Ingredients

  • 1/2 cup cottage cheese
  • 1/2 Tbsp coconut milk or milk of choice
  • 1 egg white
  • 1 oz chocolate morsels or 2 Tbsp chocolate bits

Instructions

  • Make the melted chocolate. Setup a double broiler (bain marie setup) method with chocolate bowl set inside heated water bowl. Stir in the milk.
  • Blend the cottage cheese to smooth. Add milk as needed.
  • Pour cottage cheese into melted chocolate-milk mousse mixture.
  • Whip up egg white in a separate bowl for 1-2 minutes on the high setting on a handheld mixer, until light and fluffy voluminous.
  • Add some of the fluffy egg white to chocolate mousse. Add up to 1/4-1/2 of the egg white to your lightness preference.

You may also like summer light dessert recipes, and easy Magic Bullet recipes.

Cheesecake Bar – Feta Healthy and Lighter

Feta cheesecake bars are a great healthier dessert that can be a great protein starter with cheese, egg, and yogurt protein

feta cheesecake bars.

Crumbly feta is a popular cheese that you don’t expect in a cheesecake. It’s lighter (less creamy), delicious and more healthy than traditional cheesecake ingredients.

And in fact, feta cheese has more protein, calcium and probiotics, and is lower fat than most cream cheeses. It has lower lactose and is usually easier to digest.

Both the probiotics in the yogurt (or Greek yogurt) and feta supports gut health.

And the best part is… this is such a a simple cheeesecake bar recipe!

You can make this feta cheesecake in the same baking dish or cup you will be using in the oven. So it’s less than one-bowl easy!

In just a few mixing spoon strokes, and then baked in the oven… it’s made from start to finish in less than an hour.

Tip: use a white ceramic, light color, or glass baking vessel to keep it baking slower (and not as likely to burn sides).

If you have dark or metal pans, turn down the temperature and bake for a few additional minutes.

The feta cheesecake bar prep steps:

I added the egg, and whisked the egg to break it up first. You can also do this with a fork or spoon that would be just as easy.

Then I added the Greek yogurt (or plain yogurt), the feta cheese crumbles, and a drizzle of honey.

Then combined together with a few spoon strokes.

And a few dollops of strawberry (or raspberry) jam that’s a delicious pairing with the slightly salty feta and tart yogurt… oh, and the chocolate that will be added.

I remember when I was a teen and I worked at an Italian restaurant in the pantry, and I would take a bamboo skewer to make swirly designs with the dotted chocolate syrup in the dessert before it was carried out to the table.

And in modern times, I did my Jackson Pollock with melted chocolate. That was the art mood I was in. And you can use your creative mood into your cheesecake masterpiece. This is the batter before it’s baked.

It was all made in this baking vessel, so it’s not one-bowl easy, it’s no bowls simple bake and clean up.

The lines will work well with a presentation of cheesecake bars that this will turn into.

…And you’re probably wondering how square bars will be made out of an oval dish?

First bake in the magical oven.

Let cool.

You could serve your cheesecake in your baking vessel with no extra effort, but the squares or bars are nice to share.

So cut out a big rectangle.

Looking at the oval dish as a clock, with a knife, draw a cut from  2 o’clock to  4 o’clock, 4 o’clock to 8 o’clock, 8 o’clock to 10 o’clock, and 10 o’clock to 2 o’clock as corners). Then cut/divide into squares.

Lift up the squares with a small spatula (palette knife).

You’ll have extra sides to nibble on. 😋

And since feta cheese is less creamy, you get cheesecake pieces that could be guiltless picked up by hand.

feta cheesecake bars.
Print

Feta Cheesecake Bars - Simple and Healthier

These are healthier cheesecake bars with feta cheese and yogurt, that you can make in the baking vessel you will oven bake with.
Course Breakfast, Dessert
Cuisine American
Author Brandy @ Healthy Happy Life Secrets

Ingredients

  • 1 large egg
  • 1/2 cup Greek yogurt (or plain yogurt), thicker
  • 1 Tbsp feta cheese
  • 1 tsp honey
  • 1 Tbsp jam (strawberry or raspberry)

Instructions

  • Break up egg in baking vessel.
  • Combine in yogurt, feta, and honey with a spoon.
  • Add small dollops of jam and spread in with a toothpick or skewer.
  • Drizzle melted chocolate (optional)
  • Bake at 350°F/180°C for 45 minutes or until a toothpick comes out clean.