
Sponge cake roll is one that I embrace as a cake fan, and because cake fun is how I happy roll. And the cake texture does live up to the sponge name, like this sponge cake…

That looks like it will be sent off as a spring letter (onto an eating table).
…And you can make your own sponge cake with your own personal design 💌
It’s easy to make a unique imprime pattern (your imprint) where you bake the cake batter pattern you make for a minute on the cake pan, and then add and spread the rest of your batter on top to complete the bake off (or like I saw on The Great British Baking Show bake off).
And while you may be wondering how easy this is to make, I’ll first say it’s easier to make than it looks.
Below I give you the shortcut ways…
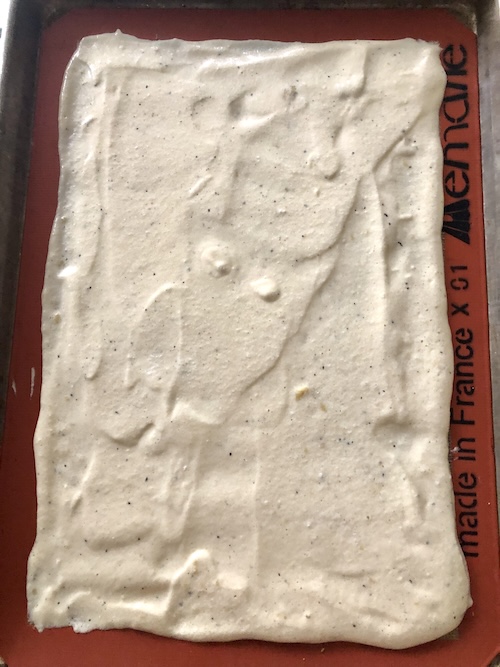
That starts with making the batter that you spread onto a silicone baking mat. One shortcut is you don’t need to go to the pan edges. Because the batter should hold its own without sides.
…Because it’s a wet batter, but never runny.
…Which is also a good battery test for your batter on how it will turn out.
And if you use a silicone baking mat (or a Silpat) with orange lined edges, you can use those edges as guidelines for where to stop. Because it’s tempting to go to the pan edge.
Your batter spread doesn’t have to be ruler straight, as the ends will get cut off at the end after baked,
And if use a half or full pan (12″ x 18″ or 20″) for your bakes, they make silicone mats that fit perfectly. Metal pans were the ones I saw daily in hotel and restaurant kitchens when I managed catering events and parties.
They will work well for this application. Like on this 12″ x 18″ pan setup with a thin layer of the batter recipe. And you can make a smaller rectangle if you want a thicker sponge. That’s up to you!
Then bake for about 12 minutes. Most other cakes can take 45 minutes or longer to bake… but this is a sponge cake roll that’s a quick bake, and that can save you minutes.
Thank you, magical oven!
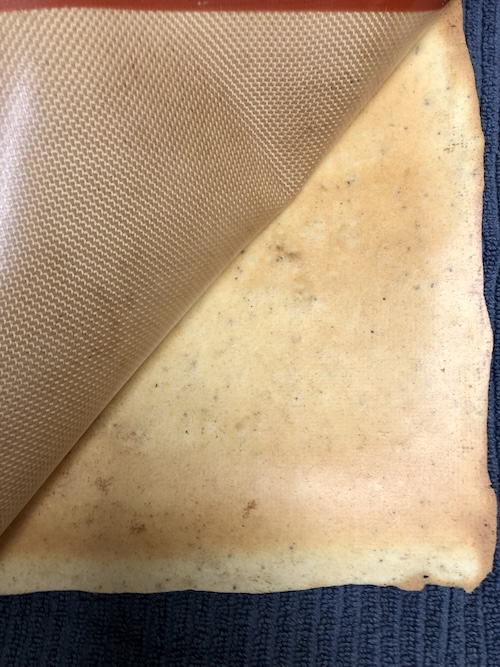
And you’ll know it’s baked done because the sides will be baked done, just before they brown. And if the cake edges brown, that’s okay as you can cut those off later, but that’s your sign to take it out of the oven.
But the best way is to check the oven at the timer 12 minute mark. I could’ve pulled this one out at 11-and-a-half minutes, but I wanted to give it a few more seconds.
When it’s out of the oven, peel warm off the Silpat. You may have to wait 1-3 minutes, as it’ll will be super hot. Use your safe gloves. But don’t let the sponge cake cool before rolling it up because the cake needs to be shaped warm-hot, or it will likely cake break later.
And peeling is so satisfying to do, especially for the scrapbooker in me that likes to work with her hands and anything that’s like paper. This one is edible paper. 😊
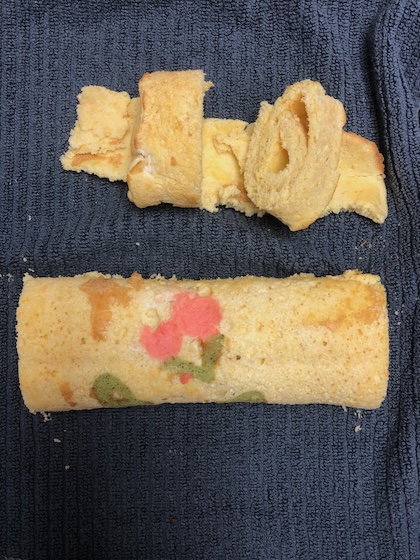
I rolled this one tight on a separate kitchen towel, but a fast shortcut is to roll up the peeled-off sponge cake on the silicone mat you baked it on. No kitchen towel needed.
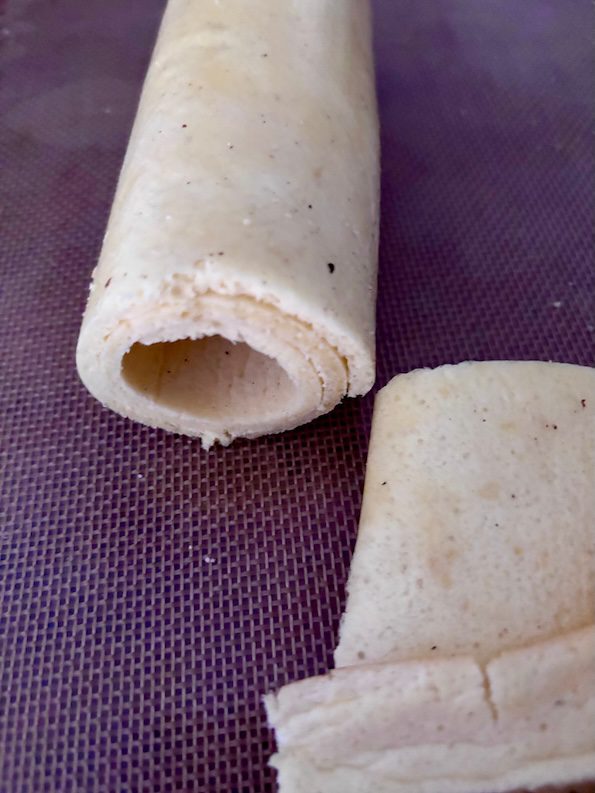
Then it can be rolled all-in-one, and then clipped or tied up temporarily like a scroll to keep the spiral swirl shape, until it’s cool. 🍥
So you decide how you want to roll it up.
Tip: Roll it tight like a sleeping bag as it will tend to spring back some. Even for a spring roll like this one. 💕
So if you just keep in mind that A LOT of action critically happens with a sponge cake roll when it’s piping hot out of the oven, you’ll be golden! (With most other cakes you don’t do anything with it, until it’s cool.)
…So be ready!
And then after cooled, either resting at room temperature or chilling in the fridge, your efforts will be rewarded with a nice swirl if you’re lucky…
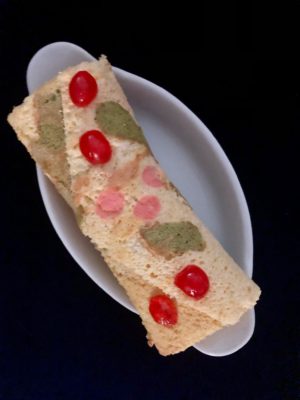
The final part is deciding what you want to fill your sponge cake roll in. You can do this in stages, like frosting a cake.
So you don’t have to make all the cake decisions at once if that’s overwhelming, or you don’t have a final sponge cake vision. You can keep decorating for the next day.
I often don’t decide in advance, and change it up as inspired with how I feel when it turns out. Then I decide the enhancing flavors and colors. It’s like naming your baby after he or she is born.
So you can bake the cake (with or without a pattern) and then decide on the filling and final zhugh (toppings) later. And that makes it your own cake personality.
Yessss!… It can be so much more than just cake. It can be filled with a jam or stuffed with whipped cream or ice cream… use your delicious food pairing imagination.
For my healthy tastes, I often like to use a thick Greek yogurt. But here I turned it into a raspberry jelly roll to keep it light. You can even make a chocolate balsamic glaze to go with melted chocolate…

Ready to make your fun sponge cake roll?
Spring Sponge Cake Roll
Equipment
- Silpat or silicone baking mat
- Baking pan
- kitchen towel (optional)
- baking spatula
Ingredients
- 3 large eggs, separated
- 1/2 cup plain flour
- 1/2 splash of lemon juice, cream of tartar, or white vinegar (for egg whites)
- 1 Tbsp orange or lemon zest (optional)
- 1 tsp baking soda
- 1/8 tsp salt (or pinch of salt)
- 1/4 cup juice (pineapple, lemon, or orange)
- 1 tsp vanilla extract
- 1/3 cup granulated sugar
- Cake filling (jam or Greek yogurt for healthier version)
Instructions
- Separate egg whites from yolks. Tip: it's easier to separate eggs cold and straight from the fridge. Then let them warm to room temperature.
- In a bowl, beat egg yolks and add in sugar. Add juice and vanilla.
- In the same bowl, mix in flour to make a slightly thick batter.
- In a separate mixing bowl, beat egg whites until stiff peaks form. Add in cream of tartar, lemon juice, or white vinegar to help stabilize.
- Gently hand fold in fluffy egg whites (a little at a time so it's more evenly mixed in as the yolk batter is thicker).
- Spread batter onto a rectangular baking sheet/pan with a silicone mat (Silpat recommended) or baking sprayed parchment paper. Level batter with a spatula or knife.
- Bake at 325°F/165°C for 12-15 minutes. Watch closely toward the end/12 minute mark until the edges are baked but not browned.
- Immediately or within a few minutes from warm-fresh-out-of-the-oven, peel off cake from the mat or paper. Then roll up in silicone mat (or a towel) into a spiral log. Clip or tie up so it stays rolled tight.
- Let cool for 20 or more minutes at room temperature or in the fridge for quicker results.
- Then cut off cake roll ends.
- Add filling of choice (Greek yogurt for healthy). Plate and enjoy!