Butternut squash is a low histamine food that’s good for seasonal allergies.
Food does make a difference and you can mix in your veggies and lean into more squash with spaghetti squash.
Often we ignore some produce foods in the grocery store, heading for the ones with marketing words and labels.
But the best seasonal foods (like butternut squash) and those for seasonal allergies don’t have ingredient labels. They don’t need them.
And they contain vitamins and minerals, and healthy food body benefits that are contained inside the food.
The PLU, color, and skin often give away what that can be.
But then there are other food benefits like low histamine that is underrated for seasonal allergies.
If seasonal allergies has got you, you’re in good company and I have a list of natural above-the-neck soothing tips below…
Before 2015, I never felt outdoor seasonal allergies living on the east coast. Now, they linger around year-round and I’ve learned to manage them… and maybe you manage yours.
Tree pollen (e.g maple, juniper, elm, oak, etc.) found in most U.S. areas is the main culprit for spring seasonal allergies that starts as early as February these days.
Allergies are your body’s annoying, but healthy response to your immune system working. 🌱
Reducing histamine can be the difference of low congestion, itching, aches, and digestive issues.
Sneezing is the body’s natural way to rid of allergens in the body, but some congestion days that doesn’t always work.
If that’s you, you can keep a black pepper tin nearby and peppermint essential oils are good to sniff and use in your steaming shower.
You have a choice to stay indoors for high allergy days which is really the most effective way to dodge seasonal allergies. Try to do your outdoor walks earlier in the day. I know that’s still a bummer. So another idea is you can jump or stay in the pool. You may be able to pull it off like this unicorn making the most of it! 🦄
And when you’re indoors, stay further away from the open window if you’re super sensitive or keep the blinds semi-shielding.
These are 10 Tips For Seasonal Allergies:
✅ Change your clothing and take a shower as soon as you can or remember to. The steam will help you feel better faster. A night shower will help especially if your seasonal allergies feel worse in the afternoon or evening.
✅ Weekly, use a neti-pot to clean out nasal passages. This helps you get some relief naturally and prevents nasty sinus infections and your taking unnecessary antibiotics. That’s probably the best tip I can give you! Water is your friend away from pollen.
✅ Also, use a natural saline nasal spray to clear your nose as needed e.g. 2-3x per day for relief. Look for grapefruit seed extract with microbial properties that help prevent bacterial, viral, and fungal infections.
✅ Use a free-standing daily air filter machine with a HEPA filter for pollen (not just dust). Pollen kicks up in the afternoon and evening so it’s good to have the machine cranked up while you’re sleeping.
Change your house air filters as needed and vacuum the filters regularly as they will work better dust-free.
✅Use a desk humidifier or have one set in each room. Moisture like this works especially well during spring allergy season.
✅ Keep eucalyptus or mint oil essential oil drops close at hand. They work well in the steamy shower. You can put a few drops in a small vessel of water and sniff. Unlike a nasal spray, the oil drops don’t enter directly into your nose.
✅ For foods, add fresh horseradish or spicy wasabi that’s great for clearing nasal passages. Also increasing Vitamin C and bromelain helps. Pineapples are a good source.
Disappointingly, local honey doesn’t work the way that maybe you hoped it would for seasonal allergies.
Honey comes from flowers, and tree pollen comes from trees so there’s no cross-pollination… or an ex-pollinating effect that would be helpful for spring seasonal allergies.
But raw honey is a good natural sugar substitute and a natural humectant that when topically used on the skin help prevent dryness and other light skin inflammations or itches.
Honey also has other “anti” properties that are good for you… antioxidant, anti-bacterial, and anti-fungal.
✅ Keep up your vitamins and minerals, especially Vit C, D-3, Calcium, Zinc, etc. Butternut squash is loaded with Vitamin C and A. And a tropical fruit smoothie is a great way to help soothe seasonal allergy symptoms.
✅ Drink teas. You can try a good green matcha tea or black tea (Vata preference) early in the day and then switch to decaf/herbal teas in the afternoon. You can do decaf all day if you prefer.
✅ Keep eye drops close by for dry eyes. You can wear blue-light-blocking glasses, so you don’t have to strain on devices that worsen dry eyes (and they help you sleep better).
✅ Keep cough drops nearby, in case you get a dry or itch in your throat. And menthol cough drops help to open up passages.
Seasonal allergies don’t have to be the daily annoyance that runs your life. You can have a much smoother season if you stay informed.
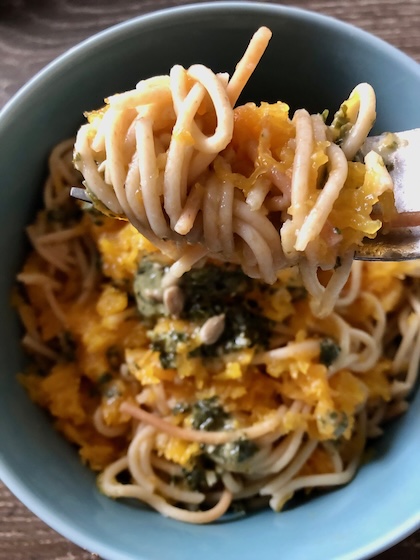
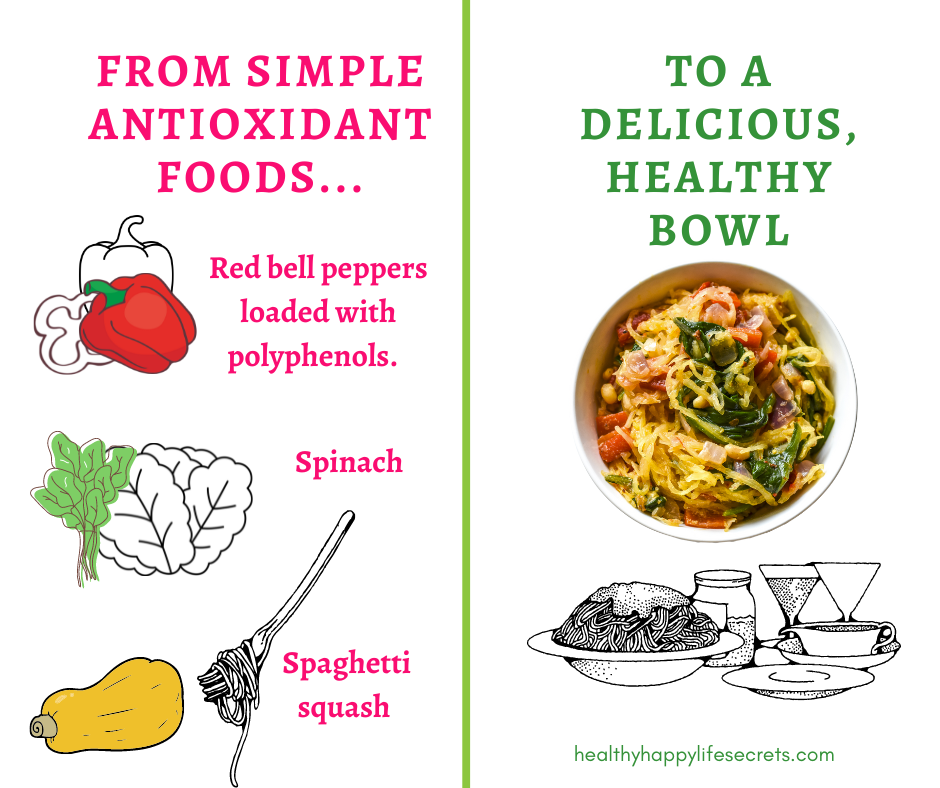
✅ And finally, bring in more healthy anti-histamine foods such as bell peppers, squashes, and eggs. You can incorporate a butternut squash spaghetti recipe that you can blend with regular egg pasta or spaghetti squash. 🍝
Wild Thing Pose is one of the most interesting name yoga poses. And it’s a beautiful pose like this wild natural artwork up the side of a bridge.
Sometimes you just need to let your hair down. So today I’m sharing two yoga poses that let you do just that, and maybe give you a few minutes of creative joy if you haven’t felt that in a while. One is called Wild Thing pose.
You may know the pose (or vintage song titles 📼 with the same name). The Wild Thing pose helps unleash your creativity, especially if you feel like you’re in a rut or ready to pivot. This pose can help you feel a little happier.
…On Fridays especially, don’t you feel like a little weight has been lifted off your shoulders from the weekly grind?
With more freedom where you can express your more fun side, in friendly conversation, wearing fun clothing, or even get around on different wheels 🛼 🛹 🚲
People on the receiving end are even in a better mood if you work in customer service. Friday makes up for Monday when stress is highest.
And it’s not easy to be creative when you’re feeling stressed. So, you may need to unwind between the two opposing moods.
If you feel irritated, anxious, or resistant (that’s Vata, Pitta, and Kapha all rolled up in one in varying degrees), then your body may be playing detox wellness catchup. There’s a delay in the mind-body connection.
So whether you’re ready to try the Wild Thing pose has a lot to do with how you’re feeling. Relaxed, calm, and a bit daring is a better time. It’s also a great pose to do after you’ve fully woken up and taken a shower to stretch your body and mind.
When you’re present in this moment, then this is a great way to celebrate. If say you’re still rehashing what happened or how a day or a happening could’ve gone better, then you’re probably better off to calm your mind down first and wait until later to do this pose.
And when you’re ready and refreshed, then you can start with a blank slate that works best for most creative endeavors.
At corporate work and public environments, they love rules, structure, and close-ended goals. In creativity work, it’s a white piece of paper or canvas waiting for you to come up with something new and unique.
So, the Wild Thing Pose is a great way to get in the spirit of your creative intention. Especially if you’re a content creator or share artistic expression, and today is a creative day. Anything goes.
You ready?
How to Do the Wild Thing Yoga Pose:
Basically, the Wild Thing pose is a backbend and you decide what it looks like. It can be easier said than done…
One foot, two feet, and one hand or on all fours. It’s up to you. One way to find your Wild Thing pose, is starting in Downward Dog and then you peel one arm off your mat and look up or face up to the ceiling or sky.
Reach that arm up in the air. The other arm is grounded on the mat or floor. Then you decide how you position yourself and the rest of your body. There’s no definite structure. This is a common start. And you can work on your Wild Thing (but it shouldn’t feel like work).
For a present awareness move, then plant the foot already closer to the floor flat down. And you could rest the other leg out with the outer foot touching or resting on the floor.
There are no limitations or rules. And you can also get into this pose from Wheel Pose. Gymnasts do really well with these poses as it helps to be flexible. But not needed for home or studio yoga.
One thing’s for sure though… in the Wild Thing pose, you will definitely get off your mat, a metaphor for thinking outside the box. You get to express freedom and creativity.
And if you have a chance to look around at another Wild Thing pose like I did in a yoga studio and saw other Wild Things in the class, you see how differently wired and designed we are as unique humans. Use your Wild Thing pose as your creative expression that stretches your body, sides, and mind.
And when you’ve had enough of your Wild Thing pose, you may not want to stop just yet. You can find your Falling Star pose from there.
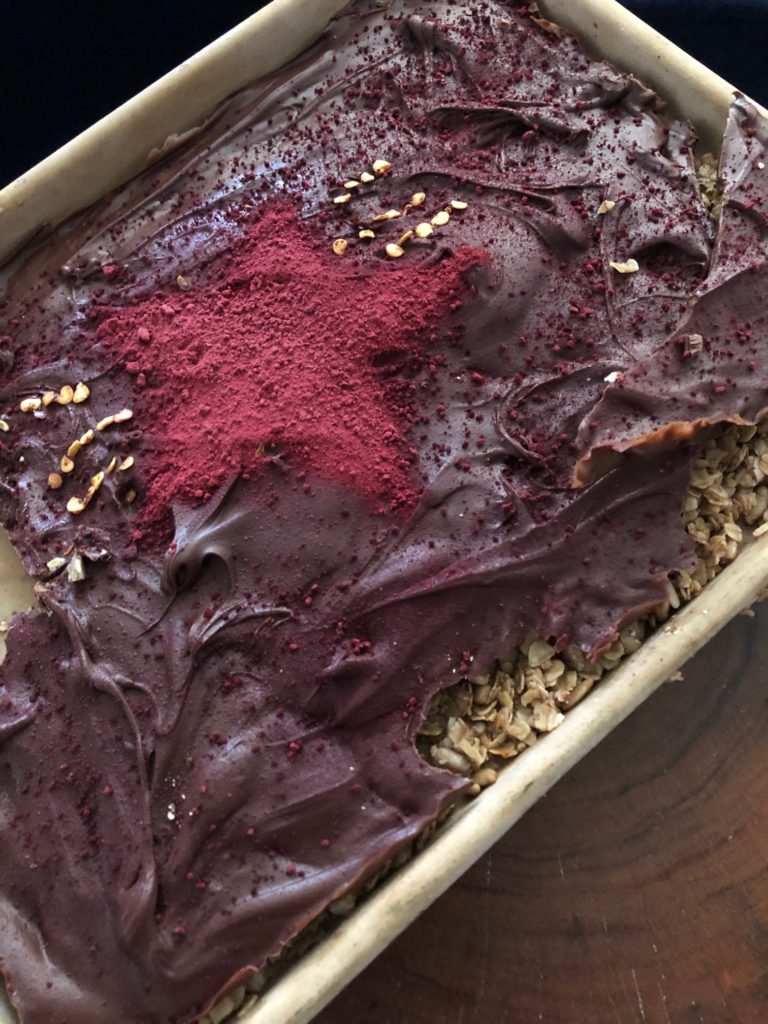
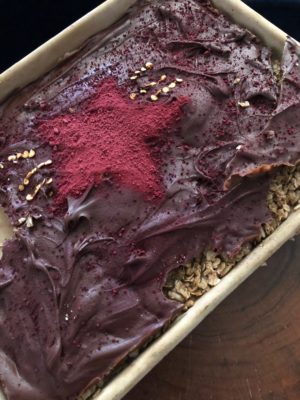
A falling star has a curvy trajectory so you could model after that. Like these curves made with chili pepper flakes for a chocolate granola snack. I made the star from beetroot powder that’s a great balancing ingredient.
Falling star beet granola recipe below. 🌟
In the Falling Star pose, like the Wild Thing pose, you choose. You can slightly adjust your Wild Thing pose into a Falling Star to get pose variations. Vatas love that 😊. You can stay on the floor with your legs and arms widely spread out… or leave just one foot and one arm touching the mat.
When mindfully present, this is a great way to empower yourself and use your body and yoga pose to show off your intention in case you’re wondering what practical application this pose has.
And you can also choose to start over in a grounded standing position. Start in a Five-Pointed Star Pose where your two legs are spread wide apart beyond hip width, two arms stretched out to the sides. And your head makes up the fifth-star point.
You are a star! ⭐️
For your freestyle Falling Star, maybe you’re leaning or swaying even if ever so gently to one side, comfortably balanced, and letting go of the opposite leg and foot from resting on the floor beneath you. You don’t need a mirror to feel lighter and to trust your instincts.
This is a good metaphor for how letting go can be freeing in your life. You can fall away from getting in your own way of anything holding you back.
Letting go of outcomes is one of the hardest things in life I found. It’s not easy to let go of something you want to happen, especially when all your life you’ve been groomed to be in control. But that openness allows for something better to come along.
Sometimes we’re not thinking big enough. So in those times especially, being in a Falling Star yoga pose can be therapeutic and a good reminder.
Another Falling Star variation is to sway and bend your torso to the side a little or a lot (like how a palm tree can bend to withstand tropical storms). 🌴
You can also reach your helicopter arms out or up to help you balance. It’s not about how bendable you are. It’s that you’re willing to even try it!
You’ll get more flexible as you stay in the pose longer. It’s your unique Falling Star creation. 💫Just be sure to have fun! 🌟
And you can do that with this fallen star beet granola pan you can make in minutes with a few ingredients.
Combine dry ingredients and then mix in wet ingredients.
Bake granola for about 25-40 minutes at 325°F or until toasted.
To make chocolate topping. Prepare chocolate on display pan you will be using. Take a piece of plastic wrap and put on top. Add melted chocolate and pour onto plastic wrap. Refrigerate until chocolate is hard. After granola is baked and cooled, you can pour into the pan and then add the hardened chocolate ontop removing the plastic.
To make beet heart: take a star stencil or make a star cutout with cardboard. Add beet powder to create star shape. For fallen star effect, use tweezers to pull out the yellow pepper flakes (found in crushed red pepper flakes) to make a fallen line.
Positive thoughts like “you got this” can make a positive impact in your day.
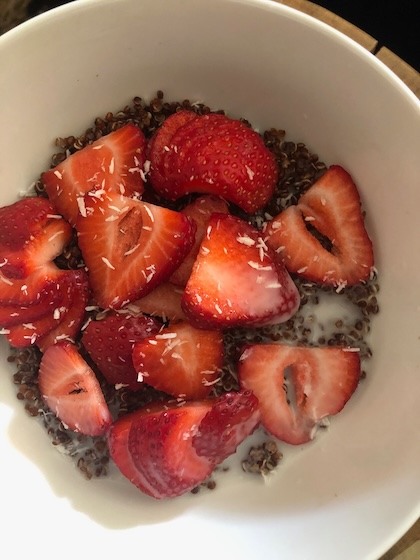
And starting your day with a heart healthy recipe (🍓 below) like this delicious quinoa bowl breakfast idea to get excited about.
Easy strawberry quinoa cereal recipe below. 🍓
If you’re wanting a better day, you recognize the difference between positive thoughts and negative ones.
Thoughts all start in the divided minds we’re given, that’s either hurting or helping us. And if this is new territory for you, start there.
Maybe you recognize which bucket your negative or positive thoughts belongs in, but you don’t know how to toss out the draining ones.
They can show up anytime: when you wake up on the wrong side of the bed or when triggered by a memory, situation, or person.
And then the subconscious mind (ego) feeds off the nourishment of holding onto negative feelings or pain as a form of protection and masks its agenda from you. But now you know better.
Bypass the unnecessary time wasted in dramatic sorrow. Be proactive with positive affirmations, meditation, yoga, or healthy distractions that are great ideas to reset and get rid of thoughts that have no good business being with you in the first place.
Sounds like a plan, right?
But then going about your day or even seconds later, new thoughts occur from news headlines you read, someone offends or irritates you, a situation stirs an emotional chord, and then you’re right back to negative thoughts and moods. It’s daily and non-stop.
Your mind and the negative thoughts grow even if you think you’re living in a safe bubble.
The unhelpful thoughts never have a chance to go away until you decide the one thing you can change and have in common in every thought is YOU.
And so, I share in this detailed blog article what needs to change to get the happy and helpful thought life you want.
This is the second part of the article from last week on relaxing your mind for the best ideas.
Managing thoughts is essential for lifelong learners, and as a prerequisite to being your most productive self, unleashing your creative self, attracting people to your energy, and living your optimal life.
Years ago, I thought traveling to exciting, new places and feeling in woo would conquer negative thoughts, as they temporarily disappeared when senses were heightened (like when you’re newly in love or starting passion work). But those fickle feelings don’t last and things always change after the newness wears off.
So then I dipped my toe in collaborating and aligning myself with the Universe and how to manifest the best life (that’s woo woo to some).
For me, I was on the right path and things were looking up, but I still had to do the inner core work in my mind.
When all that eventually clicked together, then I could feel the woo hoo! And that’s what we all can celebrate in our lives if and when we get there.
It takes all the pieces–knowledge, process, and application. And if you’re feeling lost, it helps to have a guide.
These are a few guiding and starter points that helped me and hopefully can help you or anyone else who’s trying to figure out a better (thought) life.
The first part can be the hardest–knowing that it all starts in your mind and not someone or somewhere else.
This seems elementary after you learn this, but the ego wants to steer you in another direction like something else is the cause or problem.
So if you’re busy or not paying attention, that can happen and go on until you’ve had enough.
Another point is, don’t let nagging thoughts (or drama in your mind) that won’t leave you alone play out for longer than needed which is no more than a minute.
And in relationships, especially. It takes just one step to cross the invisible boundaries of another person with your words that originated from thoughts.
Walk away from your thoughts to give yourself more peace. Below I have some suggestions on what to do.
So, How to Change From Negative to Positive Thoughts…
Our thoughts are natural to us, and they cause us to take action that can appear inconsistent or as disconnects to others.
To change this, operating from awareness is imperative. Initially, this may feel like work and working harder (like walking uphill with heavy boots instead of sliding downhill). But it’s totally worth it.
You learn a life skill to purge those unwanted thoughts that pop up impromptu and when triggered.
I think there should be a required course on this that you learn early on (and would solve some of the world’s problems as people are the problem or solution).
But anyway… changing thoughts gets easier when you’ve learned the skill and it becomes more automatic.
The negative thoughts won’t disappear immediately, but much quicker than before in your thought choice, and you’ll be wise enough to know you don’t have to act out or say aloud negative thoughts.
Which btw, doesn’t change your personality. It makes you more attractive to the right people.
And that’s part of what separates our discerning brains from animals, young children, or when we were younger…
We all started out immature compared to who we’ve become today.
So here’s how you can reset and get your loving daily juice. To promote loving thoughts, witness your thoughts (I’m sure you’ve heard of this).
Practice being aware of what’s coming in. If it’s garbage, then reject or walk away.
If it’s something that you have feelings about and need to process or work through, then allow yourself that grace.
Again, you don’t have to air your thoughts to anyone, and not putting energy into negative thoughts is going to help you avoid wasted time.
Let them pass through and find the loving side of those thoughts (i.e. how can these thoughts help me?).
In the beginning, as you’re learning or practicing, you want to draw a line in the sand and separate thoughts as helpful or hurtful, good, or bad.
Make it easy on yourself and not leave thoughts in the confusing gray zone that’s part of the baggage carried around.
And let’s be clear, these are thoughts and not the actions that could follow. We want to nip them in the bud.
The good thoughts you accept and the bad ones you reject for your own good. If it hurts others, then you toss in the reject pile and you figure out a win-win or kinder way to confront if that’s needed.
Ask yourself daily and often: What just came out of my mouth and what’s going on in my head? Hit the archive button if it’s a worry thought until you can find answers, and hit the delete button if it’s a harmful thought to you or anyone else.
Know those thoughts will still be there if you need them, which you won’t, but your brain tries to convince you that they’re important to protect you when they’re not needed (for survival). You can blame the ego (yet again) on that.
So, after you start to live life this deliberate-thinking way and focus on positive thoughts, you can see the difference in the quality of your life and the better air that’s there.
You’ll feel more peace, and that helps your stress level and health.
You allow room for ideas to come in, and you become more useful to the world with your abilities. You become part of the solution.
Find A Mantra for Positive Thoughts
Pre-social media days, we were not part of an aware culture like we are in today.
In those days along my journey, I came across these words: “Whatever the question, love is the answer.”
I don’t know who the author is that wrote that, but I knew back then that I wanted that. So I printed out and framed those wise words that are now ingrained in memory.
With intention, I used that as my mantra. And even though I didn’t know how to apply it in every difficult situation.
I knew that if I aspired to the meaning behind the words, it would one day catch up with me and my self-actualized desires.
So, if you have similar aspirations of a learner mindset, find a mantra or intention (or use the one I used) to go to if you’re trying to change to more positive thoughts and aspirations.
It can be used as a distraction from negative thoughts. And you eventually become your words and what you think of.
Use Your Internal Guide
As mentioned, it can be helpful to have a guide and for those ahead of us in certain areas and times in our lives.
But the best overall guide is your internal compass.
But we want to change them because sour moods can crowd out positive thoughts and exacerbate our need to judge, be critical of others or ourselves, and get easily irritated, which can cause our negative words or actions.
Being in healthy alignment with yourself is better because, in the end, you and your caretakers are the only ones that will be with you.
You’re the only one that’s with you (and your thoughts) always, wherever you move or travel to.
Sometimes, listening to your internal guide can be countercultural and a bit uncomfortable when you make decisions that aren’t popular or go with the flow.
And especially if you’re a harmonious or extroverted person who just wants to get along or people please.
That can make it difficult to live in integrity (doing, saying, and thinking the same thing).
Robots will have it easier than us in this way, but sadly the tin man is missing a heart. 🤖
As humans, when our thoughts don’t align that’s when we have a new chance to re-adjust.
Years ago, no one talked about mental health or wellness as part of the daily talk. Now we embrace “knowing better” in our lives.
We don’t have to just take our thoughts (or others at face value) that turn into actions that don’t always get good results and can even get us in trouble in a hyper-sensitive society.
Plus, we have more options to change the channels in every sense. And we’re more accountable.
We need this accountability. It makes us better as individual people and all together in our complex world.
So these are some accountable thoughts and maybe some personal growth homework (should you choose to accept the mission?) for turning sour cherry thoughts into sweet ones.
As a bonus, you’ll become a better person as a byproduct. I know because this is all stuff I went through. It takes one to know one, and we’re all here to figure out our best life and selves.
So, no judgment here (and actually that’s one of the assignments) 🧡 That’s a balanced Pitta way.
Pause on the gossiping:
Here’s the better way: if you wouldn’t share the news with others and the person you’re gossiping about in the room, then find a way to filter and say less.
If you’re not sure, ask.
More likely you’ll just zip your lip and that’s fine too. It’s really that simple. But even simpler is just not gossiping at all.
That becomes an automatic, better way.
When you find you can’t sit and talk in the same conversations with those who gossip, then you know you’ve changed that about yourself.
You end up productively filling your time with better ways that lead to better things.
Learn to not judge:
We never know the full picture of what’s going on with anyone else no matter how much we think we do.
Take the objective and loving-kind stance.
If you want to have an optimal life, the sooner you learn to let go (of judgment) and to stop controlling so much, the sooner that will start.
A prerequisite for this type of freedom (that it is), is to stop judging others at the first judgmental thought that enters and let the negative thoughts pass through.
Quit complaints:
If you say negative things, then you become a negative person when what you really want is happiness.
So if the first thought that enters your mind is to emphasize complaining, that hurts you.
Maybe you’re used to complaining to get your way (and learned the squeaky wheel gets the grease).
But also what’s happening in the process is you’ll be seen as a complainer.
People who don’t complain will stay away from you, so you’re in company with complainers or those who want you to complain for them or their causes, bringing more negativity in your life and less in theirs.
…If you can make these 3 life changes, you’ll be well on your way to a more peaceful life. It’s simple, but not always easy in the beginning.
It takes desire, self-control, and holding yourself accountable. Be patient and easy on yourself. The good news is these traits are changeable with practice.
And if you find people to support your efforts (and let go of the ones who aren’t), it’s easier.
Your supporters are your best allies.
Ultimately you decide what type of life you want to live. You get to decide what thoughts you keep. Copy that. 😉
Holiday entertainment is not a mere plus during the holidays. It’s a must to get through the holidays… full of bittersweet happy and sad moments… filled with illuminating reflections on the past year… finding your way through stressful calendar-marked deadlines ticking like a time bomb.
And before holiday has come and gone, you can enjoy this one-bowl comfort dessert with no guilt as it’s healthy and wildly tasty! It could be your new year dessert. 🎉
It’s gluten-free, carrot vitamin-rich and orange calming for nerves… and great for entertaining mixed emotions.
Ahhh.. but light-hearted holiday entertainment shows (like GBBO for this modified healthy baker) and sappy rom-com tearjerker movies can help us lighten our load if we feel stressed.
On that note, I have 3-holiday entertainment mentions below worth checking out
That can be exciting and worth sticking around until the end of the blog article and staying up past midnight on Dec. 31. 😊
…And somewhere in between is December 25 where we can easily forget when we started our holiday. In America, that’s usually Thanksgiving in November where we celebrate gratitude for the things we have in our lives.
In the happy holiday spirit, December and Christmas are opportunities for each of us to grow, dig deep in our shadow, be reflective about our past, and find more appreciation for our joy and happiness’ sake as better humans than before.
Christmas is always an invitation to find hope and peace now. And welcome in happy and healthy intentions for the future. And that can include skipping, baking, and inspiring yoga moves! Why not?
I plan to be in the kitchen (…and maybe you too with your planned festivities whether quiet or action-filled?).
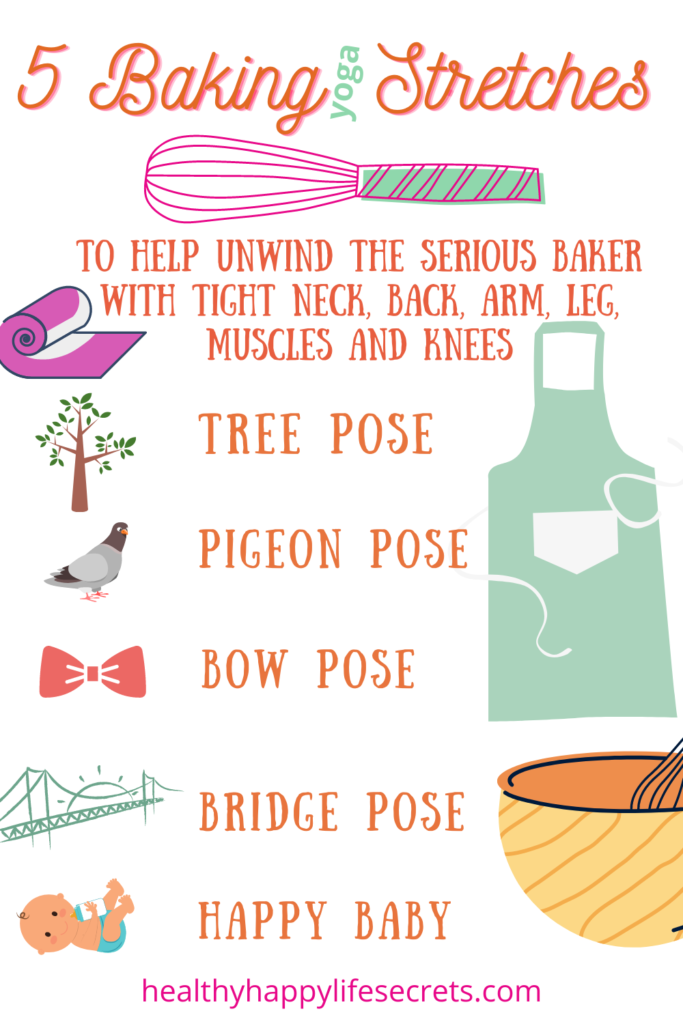
Here’s my illustrative yoga guide for those who will be busy holiday joy baking and wanting to unwind like a pretzel in front of the tube or streaming media 😊:
There’s a big buildup to Christmas celebrations that probably started way earlier in the year …like Christmas in July promotions?
This year is probably no different where you’re not hit by deer lights… that’s a certain predictable point to be grateful for. We know it’s coming!
And we can lean into holiday entertainment, decorations, and warm & fuzzy feelings to get us in the mood.
We don’t have to lean into the bitter self-pity. We can feel contentment for what we have in our accumulated wisdom.
Some things we can think of is:
We’re grateful we’re not who we once were. We’re a better version, and getting better every day. It may be two steps forward and one step back, but we’re still improving.
And some places we’re completely transformed and others we completely forgot where we were once hurting in another way.
We’re happy as is because we know it won’t stay this way. We’re wired to have the best life.
Besides things could be worse, but thankfully they’re not. Those (and your) beliefs can help shape your optimistic outlook.
You could be fighting ego or affected without awareness.
Letting go isn’t always so easy…
In awareness, it can feel like an uphill battle to try and win over an internal fight.
I find that when I have a moment where I feel a little emotional turmoil, laughter never grows old as one of the best medicines.
Healthy cleansing tears from humorous holiday entertainment or heart-felt movies, series, or shows can be just what the doctor ordered.
After from watching, you can feel good again. 📺
What we feel from recently watched holiday entertainment shows can show up in our refreshed thought life.
These are 3 of my holiday entertainment picks (and maybe they’re good for you also)… which btw, I’ve yet to meet a close friend who likes the same quirky shows I do.
I’m not talkin’ about Friends and the popular America’s Got Talent shows that everyone has glimpsed.
So I’m goin’ out on a limb here…
The first one I wanted to mention is actually not a show, but an old classic movie, The Sound of Music. And if that’s not your bread and jam, then think of a show or movie you watched as a kid that you enjoyed and impacted you.
And you can take my Cliff Notes version:
If you’ve never seen or forgotten what this classic movie is about, it starts out with actress Julie Andrews as a young lady in an abbey prepping to be a nun. She soon discovers she’s too independent thinking and not cut out for the job.
Sound a ‘lil familiar? I know it does for me having taken a hairpin turn or two early on. None of the nunnery kind though. 😊
The movie plot is a metaphor for our lives that can change in an instant, a.k.a. a life pivot.
A better plan is out there for us if we’re willing to stay open and hang in there.
Those thoughts can help us get through any bitter holiday moments.
Julie Andrews’ character is sent as a governess to 7 children for a former widowed Captain and Austrian naval officer.
Fr. Maria, she’s called, brings singing and love into the family and the odd-pairing couple ends up marrying (aww… a love story and musical). I hope I didn’t ruin the happy ending.
So now you’re either caught up or possibly curious to watch the movie (again).
Fun fact: the movie is filmed in Austria and Los Angeles of all places, so maybe that’s one of the reasons why it’s still a Hollywood boom.
In our lives, the parallel is that there’s a lot to look forward to getting to the other side, crossing the hills, and any mountains along our path. We can stop to appreciate the flowers like Edelweiss or roses that remind us of our resilience from our life situations.
Then after you get your fill of that movie, whether you fast-forward to the part where your heart is filled or watch the full movie, afterward you can pause to fill your warm drinking mug, and get ready to laugh (…maybe even belly laugh some) with this next recommend…
Comedians In Cars Getting Coffee
This modern American Netflix show of several seasons is a good metaphor for not taking life too seriously. Stand-up comedians don’t.
And Actor and Comedian Jerry Seinfeld makes that clear as he takes his guests out for coffee in coffee venues (think Diners, Drive Ins, and Dive places, plus some hole in the walls).
He chauffeurs his guests around with different classic cars to match the comedic intent and their barrel of laughs to come in coffee conversation 🐒.
Once in a while, they’re driving in lemons like an Oh sorry, Ferrari that dies on the road. That’s comical drama we call comedy.
The show is peppered with what you’d expect from comedians… impromptu funny lines about their lives and the world we live in.
Having worked in restaurants, I can find a chuckle or two with the (literally) off-the-wall menu special posters or off-color restaurant jokes…
Like when Jerry orders and asks for 2 eggs and nothing else on a plate, and the server quickly asks if he wants it on the side? The server (or waitress) made an inside funny without knowing it. Good stuff there. 😅
You’ll have to find your own humor points if you end up watching some of the episodes. …and so that brings me to a recent holiday entertainment show…
The Great British Baking Show
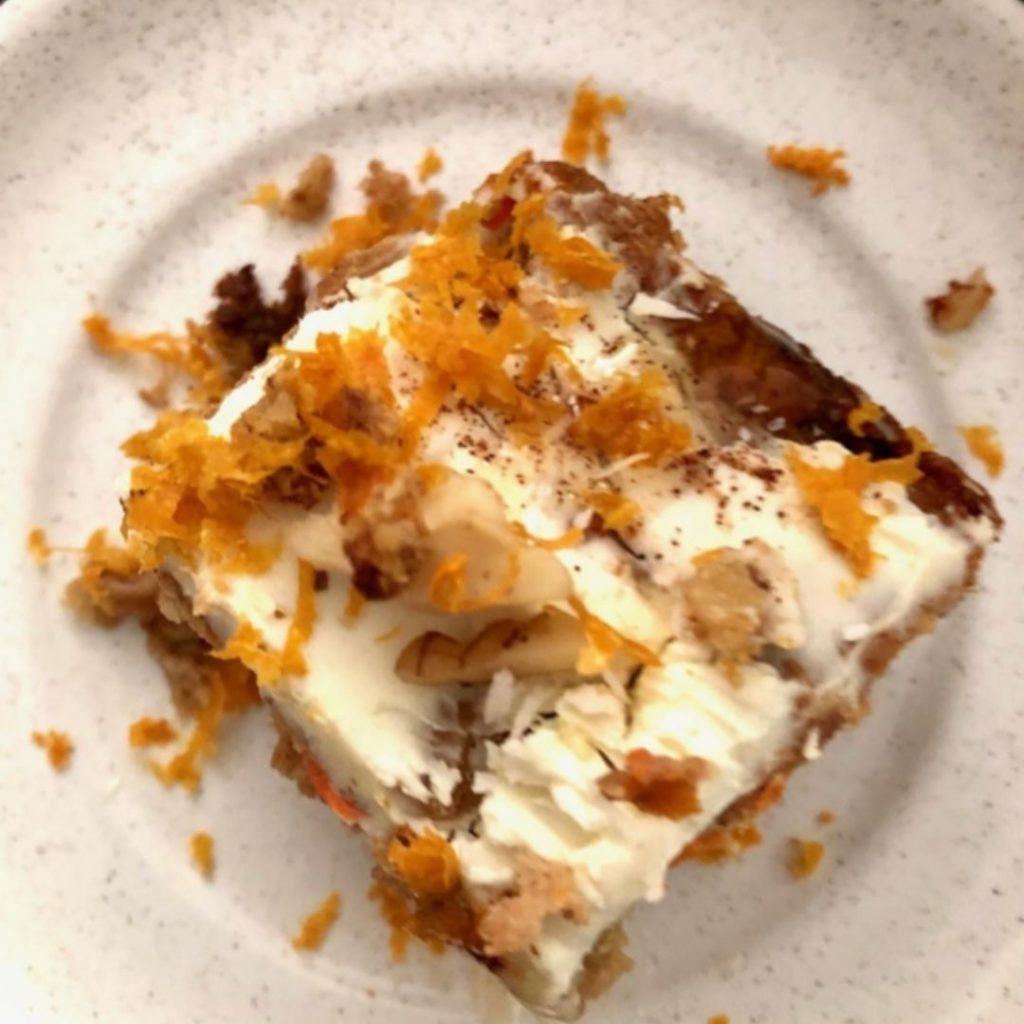
The show is “The Great British Bake Off” in U.K. where cookies are biscuits. The Jammie Dodgers are a British classic that was one of the technical challenges. Btw, these are not here for temptation reasons. I have a healthy carrot cake or squares recipe below for your baking holiday entertainment should you accept the baking challenge. 🥕
The Great British Baking Show has got to be the funniest baking show out there. It’s also interesting to watch the baker techniques and their foibles.
By now in the show’s (just-finishing up their 9th season), as you’d expect the contestants know what to expect.
If they didn’t, that would be like going under the pressure cooker show as a contestant without baking practice.
.. And that would be like going on the Shark Tank show and not rehearsing… where they’d get eaten alive!
The GBBO contestants (more fitting than calling them competitors because they help each other out in the tent)… want to be sure to make the show fun and take time out to make good bakes while playing along with the tent show elves and laughing at their side jokes.
Tent Sidekick Noel announcing the challenge 😄
As part of the audience, you can feel the contestants are more mellow, less tense, and less serious about winning… and more motivated with staying in the baking tent (sometimes baking hot tent 🎪) for as long as they can.
In case you missed season 9 which is one of my faves (I say that for all of the newest ones), the cherry-on-top Star Baker title went to Giuseppe for his traditional Italian bakes passed down from his family’s baking lineage.
So now you’re all caught up!
The Great British Baking Show also has holiday versions. You can especially enjoy it if you like holiday baking inspiration and while eating sweets…
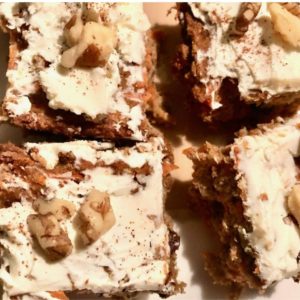
Gluten-free healthy carrot cake (recipe below)
And on that final note, I have a deliciously, seriously healthy, SWEET gluten-free carrot cake recipe below (that I’ve played around with the ingredients, whipped up, and tested all the crumbs!)… And you can just as easily prepare and enjoy in a square, round or any shape pan you like that you can bring to your screen with whatever holiday entertainment shows you end up watching. 🧡
Healthy (Easy-No Mixer Needed) Gluten-Free Carrot Cake (Bread or Squares) in One Bowl
Ingredients:
1 cup grated carrots
2 eggs (room temperature)
1 Tbsp coconut oil (or light EVOO or baking oil)
1 tsp vanilla extract (optional)
2 tsp lemon juice
1/2 cup (120 grams) almond flour (or other gluten-free flour)
1/4 cup (60 grams) oats
1/2 cup (120 grams) chopped walnuts and raisins combined
Orange zest from a medium-size orange (or add maple syrup to taste, 1-2 tsp suggested for low sugar)
1/2 tsp ginger
1/4 tsp nutmeg
1/2 tsp baking soda
pinch of salt
You can mix all the ingredients in one bowl. Add dry ingredients first, then add the liquids (that way you can use some of the same measuring spoons and cups without the dry sticking to the wet in my planner-at-heart mind 😉).
Pour into an 8″ round pan or 4″ x 8″ baking pan.
Bake at 325°F/165°C for 35-40 minutes.
After cooled, “frost” with Greek Yogurt (2% fat or reduced fat suggested) and healthily enjoy. Or you can blend with a low-fat cheese (like neufchatel cream cheese or ricotta cheese) if you prefer or will be serving to others who don’t prefer full-on healthy … but would love to try what you happily sweetly baked.
Low sodium healthy soup is easy when you make your own!
I have 3 recipes below with carrots, mushrooms, and potatoes that you can make (with low sodium and sea salt if you like).
Before 2020, I never made my own soups. And today, I only keep a backup can in my pantry.
And you can too!… if that’s what you aspire to even if you don’t know how JUST YET.
But with delicious plant-based ingredients, you can make soup broths that you easily turn into clam chowder with a potato soup base.
You impress yourself and everyone you make the soup for!
After you learn to make homemade soups in simple steps, you’ll probably not go back to store soup cans as these have delicious natural flavors without all the sodium!
And you’re doing your body healthy good. And probably saving a few dollars if that matters.
And these are the 3 easy healthy soup recipes I’m sharing below:
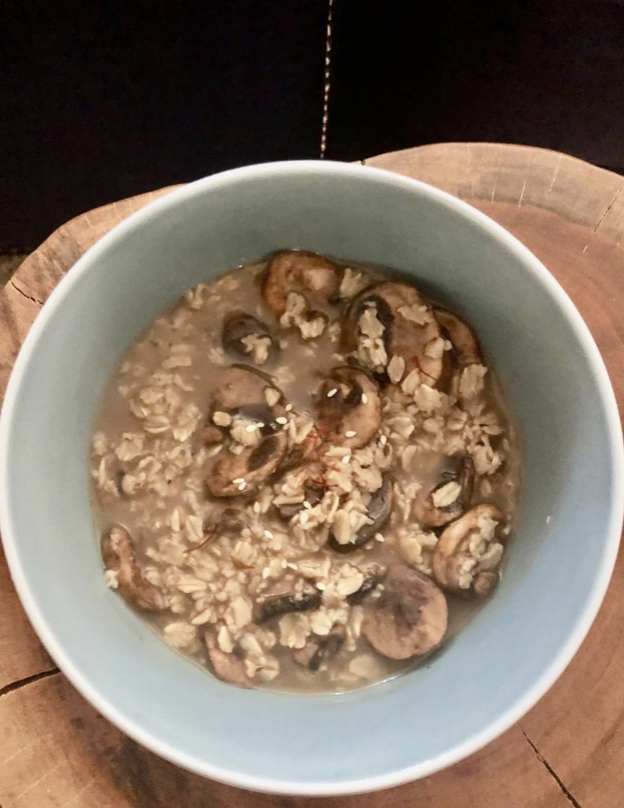
1. Mushroom soup (with old-fashioned but not-out-of-style oats)
3. Clam chowder (New England style that’s my personal favorite made from potato soup)
At this time, I’m involved in a Beta chef’s cooking healthy eating group collaboration with RDs that provides culinary teaching and recipe input to a healthy strategy program.
I love food, and my background includes working with thousands of party planning events (and started my career in hotel catering that you already know if you’ve been reading some of my previous blog posts).
I’d hardly consider myself a chef-ette, but I have always had an adult culinary arts interest. 🧑🍳
…after hotels, I left the hospitality industry and went into more traditional Corporate America work, and then came back to the hospitality working world doing Mediterranean-cuisine (Lebanese, Spanish, and Italian) event planning for about a dozen foodie restaurants.
That’s really when my good food (gastronomy) tastes and senses were re-ignited and I had a chance to re-marry with my “food is medicine” approach to life.
And marry salt from two food worlds.
Salt Talk For Your Low Sodium Healthy Soup Making
For soups, I avoid iodized salt. I don’t usually add table salt (like the ones in the packets) unless that’s all that’s available and the food isn’t already salted.
I alway buy “unsalted” ingredients when given an option.
If you eat out or eat prepared foods from groceries and restaurants, then you probably get enough salt. And probably more than enough salt in our highly processed foods.
On a DASH diet, lowering sodium is the recommendation.
When I’m cooking, I use sea salt (non-iodized) for everything and everyday use.
And then I use coarser natural sea salts like Celtic sea salt (or Himalayan or fleur de sel) for preparing meats to be baked in the oven, and for certain cooked vegetables.
Celtic sea salt is great for your rubs and on top as a garnish (not so much in mixing). The crystals are larger so they don’t blend as great as smaller salt granules. And I also Himalayan sea salt for additional healthy minerals.
And the gastronomic person in me, says coarser salt is absolutely necessary for the right flavor and texture on veggies like Brussel sprouts and edamame if you want a culinary meal experience (and not a bland one). Salt is as important as the veggie itself.
You can get away without using salt on certain veggies like broccoli or okra that hold their own tastes. If you add them to soups, the salt is usually already added.
So here are the 3 easy healthy soups that’ll help you with your salt cravings…
Cook mushrooms in a pot of covering water until soft, and add slow-cook oats. Mushrooms are immune-boosting and are alkaline. Cook until mushrooms are soft.
If you want, add a drizzle of cooking sherry, truffle oil, and saffron to get culinary fancy and balance umami tastes.
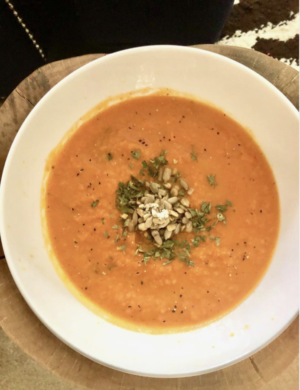
Cook carrots on medium heat. When soft, mash carrots. For smooth and easy-to-make soup, sdd to your Magic Bullet or blender and pulse a few times until it's to your smooth texture liking.
Add ginger spiced and chopped ginger bits (if you prefer for a more pungent bite good for Kapha). You can also use ginger juice for less chunks, and spices.
Zhugh with sunflower seeds and dried parsley if desired.
Cook carrots in water until soft, then mash and grate or squeeze ginger juices in the soup. You can finish off with alt-milk for a creamy-effect or just leave as is. That’s probably the way a.k.a. without ginger I would’ve preferred as a child 🧒🏻).
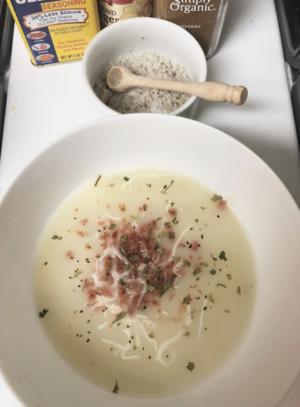
Easy Potato Soup or New England Clam Chowder
This low sodium healthy soup is easier to make than you may think! You can make delicious chowder from a simple potato soup base.
Peel and cook common Russet potatoes in a pot with water. You would do the same step if you were making mashed potatoes.
Then decide if you want a creamy soup. And if you do, pour out some of the water and then mash potatoes in the same stovetop pot. Still with the stove heat on, add in your ready-to-eat clams (3 large potatoes to about 5 ounces of clams you can cook or use a can).
I like to zhugh up with aromatic herbs, either fresh or with ground herb spices like cilantro, parsley, oregano, and/or basil.
If you’re not sure if you should add any herbs into your soup (if you’re feeding others), then parsley and thyme spices are less strong (more universally likable) and can be added in of left to individual tastes.
Potato base soup
If you’re looking for a few easy-to-make snack ideas to go along with your healthy soup recipes or just to eat on their own, you can try…
Another different twist and take on changing up tastes, is this idea… instead of adding salt, you could add a ‘lil vinegar to your potato snacks and soup.
I like to add ACV vinegar but you could also try malt, red, or white vinegar… they’re healthier and also give the food a bit of a tangy bite.
I like to also add my daily spices (turmeric, black or white pepper once in awhile). I skip needing any salt after all those changes 😉.
So hopefully you are soup-er excited to make your comfort homemade and easy healthy soup recipes, and maybe you even choose to change up a way that you snack.