Matcha cookie is hard to match-ah. This one you don’t have to bake, tastes great and is low sugar. And sweet tooths, you don’t have to love green tea.
And the healthy benefits are BIG and green:
Matcha green powder comes from the chlorophyll pigment that’s anti-inflammatory (along with EGCG catechin found in green tea, some other teas, fruit, wine, cocoa, and most coffee, to name a few sources).
And matcha powder has L-theanine that’s also found in black, green, oolong and white teas that come from the same Camellis sinensis tea plant shown to be good for calming, sleep, and productive mental focus.
The downfall is matcha green powder is not naturally a sweet ingredient, so if you’re not a fan of the bitter and earthy taste… you’ll love this matcha cookie that turns out sweet as honey!
But is low-sugar.
There’s actually healthy honey in the cookie (but less than 2 tsp per cookie).
And you can make this without butter that most cookies are made with.
Coconut oil is a good healthy fat to use instead and is used in the recipe below.
It’s a recipe that fits the easy and fun mold.
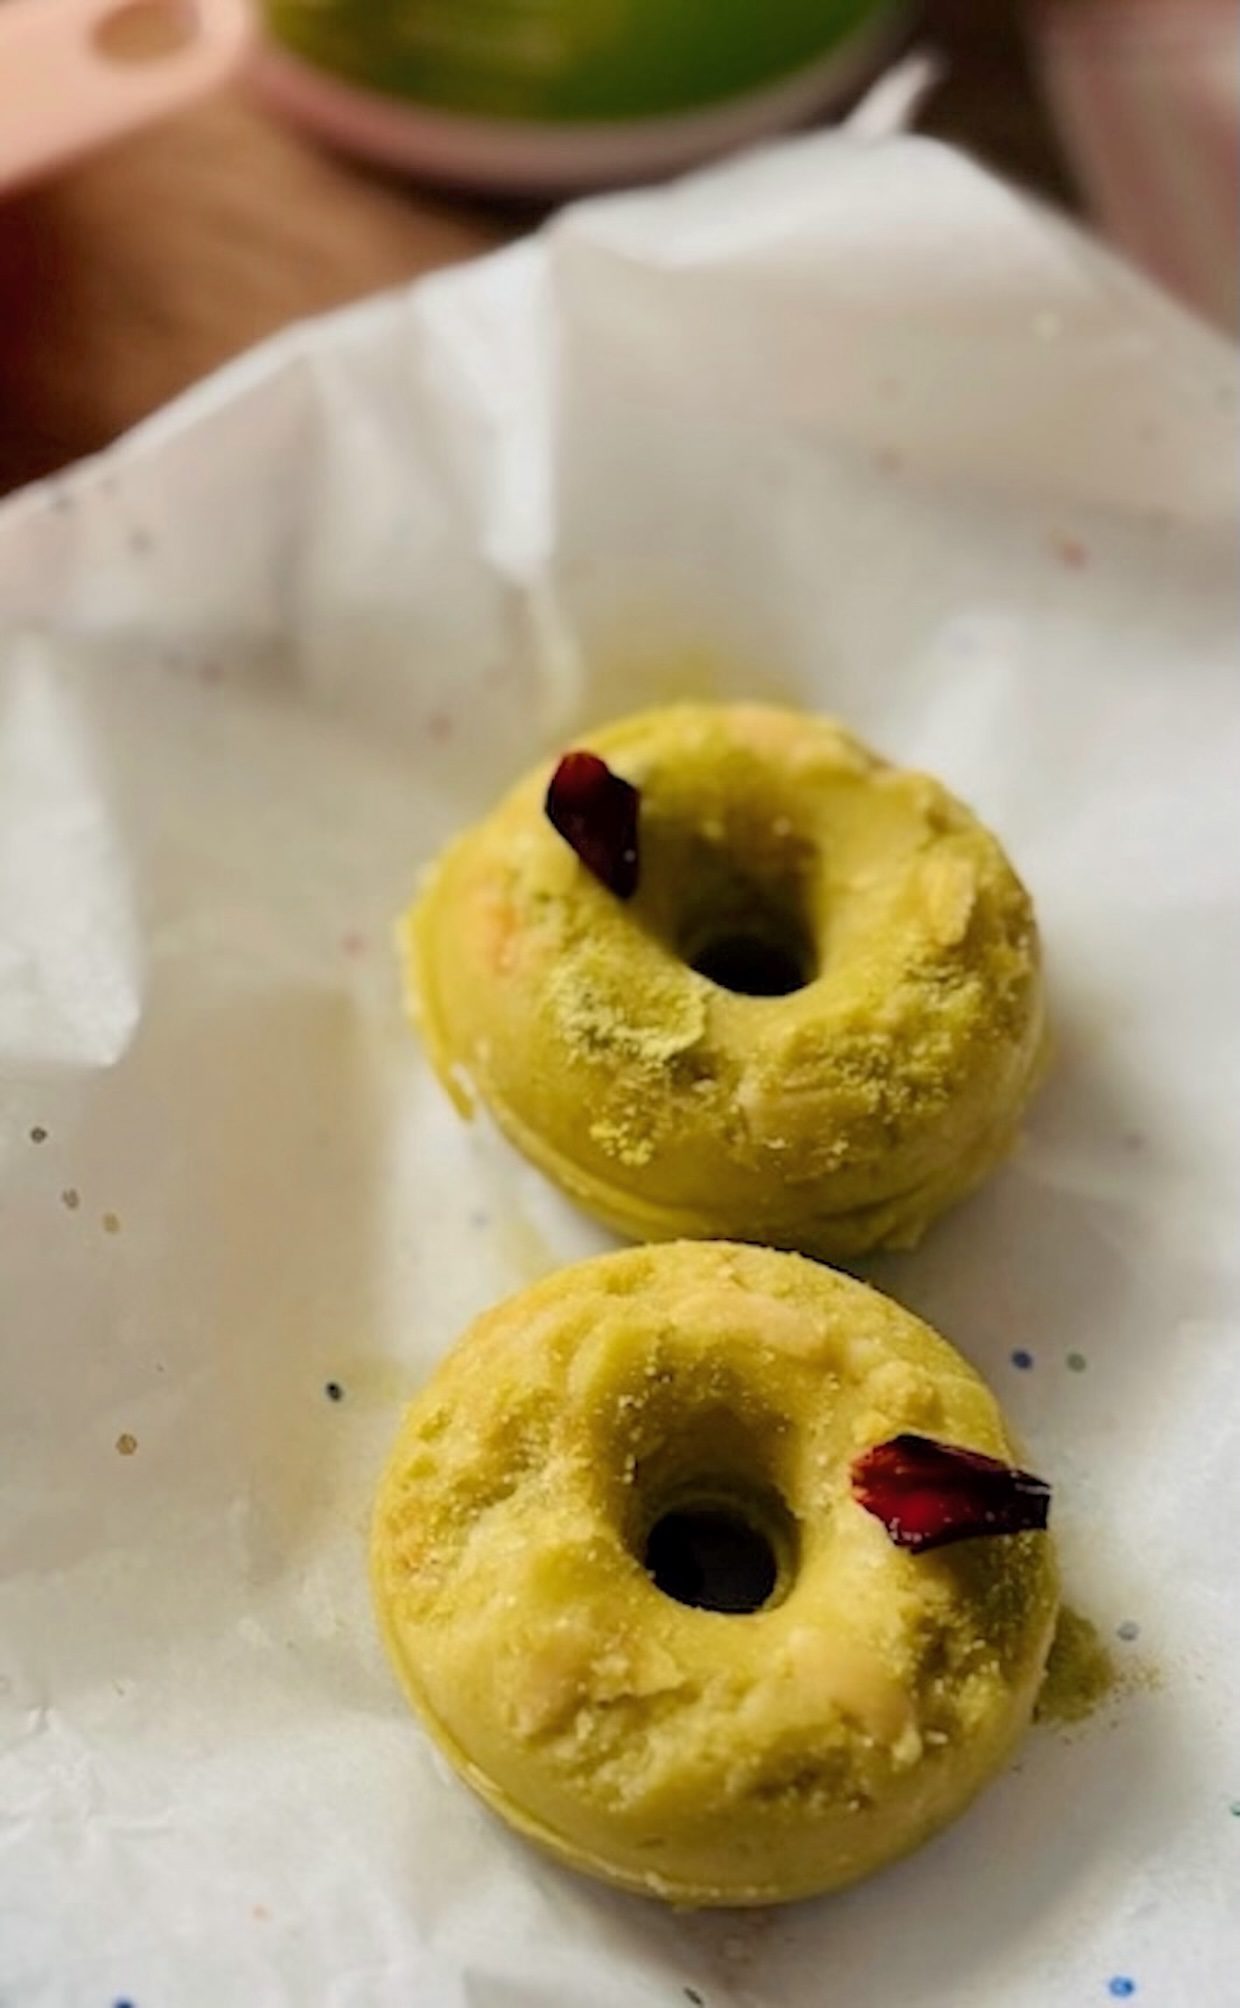
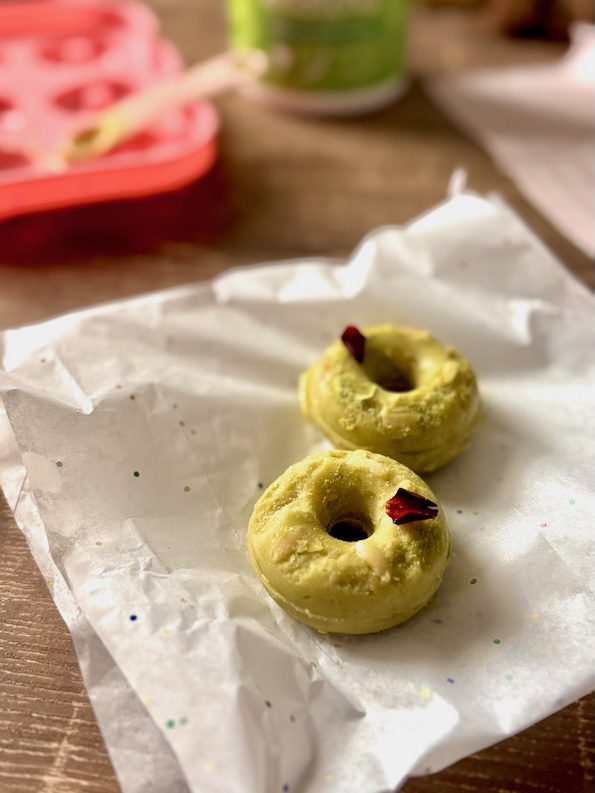
And in the mold, you can simply refrigerate and enjoy.
These matcha cookie shaped-as-donuts are delicious on their own (and dare I say more satisfying than a donut! 🍩). But you can try for yourself.
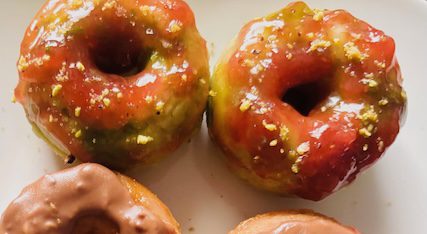
And you can add a strawberry glaze with jam if you like (but is not needed especially if you’re counting low-sugar grams).
…Now we’re jammin’! 🍓
Oh, and if you want to pop these cookies (…yes, they’re cookies!) in the low temp oven and bake these for a little crunch, you can.
But I like ‘em (taste and texture) just as they are as a low-sugar sweet bite with healthy ingredients.
You can also make this matcha cookie gluten-free with buckwheat, coconut, tapioca, or all almond flour as substitution choices.
Since gluten-free flours usually make a more crumbly dough, if you find that happens, simply add a little more coconut oil and/or honey and you’ll see the crumbly bits come together when you press into the dough.
This is as easy as playing with dough and as fun as edible Play-doh!
Add flour to a bowl. Make a well/hole in the middle.
Add and combine honey, extract, and matcha to make the dough mixture. Tip; Combine with a spoon starting in the middle and moving out so the liquids are incorporated. Make another well.
Heat or microwave coconut oil (for 20-30 seconds) into liquid (if not already). Add coconut oil to the dough mixture warm.
Use spoon and fingers to make a dough. The dough should be a little wet and like Play-doh. The small pieces should stick together easily.
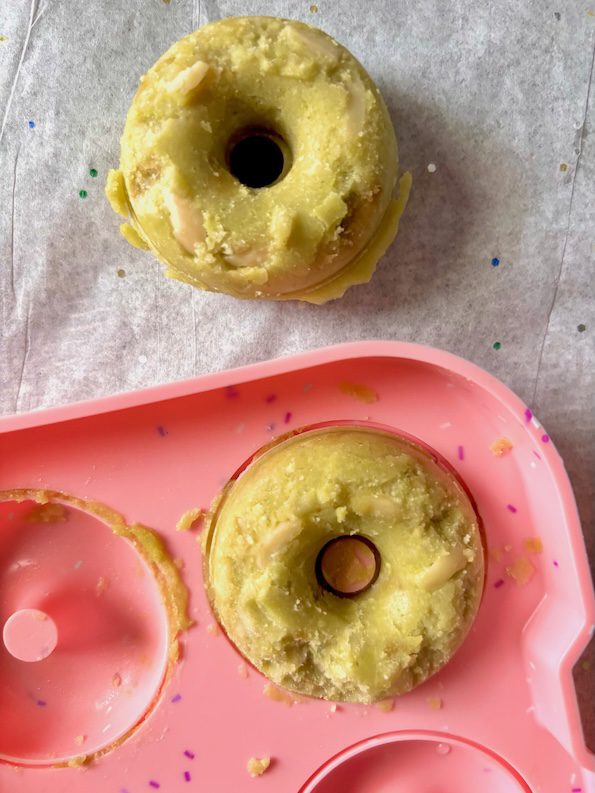
Press into silicone mold (if using).
Refrigerate for at least 20 minutes.
Dust with additional matcha powder. Add a a glaze if desired and/or enjoy!
Notes
Tip: If the dough is too dry and pieces aren't combining fully, then add a little more liquid (coconut oil, honey, or extract).
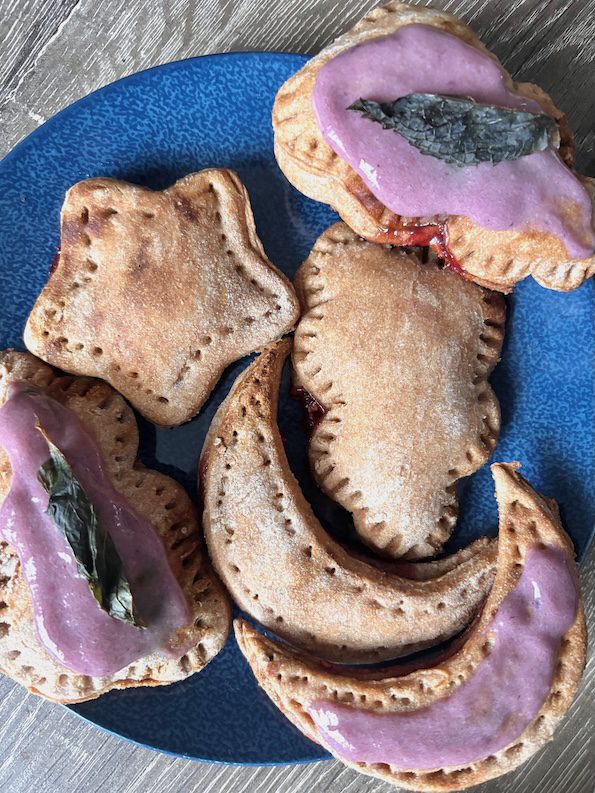
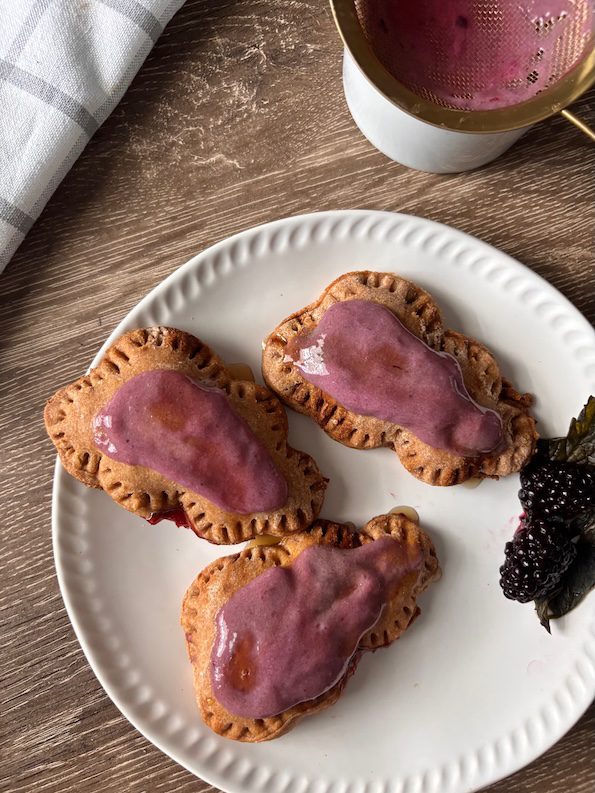
Fruit pastry tart that’s jam berry-filled is berry filling and puts a smile on some days and faces. And you can make a healthier, low-sugar version with little butter, so you can save the calories and still enjoy the pastry anytime!
Like these clouds, star, and moons…
That have a zing-y blackberry glaze for your starry gaze!
For the pastry filling, you make your own jam or use a store-bought (organic) jam with 10 grams of cane sugar per tablespoon or less.
It’s not the low-sugar 5 grams per 100 grams, or half-a-cup… but it’s lower sugar that still counts.
And for this fruit pastry tart, the pastry is made from whole wheat flour that’s a little more fiber and protein vs. all-purpose flour more commonly used.
Every little healthy bit adds up.
For the fruit pastry tart below 👇, you could use the steps to make a wholewheat simple pastry dough… or use the dough you would use for a pie shell or shortcrust.
No proofing needed.
And there’s no need for folding pastry to make lamination layers like in puff pastry (that looks like fabric bolts in a fabric store if you need an imaginary visual).
But the difference is the ingredients below are modified to healthier ones.
And if that’s important, save these measured steps because this is a simple pastry recipe that you can use over and over again for many baking and dessert applications.
So let’s begin…
First off, allow about an hour from start to finish.
The baking itself will only take 15-20 minutes, but pastry dough is easier to work with when it’s cold. So stopping to refrigerate twice (or at least once) when you’re picking up the delicate cutout dough shapes, will pay off in the end.
…I’m just trying to prep you for what to expect.💭
And the good news is that the minimal extra time needed to refrigerate is about as complicated as it gets for this pastry!
Fruit Pastry Tart Ingredients:
And so starting with the easy prep, gather your pantry cupboard ingredients and combine in a bowl with a regular spoon:
Whole wheat flour, honey, and neutral (light) olive oil will add to the healthy aspects. You can also sub in coconut oil that has a different viscosity, so the amount can vary.
Small amount of butter: Keep in mind it’s easier to work with butter when it’s room temp soft so you can bring out what you will need (the 2 pats), a few hours or a day before.
If you forget, you can use heated, melted liquid butter. Both ways will work in the end.
But before you add to the other ingredients, let warm butter cool down because you want to work with a colder dough.
Water: Use coldish water after you combine the other ingredients.
Add flavor extract, salt, and baking soda.
And after you’ve combined all the ingredients together by hand or machine (if you wish), you can roll out your pastry dough onto a sheet pan (like a 17″ x 11″ cookie sheet pan with a Silpat setup works great).
Add some bench flour, so the dough doesn’t stick to your hands and rolling pin.
If you use a full size Silpat, you’ll know you’re done rolling when you reach the inner orange edges (or about 1″ from each side).
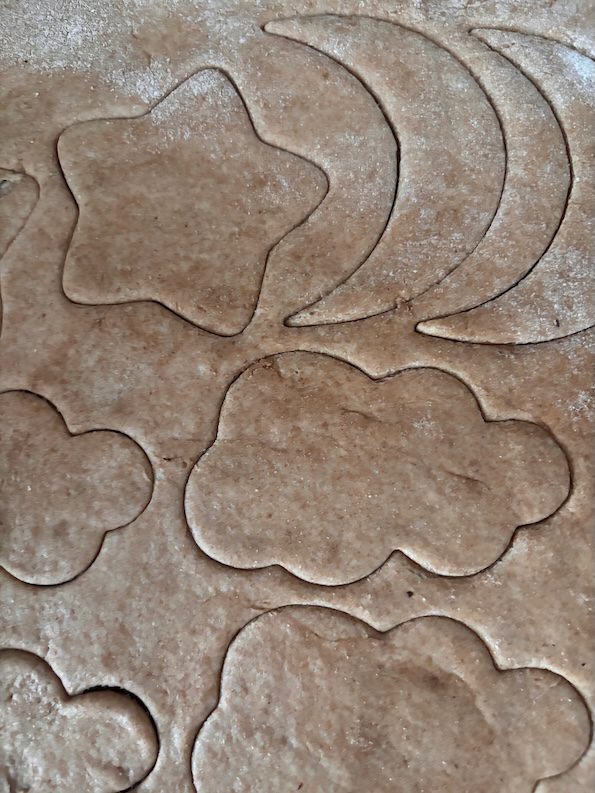
When you’re happy with your evenly rolled out dough, then take your chosen cookie cutter(s), and imprint-cut 12 shapes (2 for each shape if you use different shapes, as you’ll need a top and bottom).
Any regular size cookie cutters will work, and you will have extra pastry that you can make more with or save for another pastry project. I’m a scrapbooker, so this step makes me happy! 😊
And at this point, do not remove the excess pastry yet as it’ll be easier if it’s cold. It’s easier to move shapes when the pastry is cold.
I mentioned that already, but it’s worth repeating.
Imprint cut but easier to remove shapes when the pastry dough is cold. ☁ ⭐️🌙
So then this is a good pause point to refrigerate the pastry pan for at least 10 minutes. (You can do a few yoga moves if you don’t know what to do).
Then when cold, bring out and remove the excess pastry from your shapes with a knife or offset spatula that you’ll use to pick up the shapes. I find it easiest to put the matching cookie cutter shape ontop of where I’m removing the excess pastry as I move from left to right on the pan.
But you do you! …and the way that makes sense to you.
Then add jam to center of the bottom shapes (or 6 of the shapes). Leave some room for the jam to ooze out when you close up the pastries.
Refrigerate again: You can refrigerate the pan for the second time so you don’t mess up the shapes. This mostly depends on how quickly you work. I’m purposefully slow and detailed, so I refrigerate again.
You’re less likely to mess up the shapes when they’re cold and firmer.
When pastry sheet is cold again or easy to work with, use an offset spatula (or regular cooking spatula) to pick up the top fruit pastry tart shapes (without jam) and gently place on top of the bottom shapes.
Then crimp the matching tops and bottoms together with a silverware fork (no fancy tool needed).
I find this step very satisfying too. 😉
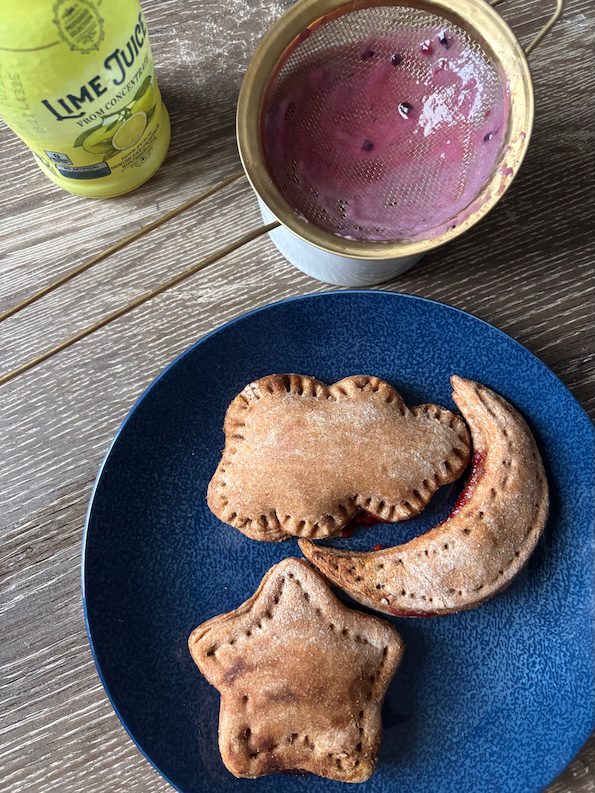
And if instead of vertical line patterns, alternatively, you can also use a toothpick to poke holes evenly spaced apart on the pastry shape edges, and then push down on the pastry making a line in-between the toothpick holes you’ve made. See the star and moon shape below.
You do this with the long side of the toothpick . . . like you’re connecting dots.
Then when you’re happy with your pastry creations, bake your fruit pastry tart pan.
It’s a quick bake… like cookies.
So stick around. And while you’re waiting for the bake, you can make the glaze.
You can use crushed berries. I like a blackberry, lime, and honey trio. You can use a sieve to filter the berry seeds and push the glaze through into a bowl so the consistency will be the same (consistent).
Let the fruit pastry tart pan cool before adding the glaze ontop.
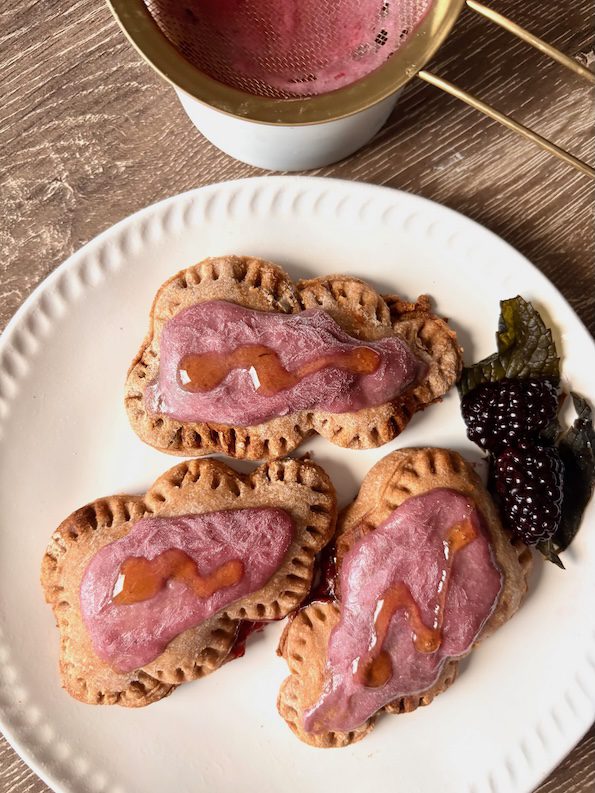
These look like soft leather plushies. I could put a few faces on these. 🙂
Regarding freezing… yes, you can freeze them (and with a glaze), and bring them out and revive them with a smeared drizzle of honey (or maple syrup).
Like changing clouds, the smeared honey look like shadows… and now they’re glazed shiny again, happy, and ready to eat.
These are pastries that you can serve anytime with your favorite cookie cutters!
Course Breakfast
Cuisine American
Prep Time 40 minutesminutes
Cook Time 20 minutesminutes
Total Time 1 hourhour
Servings 12pieces
Author Brandy @ Healthy Happy Life Secrets
Equipment
cookie sheet pan
Silpat optional
offset spatula optional
Ingredients
2cupswhole wheat flour
2tbsphoney
2tbspbutter, softened
1tbspneutral oil (light olive oil)
1/2tspvanilla or almond extract
3/4cupwater
1tspbaking soda
pinch of salt
fruit jam
berries, maple syrup, juice and/or water for glaze
Instructions
Add the flour into a bowl. Then evenly combine the softened butter.
Add the remaining ingredients and form a pastry dough ball.
Roll out on a sheet pan. If you use a full Silpat (17" x 11-1/2") sheet, the dough will roll out to the inner orange edge or about 1" from the edge on each side.
Use your cookie cutters to imprint cut shapes but do not remove the excess pastry yet. Refrigerate for about 10 minutes.
Then remove excess pastry. You'll be left with extra pastry you can re-roll or freeze for another time or pastry project.
Add jam to center leaving an edge on the pastry shape bottoms.
Refrigerate again.
Add a top pastry with the same shape ontop.
Use a small silverware fork to make an edge pattern and crimp edges shut. Alternatively, use a toothpick to make evenly spaced hole indents and then press down with the long side of the toothpick to "connect the dots."
Bake pastry on 350°F/180°C for about 15-20 minutes. The bottom edges will look darker. Don't overbake.
For the glaze: crush berries and add milk, maple syrup, and water or liquid like lime juice until you get the right glaze consistency. Tip: push the glaze through a filtered sieve. If it's too thick, it won't go through.
Baked Alaska is one of my food dreams I’ve had ever since I started my career in catering after graduating college. And I finally made my own and you can too with just your oven! You don’t need fancy fiery equipment. The easy steps and healthy ice cream cake recipe 🍨is found below.
And I get excited dishing on the Baked Alaska dish! 🎂
It was served on a dish in hotel events I worked hard in.
And I had been thinking about it, but didn’t try one until two decades later. 💭
…Can you imagine!? My mind and stomach never forgot and when I tried my FIRST ever celebration for my birthday at the swanky DBGB DC restaurant.
…Say that 10 times! I don’t think I can… but I think I can eat it 10 times. 😊‼️
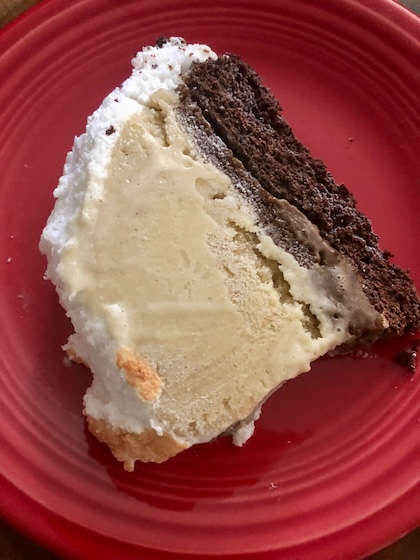
Baked Alaska bombe 🎇
DBGB near restaurants where I event planned
Cake slice celebrating life!
My memorable Baked Alaska experience that became experience-sss did not disappoint.
…So I was inspired to make my own. I mean… what’s better than cake and ice cream, I scream! 😀
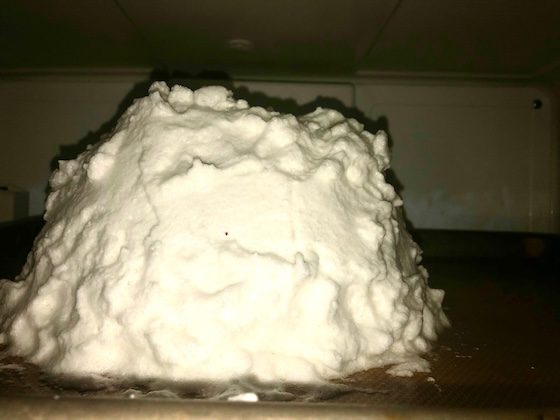
The freezing before the oven broiling… how dramatic! 🎂
Because when you look at this cake as an ice cream cake, it makes it so much less intimidating.
And I can tell you, it’s much easier than you may overthink like I did.
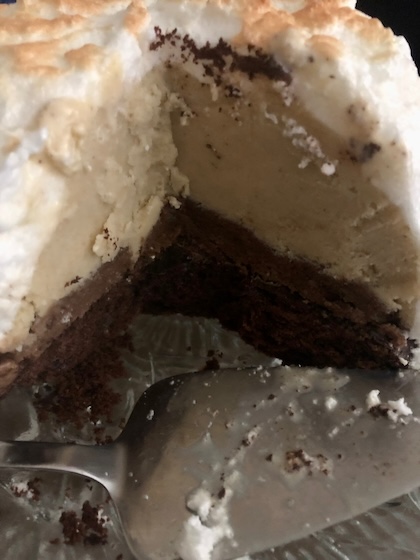
If you’ve worked with meringues, you’ll be golden… as in golden brown flecks on the meringue.
The bombe effect may be a little more effort, but you can make the ice cream cake part and then decide if you want the fireworks. 🎆
And this recipe is Baked Alaska in the oven.
If you were like me on my first Baked Alaska bake, you may have wondered how the ice cream didn’t melt…
A-ha! I figured out why…
The magical oven 🪄 doesn’t melt ice cream that is sooo cold (as has been in the coldest back part of the freezer for hours). Something to do with 32°F melting points and not reaching that limit… but scoring baked (Alaska) points.
…And btw, the dessert is named after the purchase of Alaska in case you’re wondering.
That was a celebratory reason to have cake. As much as end of summer, new season, or a birthday is. 🎂
And for your Baked Alaska, you can start with a boxed cake… but I think you’ll find baking a homemade chocolate cake easy and simple for your first one.
With cake and ice cream prepared, you’re ready for the meringue.
So here we go with the steps.
First off, grab a big bowl like one you would put a big salad in. It won’t be baked but it will need to be freezer safe. Be sure to clear enough space in your freezer for your Baked Alaska dessert.
Add a plastic wrap layer to line the inside of the bowl. I use a stainless steel round bowl. Those were the kinds I saw in hotel and restaurant kitchens I worked in, so I know they work well.
Or you could use a glass Pyrex or freezer safe one as all glass are not created equal. And some could break in the freezer. But then that’s why I used stainless steel.
Then make your meringue and add a layer to the plastic lined bowl. You actually don’t need to freeze your meringues at all. But for a better effect, you can freeze for a few minutes.
Another tip is to make your meringues and ice cream ahead of time. That’s the planner tip to do less in one swoop. That way you can enjoy the assembling on the day you want to enjoy your Baked Alaska (aka baking day or Alaska baking day!).
This is a great dessert to celebrate holidays, change of seasons, and flavors that are calling you like cinnamon and/or a healthy chocolate cake made with coconut oil that was on my mind. You get the picture! 😁
Flavors like chocolate, coffee, vanilla, Neapolitan trio, or cinnamon (my fave 🍥) always WOW 🤩 and work for a Baked Alaska.
Also, if you love the idea of a Baked Alaska ice cream cake, you’ll probably also love to make an easy and fun party tartufo dessert.
Baked Alaska is my favorite celebrations cake hands down and you can make your own cake, meringue and ice cream. I heard about the dessert working in catering and waited until I was ready to have the best cake slice of my life at DC's DBGB restaurant in 2015.
Course desserts
Cuisine American
Author Brandy @ Healthy Happy Life Secrets
Equipment
freezer safe bowl to fit the ice cream shape
cake stand or plate
aluminum foil
Ingredients
meringue shell
ice cream of choice
cake of choice
Instructions
You can make or prepare ice cream and meringue a day ahead or a few hours in advance.
Bake cake and cut around the base of the bowl (the cake will be the Baked Alaska base). Let cake cool or set aside covered in fridge until you're ready to use.
Assemble the meringue: Line your freezer bowl with plastic wrap. Add a meringue layer as thick as you want (up to 1" recommended). Cover with fanciful swirls if it suits your fancies.
Add ice cream to meringue. Add enough ice cream until the bowl is full. Flatten out the top of the bowl.
Freeze meringue and ice cream at least 2 hours in the back of the freezer (but before/without icicles forming that would add unwanted moisture). Bake same day.
Prepare oven: Lower top oven shelf/rack just low enough to cover the height of the Baked Alaska plus a minimum of 6 inches from top of oven to broil.
Pull ice cream/meringue bowl out of freezer and place into oven ontop of a piece of broil-safe aluminum foil (without bowl or plastic). Broil for several minutes until there's a toasted top. Safety tip: do not turn or move the cake (optional) in the hot oven without turning OFF the oven first! Then wait for the broil setting oven to cool down before opening oven door and turning oven/broil setting back on (optional). Watch the broiling for several short minutes until lightly toasted pretty, that happens quickly.
Put together still hard ice cream/meringue and set ontop of cake. Freeze Baked Alaska (ice cream, meringue, and cake) until ready to share and eat.
Notes
Easy broiling quick tips for beginners: in a traditional, no-fancy home or apartment oven with bake and broil settings, "broil" is either an "on" or "off" setting (that can be around 525°F) unlike "bake" that has temperature options. Many ovens have a safety feature that "beeps" and then turns the broiling off if it gets too hot. You'll know because the top of the oven heating element will go froma fiery red to black color, so it's easy to tell what's happening inside the oven with the oven door closed.
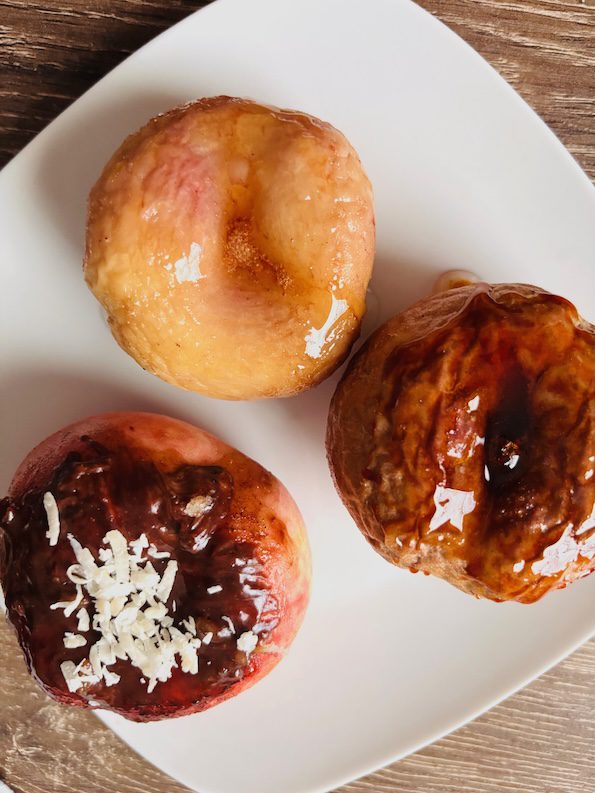
Healthy donut does exist in a donut peach. These are a new kind of peach.
These peaches are glazed with egg white, honey, unsweetened coconut, and melted dark cacao.
Taking a bite in, this is clearly a peach and not a floured donut (in case you were in doubt)! 😊
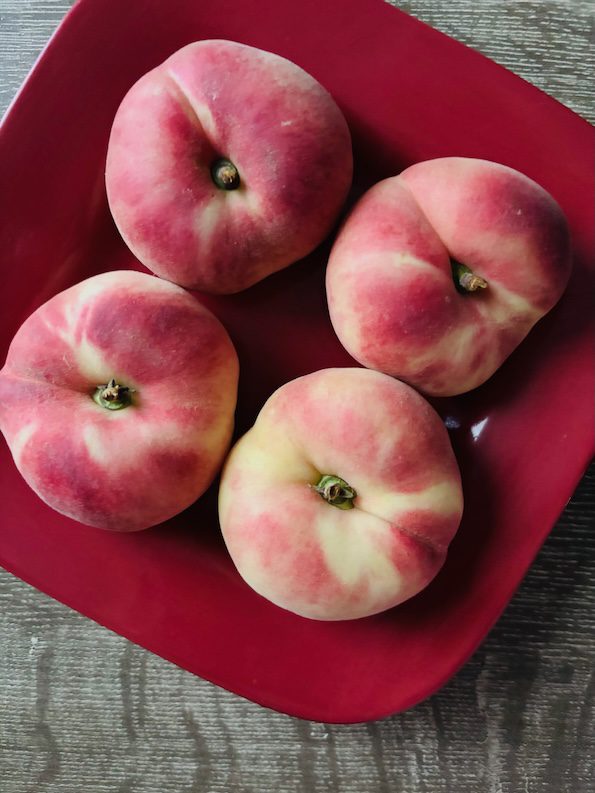
These peaches are also known as Saturn peaches and flat peaches. 🪐
Overhead, they look the same as regular peaches. You can eat these as plain whole fruit too!
Have you seen these before at the grocery stores?
You may have seen them come in a package of four.
I think they’re slightly sweeter than most peaches I’ve had. And have less juicy pulp.
But make no mistake, they still taste sweet like peaches.
And if you want to kick it up a notch, I have a neat way to prepare them so they can be a baked and healthy low-sugar “donut” dessert and sweet snack (instead of reaching for a real heavy donut! 🍩).
The first step is to cook the donut peaches.
If you skip this part and only bake them, the skin on the peach donuts will dry out some and they will be darker in color because the peach naturally starts off darker in color.
When cooking is added as a step, the peaches lose their vibrant peach skin color and turn warm-ish brown color (more like a Krispy Kreme donut or a whole wheat donut color).
…Which btw, if that distracted you and donuts are a missing hole in your life, try a healthier and traditional donut that you can make as a low-sugar donut hole made with whole wheat flour.
And getting back to the peach healthy donut, after cooking you can set-and-forget bake for a few minutes until it’s time to glaze.
To glaze, I like the opaque look of egg white and water. They remind me of cinnamon swirl donuts I had when I was younger. Plus egg whites are healthy.
Tip: When separating your egg, do it first when it’s easier out of a cold fridge temperature. Refrigerate your yolks and save to make bearnaise sauce, ice cream, and/or lemon curd are some of my faves.
Let peaches ripen at room temperature until they're about a day away from soft eating. Then cook in simmering water to soften. Time will vary depending on how ripe your peach is to begin with. The original peach color will change. This step can take about 20-30 minutes.
Bake on 300°F for about 20 more minutes. Again time will vary based on ripeness and how long you cook from the first step.
Make the glaze: Whisk egg white and water together at room temperature.
Use a brush to coat the peaches in the oven and then about 10 minutes in, re-coat. Keep adding glaze coats until you get the opaque white color you like.
Add any zhugh like sprinkles or crumbles when the top coat is still wet. You can also add maple syrup or honey after they cool and then zhugh (or zhugh again).
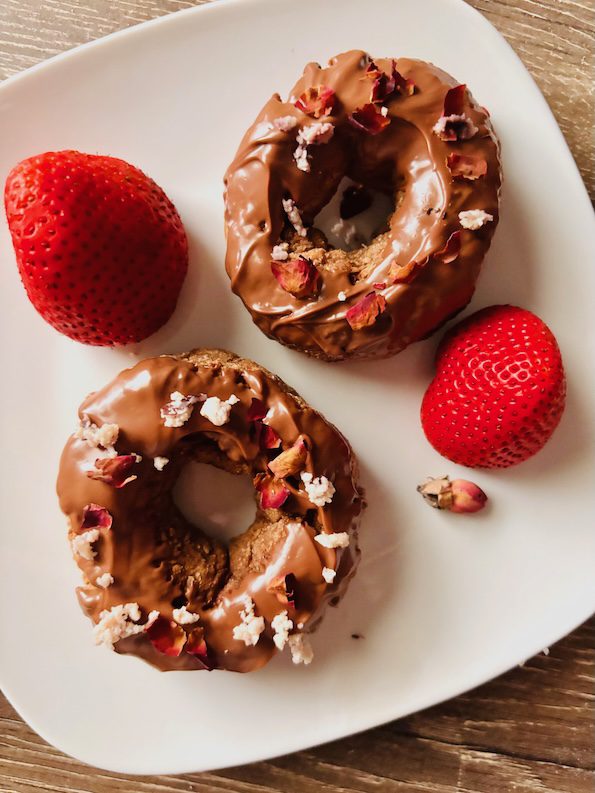
Donut baked with low-sugar cinnamon and honey is a way to love the original fried dough dessert that tastes amazing. 🍩 And these are made with healthy flour and ingredients. Recipe below.
The hole is credited to a sea captain on the waters in 1847.
Holed-donuts even look a bit like life preservers 🛟… and his story (and history) goes like this: the captain wanted more even cooking all around, so he punched a hole in the middle.
Then years later, donuts became “oily cakes” from the earliest donut shop recorded on land in the U.S.
And today, you can avoid oil and water (in cooking) by easy baking low-sugar donuts.
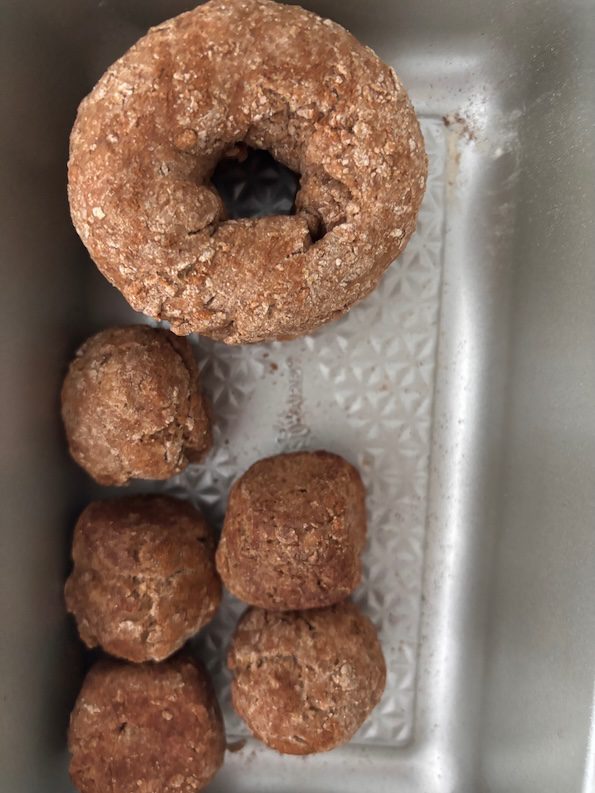
And you get more of an even bake like I did, using your special pans.
I used my Nordic Ware for this baking project that would hold up to any heated baking wars inside the oven. 😊
When you mix in whole wheat flour, you’re getting more fiber and protein than all-purpose flour. It’s a small tweak you can make in your cakey dough recipes.
The dough-batter will be a little darker in color.
I grew up on whole wheat sandwiches so it was an easy substitute for me.
You can see it holds up well in the pan of whole and hole donuts. With holes too, you get double the w(hole), plus more.
And sometimes a low-sugar healthy sweet cinnamon donut hole bite is all you need to fulfill the sweet tooth inside the pie hole (mouth).
When I worked with food event planning in Lebanese restaurants, one of the more popular desserts was Awamat (donut holes).
So this is where it can get confusing… is the hole the space in the middle of the donut or the donut round hole? 😁
In my party planning days 🥳, it was the round holes.
Those were often the choice for birthday parties or special dinner events that could be built up into a Croquembouche display (like a Christmas pine cone tree 🌲).
Holes in the middle can’t do that as they’re just air.
So the solid holes was something special and new to me. 🍩
Another new change I learned: donuts aren’t just for breakfast anymore like they used to be.
And the decked out party cinnamon donut holes I worked with were made with honey instead, and zhughed with saffron that gave a tangy tasting top.
…Plus a pretty interesting look with the stringy red strands.
In reminiscing about those special event donut days, this is my low-sugar healthy whole wheat version of the donut that you can decorate for any sweet occasion. You can make these anytime.
When you want a sweet bite, these fill the hole with a low-sugar, healthy baked snack.
Course Dessert
Cuisine American, lebanese
Servings 4
Author Brandy @ Healthy Happy Life Secrets
Ingredients
1-1/2cupwhole wheat flour
1/4cupmilk of choice
1tspbaking powder
1tbsphoney (or maple syrup)
1tbsplight extra virgin olive oil
1egg, beaten
1tbspcinnamon spice
additional cinnamon for zhughing (optional)
Instructions
Mix dry ingredients with wet ingredients until fully combined.
Roll 8 balls with hands and add to baking sheet pan (or make 2 donut rings and 4-5 1" balls).
Bake on 350°F/180°C for about 20 minutes. Don't overbake. Tips: With whole wheat flour, you'll tend to think that it may not be baked through so time is more reliable. About a few minutes or 5 minutes before finished, you can also flip the donut bottom to top of the pan, and see that the bottoms are slightly darker and finish your bake more evenly. Or for the donut holes, have fun rolling them around!
For a simple glaze, save your egg white and add a splash or water. Glaze donuts about 5 minutes before end of bake. You can also add a melted chocolate, light honey, or maple syrup glaze after the donut pan is cooled. Or simply zhugh with a dusting of cinnamon.