UA-141369524-4

Protein Smoothie Bowl – Spirulina vs. Collagen Protein Powder

Protein smoothie bowl is dreamy color-enhanced with healthy anti-inflammatory powder supplements like spirulina, that’s also high in protein… and that you can learn more about below. Plus, how to blend in the superfood powder to make a tasty bowl (and not just a healthy one!).

protein smoothie bowl with healthy yogurt blue spirulina and matcha collagen powders.

Spirulina if you don’t know, is algae. It sounds like what you and I may have studied in school under a microscope or saw floating in a pond. I saw both in my journey.

Today, it’s no longer controversial in food and as a food ingredient. It’s also no longer a hold-your-nose-to-swallow healthy food that tastes like medicine when you find the right mild one that’s much easier to come across and source online today.

…Because I remember when I tried to source blue spirulina before 2020, and it was not online ready yet. But back then, I did buy green algae spirulina that quickly brought me back to the smells of living next to a pond and walking into a pet store, getting closer toward the fish aquarium sections.

But I blended some of the powder into my green smoothies with a bunch of pineapple to try and sweetly mask the taste.

And then one day I noticed the blue spirulina powder on the market. I had seen the powder in a bowl coming out of a smoothie place years earlier.

I was excited for getting the powder because I knew what aqua bright colors it could make.

…And so I did! And you too can make a breakfast protein smoothie bowl into a mermaid blue…

With the concentrated spirulina powder I had, I added a few drops of healthy plant-based Pandan gel that I discovered had been available for a while. It’s the vanilla extract of the east. And has an earthy taste and dark green color if you’re not familiar.

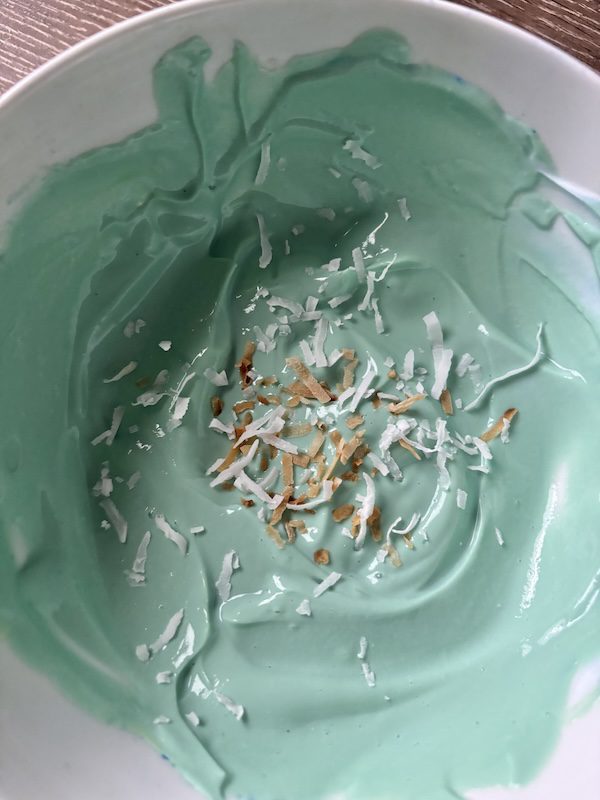
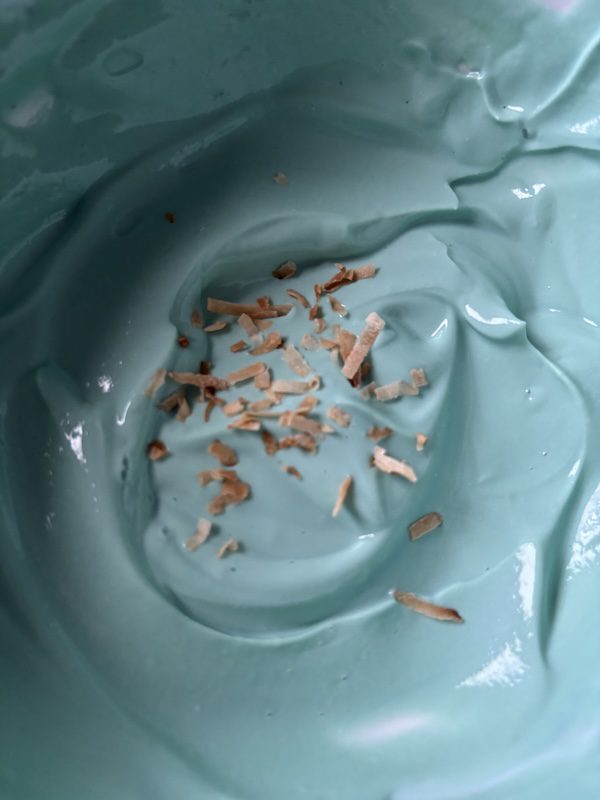
With the blue powder and green gel combined together, you get a cool blue-green aqua shade. Is it blue or is it green? That’s between your color mix and cones’ perceptions in your eyes.

And whatever the soothing end color, for me this has become a loved yogurt smoothie breakfast morning bowl. It’s also one of my site colors for daily inspiration.

Spirulina Protein Powder

But more than color, spirulina is also more than half protein! Between 57-70 grams in 100 grams that you can add to your grocery healthy protein list.

it’s an alternative for a protein powder if you don’t like whey (that comes from dairy).

Or collagen powders (that come from animals).

Spirulina is plant-based, and has other benefits like it’s a high antioxidant potency for anti-inflammatory health. The blue-green algae colors are filled with chlorophyll, that are especially good for body immunity and detox.

Blue spirulina is great for smoothies or a protein smoothie bowl. It makes for a fun healthy drink or bowl with natural colors.

Blended up with yogurt or milk white as the base medium, you get a lighter shade. It’s really an eat-from-the rainbow drink because white contains all the colors.🌈

But you can also go deep green or deep blue marine blue by blending in blueberries to blue spirulina.

And if you want to go wild purple, you can even make a deep purple color by also blending in strawberries or raspberries. Now that’s one royal bowl. 👑

And if you’re deciding which powder to add based on protein amount, here’s the healthy skinny…

Spirulina vs. Collagen (vs. Whey) Protein

Collagen is animal protein and has about 90 grams of protein per 100 grams, so it’s more than plant-based spirulina. Hydrolyzed collagen is the finer version of collagen.

In case you’re wondering, bone broth has less than 10 grams per 100 grams, since it’s diluted (vs. powder supplement). Collagen is a type of protein found in bone broth.

Fun fact: Even though you hear fitness people talking about and taking whey powder commonly for weight lifting and muscle building, you’d think it came from an animal source. But it’s actually 70-90 grams of protein that comes from dairy (as in separating curds and whey in the cheesemaking process)… and milk is not just for babies.

So the choice is yours…  you can add whey, spirulina, or collagen into a protein smoothie bowl if you’re trying to rack up more protein points.

You’d never know in a pretty Tiffany blue bowl that you can dunk a spoon in… maybe even today?

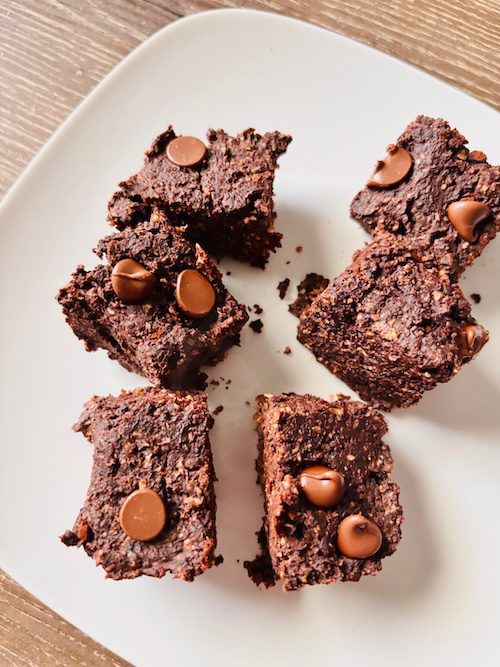
And if you like this dreamy color and healthy idea, you’ll probably like this idea too, to make a healthy blue frosting  you can have for breakfast (and feel good about feeding your body)… and/or a berry yogurt smoothie you can make in seconds with a Magic Bullet.

You can also turn a protein smoothie bowl into a drinking smoothie by simply blending in the liquid portion of the yogurt, milk, or other liquids.

protein smoothie bowl with healthy yogurt blue spirulina and matcha collagen powders.
Print

Dreamy Protein Smoothie Bowl
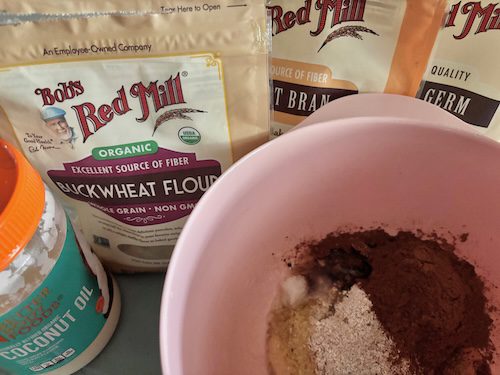
This is a protein smoothie bowl you can make your dreamy delicious bowl with blue-green.
Author Brandy @ Healthy Happy Life Secrets

Ingredients

  • thicker Greek yogurt
  • Pandan gel
  • Blue spirulina powder

Instructions

  • Add.your favorite (Greek) yogurt to a bowl. Then add a few drops of Pandan gel and blue spirulina powder until you get the color and amount you want.
  • Add toasted coconut, seeds, nuts, granola, berries, bananas, and other fruits... it's your dreamy bowl you can bring to your daily life!

Healthy Brownie – High Fiber and Surprisingly Good!

Healthy brownie with fiber (and protein) can be made with wheat bran and wheat germ. You can 2XX (and fibermaxx). And have a delicious dessert good for breakfast or anytime.

Oh, and healthy especially with buckwheat flour added that’s in this fudge-like brownie recipe.

Healthy brownie made with oat flour and other healthy flours.

Also, learn how each kind of flour impacts your healthy brownie’s texture, and which flour has the most fiber. So you can decide which fiber to add in this healthy brownie. I’ll help you below…

Fiber is plant-based indigestible food that helps digestion. Think of whole wheat and other insoluble fiber sources, like tumbleweed passing through and picking up particles that would otherwise stay longer in your body.

Soluble fiber is good for helping cholesterol and blood sugar. And supporting optimized weight below the belt.

And daily fiber helps you feel leaner and look your best in your jeans… and who doesn’t love that?

So a healthy brownie is a simple way to lace in healthy ingredients that help our health… and satiate a sweet tooth. And in the duo benefits, you have your choice of healthy ingredients.

Here’s the healthy skinny, so you can make your ingredient choice as to which ones you want to include for your brownie this time.

First up is is the wheat germ ingredient, that’s the seed. It’s where it all begins for a wheat kernel…

Wheat germ has more protein and Vitamin E that also is an antioxidant. And wheat bran has more fiber than the good germ which is good for weight management.

Wheat bran is also part of the wheat kernel, like the skin or outer layer that’s super high in fiber. When you buy wheat germ, you’re getting more vitamins and minerals that embryos carry. And wheat bran has more fiber.

Whole wheat flour is more common and balanced with germ and bran in it, but it’s more processed. It includes the endosperm, that’s the middle layer and starchy section that helps make more flour.

Think of whole wheat flour as the more healthy alternative with more protein and fiber compared to or vs. (white) all-purpose flour.

Then there’s buckwheat… that’s a gluten-free flour choice.

Buckwheat is a super food and is actually not a wheat. That’s why it’s gluten-free. It has an even higher amount of fiber for fibermaxxing if that’s one of your heatlthy missions. It’s a good add for most sweet and breakfas-y dessert recipes like a blueberry scone or buckwheat ginger cookie snap.

…So those are the wheat options (both gluten wheat and gluten-free buckwheat flour)… and then there are a couple other good healthy brownie gluten-free options, including coconut flour and oat flour.

Coconut flour vs. whole wheat flour vs. oat flour

For the healthy brownie recipe options, you can decide between whole wheat flour, oat flour, and coconut flour as the main brownie flour. And the others (germ, bran, and buckwheat) are healthy supporting adds.

If you’re trying to do a fully gluten-free healthy brownie, buckwheat, oat, and coconut flours or a combo of them would be good choices.

Coconut flour is super high in fiber with over 20 grams or more per 1/2 cup (about 100 grams). Coconut flour has more insoluble fiber (and more fiber than oats). Oats has more soluble fiber (overall 3-4 grams of fiber per 1/2 cup  or about 100 grams). Whole wheat flour has 6-7 grams of fiber per half cup.

If you’re looking to control blood sugar or cholesterol, then oats would be a good brownie ingredient choice. And the best choice for a healthy fudgy brownie. You can simply grind rolled oats to make the flour.

And besides coconut and oats, another gluten-free alternative is black beans that will give a more lumpy brownie with 6-9 grams of fiber.

It’s a good option if you have extra bean cans around (or kicking the cans deciding which ingredients to choose 😀)… and you want to have a more balanced soluble and insoluble fiber eating experience. For a brownie with black beans, to enhance flavor, you can add black coffee as a flavored liquid instead of regular water.

Healthy Brownie Tastes and Textures

Adding or subtracting flours won’t impact the brownie taste negatively (as cacao powder or chocolate-y flavors is the main brownie flavor and another healthy ingredient).

Unsweetened 100% cacao powder (cocoa baking powder) is anti-inflammatory. It helps to make this an overall low-sugar brownie.

And for a healthier sweetener, honey is also used, but you can substitute for a smidge of healthy monk fruit sugar (that’s better for a cake-like brownie, e.g. with whole wheat flour).

For additional flavor pairing or for no-added sugar, you can use peppermint extract for a chocolate mint brownie or coffee to enhance the cacao flavor tastes.

And besides tastes, you can favorably change the texture of the brownie you choose by the flour choices you make.

Whole wheat flour (a fully gluten option) will help make your brownies flour-cake-like, and a smoother batter (less healthy bumpy or rustic). And if you add baking powder (and/or baking powder), that will help the brownie rise in the oven.

But gluten-free flours like coconut flour will stay about the same height before and after the oven bake. Coconut flour brownies will be more dry for texture: the coconut flour batter will be more dry and the brownies out of the oven will be too.

For coconut flour brownies, I leaned into coconut tastes with shredded coconut here…

Coconut flour brownie.

And if you’re feeling like coconut vibe-tastes, then you’ll love this no-bake and low-sugar chocolate chip coconut bar.

…And finely ground oat flour brownies will give more of a fudge-y brownie (like a flourless cake). The baked brownie will look more like the batter, than not at all. Brownies are simple that way. You can kinda predict what they will look like on the other side of the oven. 😊

Fudgy homemade brownie made with healthy ingredients.

…Where the brownie batter will be more like a slightly sticky cookie dough with some grainy oat bits. And more like a store bought brownie mix than say with coconut flour.

So, weighing fiber types/amounts and brownie texture differences and what’s priority to you, will help tip the scale toward as to which flour(s) you choose this time for your healthy brownie plate.

And as you’re deciding flours if you haven’t already, this brownie recipe also has egg white and applesauce as healthy binders.

…Which btw I love substituting using any butter or egg yolk with unsweetened applesauce in a healthy brownie. And if you like applesauce in general, you’ll also like a fruit roll up or applesauce cobbler.

Longer Lasting Brownie

Applesauce will help your brownie last longer if you want to make a larger batch. And coconut oil will help that mission too.

You can use another oil like light olive oil or canola oil, but it will not last as long at room temperature. Those oils can grow rancid quicker at (warmer) room temperatures.

And the same goes for liquid choices. Milk (and liquids that need to be refrigerated) will not last as long vs. using water (or an enhancing liquid like black coffee).

…So now that you have all the brownie ingredient notes, are you ready to make this delicious, one-bowl batter recipe?

Print

Healthy Fudgy Brownie

This is a 2X fiber brownie that has no black beans. It's fudge and less cake-like. This will make 6 small brownie bites or 2 regular size square brownies.
Author Brandy @ Healthy Happy Life Secrets

Ingredients

  • 1 Tbsp buckwheat flour
  • 1 tsp wheat bran
  • 1 tsp wheat germ
  • 1/2 cup ground oats or coconut flour (see notes)
  • 1/2 cup cocoa powder (100% unsweetened cacao recommended0
  • 1 large egg white
  • 1 Tbsp applesauce, unsweetened
  • 1 Tbsp coconut oil
  • 1 tsp raw honey
  • chocolate chips (optional)
  • water (1-2 Tbsp or more as needed)

Instructions

  • In one bowl, hand combine ingredients with a spoon.
  • Bake at 350°F/180°C for about 15 minutes. Do not overbake.

Notes

If you want to turn this into a cake-like brownie, add 1/4 cup whole wheat flour and 1 tsp baking powder.
Oat flour is better at blood sugar and lower cholesterol and coconut flour is good for supporting regular digestion. Coconut flour will make a more dry brownie, and oat flour will give a more fudgy brownie.
Add enough water (or liquid) to get a smoother batter that fully incorporates the flours of choice.

Coconut Milk – Homemade Delicious from Pantry Ingredient

Coconut milk is delicious when you make it yourself. You can buy it at the store but sometimes you don’t want a whole carton or you don’t have it on hand. And you can make coconut milk from your dry pantry ingredients. See below.

homemade coconut milk from shredded coconut found in a kitchen pantry.

First off, coconut milks can be confusing. And then there’s coconut water. So I’ll break down the main difference below that’ll help you in making coconut milk.

At the grocery store, you find coconut milk in the milk refrigerated section usually on the perimeter inside the store.

And you can also find coconut milk in the canned aisles or international sections, usually for cooking, soups, or baking needs.

Then there’s coconut water, that’s usually found in cartons in the beverage aisles.

The first two kinds of coconut milk are from mature coconuts. It’s from the white flesh parts that you probably are familiar with. 🧉

And coconut water is from young or baby coconuts. You can usually find those in international or Asian grocery stores that look like straw husk wrapped coconuts.

Coconut water is more pure tasting and goes well by itself or in a tropical mango drink.

And this recipe is all about coconut milk that you can easily find ingredients for in your weekly grocery shopping. And it comes from none of the sources above.

Because all you need is shredded or flaked coconut. I discovered this because I’m a baker.

So naturally I like looking at baking ingredients. And as someone who likes coconut flavors, making a coconut smoothie or a coconut fruit cake with coconut flour… making homemade coconut milk from pantry ingredients is right up my alley!

So I’m sharing how I do this with dry, unsweetened coconut, also known as desiccated coconut.  These are the dry coconut flesh shavings.

There’s also sweetened coconut that looks more moist in a bag. It has extra sugar and preservatives, so I recommend using the unsweetened version for the healthier reasons.

To make the coconut water: add half dry coconut shavings (or chips) and fresh water to a cup or bowl. Refrigerate overnight.

Then bring out and blend in a Magic Bullet (or blender_.

Next, pour the coconut and water through a sifter. I have one that I use for loose tea and you probably have one if you look around. You can also use a colander or cheese cloth.

As long as you can pour the water through and sift out the coconut, you can make coconut milk.

And voila! you have a delicious coconut milk with a white color and slightly opaque-sides. It’s really quite pretty like a dove or ghost color. 🕊️

And it tastes coconut pure, like a young coconut’s water.

So that’s where it’s fun because you’re getting a milk hybrid from mature coconut flesh, but the sweet pure tasting vibes of a young flesh (like in coconut water). Best of both worlds  🎉

You can then re-use the wet coconut shavings in your breakfast bowls and other uses. Maybe a coconut smoothie?


homemade coconut milk
Print

Homemade Coconut Milk

You can make bright tasting coconut milk with pantry coconut
Servings 4 ounces
Author Brandy @ Healthy Happy Life Secrets

Ingredients

  • 1/2 cup unsweetened coconut shavings
  • 1/2 cup water

Instructions

  • Soak coconut with water over night.
  • Blend coconut and water in Magic Bullet or blender.
  • Set the strainer over a cup. Through the strainer, pour the water and coconut into the cup.

Vegetable Pizza – How to Make From a Home Oven

Vegetable pizza is a plant-based pizza that can be made easy, savory, and interesting from a home oven. Like this whole wheat flour pizza crust…

 Vegetable pizza made from whole wheat flour with green lentils and onions.

Or like this tomato-shaped farmers market okra, peppers, beets, and alfalfa sprouts pizza.

Microgreens like sprouts 🌱 are a great add to a veggie pie.

Vegetable pizza baked from a home oven in the shape of a tomato.

This one was made same-day and with “00” pizza flour that makes chewy crusts like those found in frozen pizzas. That’s what I found from baking in my home oven on regular baking temperatures.

That’s different than a commercial oven that I’m also familiar with.

You see, I’m not a beginner pizza maker or vegetable pizza maker…

I spent 4 of my pre-college years working for Domino’s Pizza making pizzas in busy stores around the DC metro suburbs.

The crusts were more like softer warming bread crusts, the kind that I am used to making at home these days. 😋

At the pizza shops, they were called the regular handmade pizza crust. Bread and handmade made for good comfort food. It made the bread soft and a little airy inside.

I was glad I could achieve a similar crust at home from techniques I tested and learned.

And similarly there’s no reason why you can’t make your own handmade pizza dough from your home or apartment oven. 💭

The recipes and steps for how to turn your pizza ideas to dream reality are easy to follow and you can also check out my Home Pizza Dough Beginner guide.

You can make your own easy pizzas from you home oven. And you can see some of my fall pizza regular and soft bread crust examples for ideas.

And you can also make slightly more advanced light and airy, charred pizza bread crusts (like those from wood-fired pizzas or “professional” pizza equipment).

Those are impressive and deliciously satisfying Neapolitan-style pizza that can come easily from your home or apartment oven! …Yasss! 🤸🏼‍♂️

I think pizza is an easy add anyway.

Especially because food costs have climbed a lot over the past years, and making your own home pizzas is a good way to save food and pizza money… and still get your satisfying pizza-fill on Game and pizza craving days.

Making pizza bread is as easy as  1-2-3 once you get the hang of it. It can be an auto-no-brainer with a few tries.

And that can be a regular healthy meal for you (more on this below)…

It’s also a way to impress your friends with your pizza kitchen skills like with this pizza that you may be surprised to know was made in my apartment oven with just a regular baking pan:

homemade vegetable wood-fired pizza with mushrooms.

So no fancy tools. And no wood-fired or outdoor pizza oven. What’s not to love? It did get gobbled up – leaving no crumbs.

And pizzas are also such an easy way to add more anti-inflammatory healthy plant-based foods to your diet.

A vegetable pizza is an easier sell than a plate of veggies (for any age) because not one ingredient is the star.

It’s the salty, savory ingredient melange that makes a pizza.

And it wins points for this old vegetable pizza maker! It’s happy and oh yeah, healthy…

Pizzas can be very healthy and low-fat if you don’t add as much “greasy” cheese as you see on most pizzas on the planet. In the pizza shops, our rule of thumb was one layer of oily cheese and no gaps. And that was a good amount of cheese you can pull apart.

But you can use a lot less cheese like in a Margherita pizza where healthy Buffalo mozzarella (yum!) slices are randomly added and the melted cheese patches don’t cover the entire pizza. It’s what you make it!

We also used in the pie shop, all our healthy scraps that fell in the pit for the everything pizzas. Those ingredients are just as healthy!

And you can do the same at home with very little pitfalls.

…Only pizza benefits.

Especially vegetable pizzas that make good beginner pizzas and are good opportunities to use all those veggies that the gardens are abundantly growing. 🍅 🥬

Pizzas are a great way to ramp up on onion and mushroom pairings as powerful immunity foods, especially during cold and flu season.  🧅🍄‍🟫

And if you’re dairy-free, you still can enjoy a pizza.

I remember there were always people who ordered no tomato sauce or no cheese… and even no dough…whaaat? That was before gluten-free was a thing.

And subbing those ways is all covered in my little 17-page guide. Because I believe there’s a pizza for any occasion! And can be enjoyed by anyone who can eat solids.

Oh, and I almost forgot… if you like sourdough or have never made before but interested in beginner learning skills, adding starter to your pizza dough is a great way, and for the crust’s sake that I cover as well.

It’s much easier adding sourdough starter in a pizza where it’s just a little bit and not a whole sourdough bread commitment.

Sourdough is also healthy because it’s lower glycemic index than doughs made from just commercial yeast. And that’s good for not spiking blood sugar (and helping prevent lifestyle/Diabetes 2 on the rise).

That’s just one reason why people are still so wild about the wild yeast and an added benefit for those who didn’t know!

That’s healthy food inspiration and ideal weight aspiration for anyone who has a gut and wants to keep it healthy. I’m pretty sure that’s all of us 🧡

Print

Vegetable Pizza (Whole Wheat Flour Crust)

An easy and delicious pizza crust you can make in a couple hours to accompany veggie toppings you choose.
Course pizza
Author Brandy @ Healthy Happy Life Secrets

Ingredients

  • 1 cup whole wheat flour (or combine with bread flour)
  • water (enough to combine and have a slightly moist dough)
  • 1 tsp salt (kosher salt recommended)
  • 1/4 tsp instant yeast

Instructions

  • Incorporate ingredients with either a mixer with a bread hook or do by hand. By hand, create a well (that looks like a volcano) in the middle of flour, yeast, and salt (like you would in homemade pasta making). Gradually add water and mix in.
  • After combined, knead dough. Roll with hand and flatten with palm of hand. Do not be gentle. Do this for 5+ minutes.
  • Let dough rest for at least 2 hours in a plastic container. Be sure the dough is moist. If baking same day, pull out and shape/flatten dough with hand leaving about 1/2" edge crust untouched.
  • Bake at 350°F/180°F for 20 minutes and then pull out of oven and add sauce and vegetable toppings. For wet or frozen veggies, cook those separately in a pan before adding to pizza. Bake for another 10-15 minutes or until bottom of crust is fully baked.

Easy Apple Tart Healthy Recipe

Apple tart can be a breakfast idea or dessert made from healthy baked wheat, oats, and honey. Oh, and wholesome apples are whole snacks for some… maybe you? Fuji apples here, but there are so many apple to choose from for your enjoyable tarts. 🍎

baked apple tart with oats and honey.

Below is an easy breakfast ingredient recipe for apple tart that’s low sugar and needs no proofing. And the proof is when you make them (…and in photos below 😊).

And if  you decide to bake your apples at all

Because a whole apple snack from an apple tree needs no improvement or addition… and if all you do is add peanut butter on them and eat them raw, they’re delish-elevated!

I esp. like the crunch and taste pairing of Granny Smith green apples with a natural peanut butter (like the kind you stir up with peanuts). 🥜

With a baked apple tart recipe, the sweeter crisp red apples are better for dessert snacking. As they soften in the oven, you can taste more of the sweet and tart.

…And for a pop of bright red on a plate.

Well… sometimes.

They do come out with baked fall colors. You’ll see below what I’m talking about. 🍁

Because red apples vary in color as you’ll see shades of red, yellow, white, and green if you pay closely attention. It’s like nature did a Bob Ross painting on each apple (and apple orchard if you like landscapes).

Like us peeps in nature, no two apples are exactly alike.

They say there are over 7,000 apple varieties and you know the ones that are abundant and growing in your surroundings. 🌳

apples with peanut butter snack.

Red apples dominate the fruit market scenes in the autumn. They match the fire engine red leaves on the U.S. east coast and make great healthy candy apples (instead of sugary caramel).

Healthy apples can be stuffed with healthy ingredients… like the sweet messy kind you can’t stuff in a bag 🎃, but you can stuff yourself with and enjoy the swirling mess in your mouth.

That’s one idea for today.

And with apple season upon us, you need no other reason to come up with new apple snack ideas, like an easy baked apple tart.

The steps are simple and easy…

Cut your whole apples in half and de-core them.

An easy way to do this is to take a paring knife and cut around the core, and as you get around to the other side of the track, you can almost pop the center out.

Save your apple seeds and plant them.

Then seedless, you can eat all the apple flesh parts without waste. Organic (pesticide-spraying free) apples are suggested if you eat the skin (that have a lot of healthy fiber).

Add peanut butter (that will ah! and ooh!-ze out when warmed and baked).

Then put your apple halves aside.

Make your pastry dough:

It’s an easy mix of ground oats and whole wheat. You can even add wheat bran and/or buckwheat for some more variety and healthy goodness, like I did. Mix in water.

Then add the honey and butter that’s a food pairing harmony, working so well together for taste and texture.

But if you want to use a healthy oil (instead of butter) you could do that.

And also your choice is to add cinnamon (and/or cardamom) spices with your apples.

Cinnamon adds that warm fall-ish cozy fireplace or fall hiking outdoor tasting vibe. Sweater weather is coming, but apple cinnamon baking is the active season beforehand.

For Vata (fall season) and us balancing moods, that’s comforting and clearing. It’s a great season to breathe intently and catch new breaths.

And getting back to the bake (and not to get too much in the weeds), cinnamon will help anxious energies. Cassia or traditional cinnamon spice you find easily in grocery stores is going to be sweet for adding to bakes before going in the oven. The other Ceylon cinnamon kind is more healthy and good to add to coffee and zhughing. But mix-and-match spices and kinds before, after, and during as you please. apple tart with oozing peanut butter and cinnamon.

You do you… and dousing some cinnamon spice of any kind is healthy. The plants even love some on their soil to prevent unintended growth. 😊

Cinnamon is one of those natural foods that have no pitfalls. and goes great in the fall.

And now you’re ready.

For this easy apple tart good for fall bake, you can put this short pastry crust together in a few short minutes.

The dough will have crumbly bits falling off (appropriate for the season), but will mostly stick together as a ball.

Divide the dough into three equal parts.

Flatten/roll out the dough with the palm of one hand is easier. See as easy promised, you don’t even need a rolling pin.

Shape the dough into an apple shape around each apple half if you like. Of make into a circle with your circle cutters.

Use some honey to glue your apple bottoms (halves) to your flattened pastry bases. Then when you’re happy with your apples…

Bake at 325°F for about 25 minutes. If you want to give your apples a drying baked apple look (see 🍎 baked photo above), you can leave them in the still-warm oven after you turn the oven off. That will soften the apples even more for that you can even add to an apple pie. 🥧 💭

Before the apples are fully softened, the pastry base will be golden brown. You can pull them out of the oven at that point or bake a ‘lil longer. The apples start out shiny smooth like this duo below.

Which btw, these apple tarts in-the-making look like they are in jail but believe me, they’re enjoying their warm cell and cozy base as they bake. 😁

apple tart baking in oven.

Oh, and if you like this recipe, you’ll love these low-sugar dessert recipes… some even have apple ingredients.

And if you’re looking for Vata season sweet and salty snack idea, you can try a happy Rocky Road energy bar, a no-bake peanut butter cookie, and/or pair with an apple carrot smoothie.

Curious, what you like? Lemme know in the comments.

baked apple tart with oats and honey.
Print

Baked Apple Tart Breakfast with Oatmeal and Peanut Butter

This is a great dessert snack idea with healthy oatmeal breakfast-inspired ingredients. Makes 3 apple tarts.
Course Breakfast
Servings 3 apple tarts
Author Brandy @ Healthy Happy Life Secrets

Ingredients

  • 3/4 cup whole wheat flour (can combine with wheat bran or buckwheat)
  • 2 Tbsp softened or melted butter
  • 1/2 cup old fashioned oats
  • 3 tsp peanut butter
  • 1 Tbsp raw honey, plus more
  • 4 Tbsp heated warm water (plus a little more as needed)
  • 1-1/2 tsp cinnamon spice
  • 1/2 tsp cardamom spice (optional)

Instructions

  • Grind your oats into fine pieces.
  • Cut your apples in half and hollow out center with seeds. Leave skin on (if using non-organic apples, you can de-skin apples also if you choose).
  • Add peanut butter to apple hollowed center. Set apples aside.
  • Make the pastry dough apple bases. In a bowl, add the flour and oats, butter, cinnamon, and then add water and honey, and cinnamon (if using). Fully combine with a spoon. You can use a little more water as needed to help the dough crumbly pieces stick together. The dough should stick together and have some crumbly bits.
  • Divide pastry dough into 3 equal balls. Flatten each with palm of hand and shape into circle or apple disc-base shapes that your apple halves will fit onto of.
  • When you're happy with your pastry discs, add a honey circle ring drizzle around to "glue" your apples to the pastry. The peanut butter will ooze out of the apples.
  • Bake at 325°F/165°C for about 25 minutes or until the pastry is lightly browned on the sides and bottom. You can leave in the oven after the temp is turned off for a softer baked apple tart.