Frozen cocoa beverage…whaattt? Cold cocoa (vs hot cocoa) is probably not what you think of when you think of cozy Christmas-y holiday vibe drinks in December. ❄️
And not a beverage you would hold with mittens around a dreamy outdoor cozy fire.
…But before you turn away the idea, a frozen HYGGE-cozy flavored and FUN layered cocoa variety can be a welcomed chiller! 🧊 Think of it like an unusual frozen smoothie. And that is great for cooling any stress-irritated moods that can sink in.
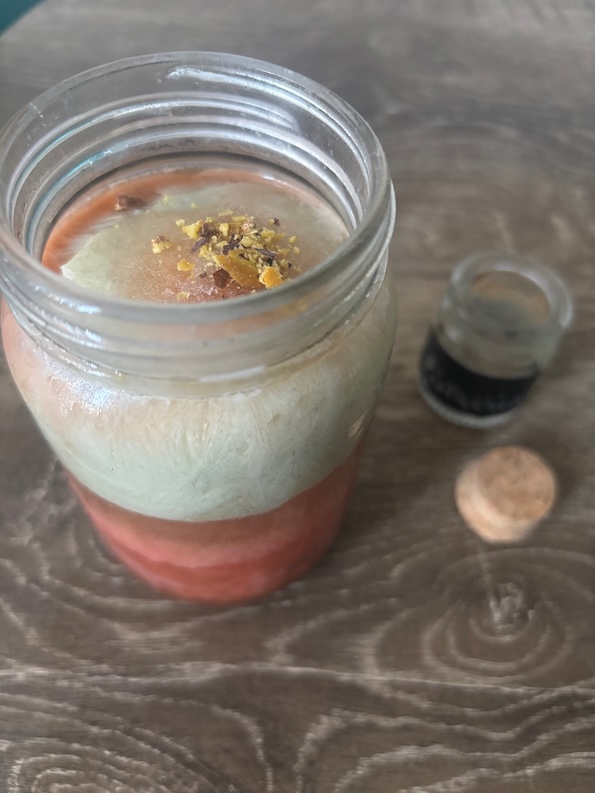
Like this one I share how to easily make…
…It’s layered, and looking like a sand art glass (yes?). And one you can imagine maybe finding at a Christmas market or art show.
Oh, except this one is deliciously drinkable made with drink slip away ingredients (and not slipping sand)! 🧋
And this frozen cocoa beverage is inspired by dairy-free spumoni ice cream flavors dreamt up from a childhood travel experience in Italy. 🇮🇹
Each layer is frozen and when the drink melts, it’s more fun to watch than a snowman melting. ☃️
You can use anti-inflammatory cocoa like I did with Hershey 100% raw cocoa, and then layer with cherry juice… and then add almond milk with a few drops of Pandan (for natural mint green color) and pistachios.
If you’ve never tasted Pandan 🌱, it’s a plant-based ingredient with a vanilla-nutty vibe that taste mixes well with plant-based milks like almond or cashew milk.
For healthy cocoa, instead of going to the cocoa mix beverage aisle of the grocery store, visit the baking or seasonal aisles instead to find the pure multi-purpose cocoa.
The cocoa can be used to make a drink like hot or cold cocoa, or used to bake with and make desserts like healthy chocolate cake, brownies, and cookies.
You want to find an unsweetened, raw cocoa that is not alkalized (processed or Dutched cocoa) for the healthy tastes. And this is the best kind to bake with too!
Most marketed drinking cocoa coming in packets or pouches with the options of marshmallows are the processed kind often loaded with sugar.
You can always sweet treat yourself with marshmallows (sugar) ontop at the end. Or simply zhugh with coconut chips or pistachio crumbles.
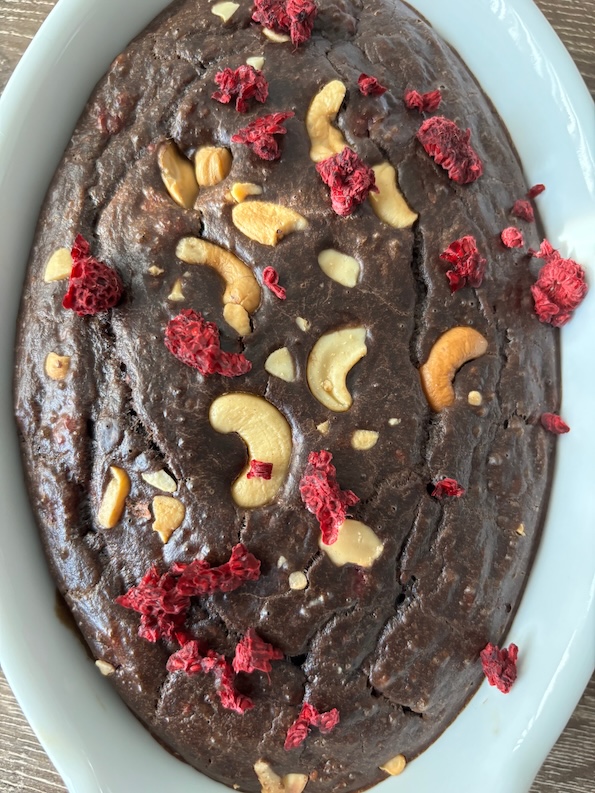
And then after you’ve made your frozen cocoa beverage artwork 😁, you can serve with cocoa desserts like this cocoa brownie cake with cashews and dried raspberries.
Which btw, polyphenol-rich cocoa and raspberries are an anti-inflammatory power couple.
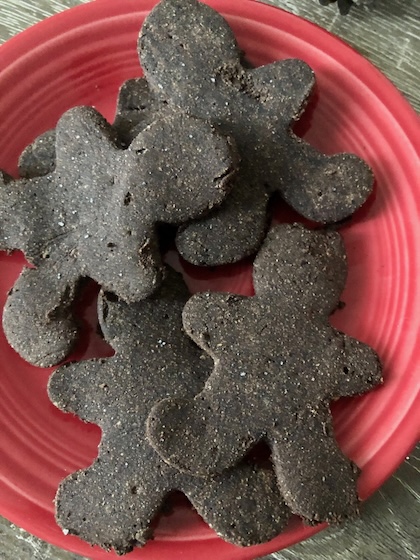
…But me-thinks 🧒🏻 that a frozen cocoa beverage is just what these healthy un-iced and faceless molasses gingerbread men ordered. The mystery remains… 😊
Lemon cookies are one tasty way to brighten up your holiday and Christmas cookie baking fun. 🎄
At first, it may sound strange to bake in lemon during the holidays.
…Because when we think of Christmas cookies, we traditionally think of chocolate, pistachio, or spices for Christmas-y vibes… and not summery lemon-y ones.
…But actually lemon is a winter fruit as most citrus fruits are.
Tip: you can buy lemons in the grocery stores in the winter months and freeze them for year-round use. You can save money this way as lemons are abundant in winter and when their price falls.
And these two healthy-inspired lemon cookies warm up the holiday baking season and festivities…
…So now that we’ve established lemons 🍋 are great, tasty year-round ingredients, they’re also super healthy.
Lemons are loaded with Vitamin C and full of limonene that’s an antioxidant.
And not only body healthy, the sunny lemon yellow is going to put anyone in a good happy mood… while brightening up tastes.
…Just ask those in the Mediterranean regions where cooking lemon into the daily diet for longevity reasons is a happy way of life.
Healthy Lemon Cookies
And so… in search of making one happy, anti-inflammatory lemon cookie, I was inspired by using healthy oils (no butter) and more healthy, natural sugar sources that have vitamins.
…But that was waayyy before I started baking all of my own sweets including cookies (my favorite!) for consumption…
Actually, I used to play a game with myself in the cookie grocery store aisle where I would find the healthiest cookie in a package with the smallest amount of sugar for the tastiest effect.
That was how I defined high cookie value.
Those were the day before I discovered how easy it is to bake your own cookies (that’s faster than if you go to the store and back).
And if you’re trying to lower your sugar intake (that’s a good idea! 💡) but love cookies, tart lemon is a great ingredient dimension add to cookies so the focus isn’t on sugar.
…The sour taste buds are doing a front row Radio City Rockettes happy dance with the secondary sweet buds behind. 👯
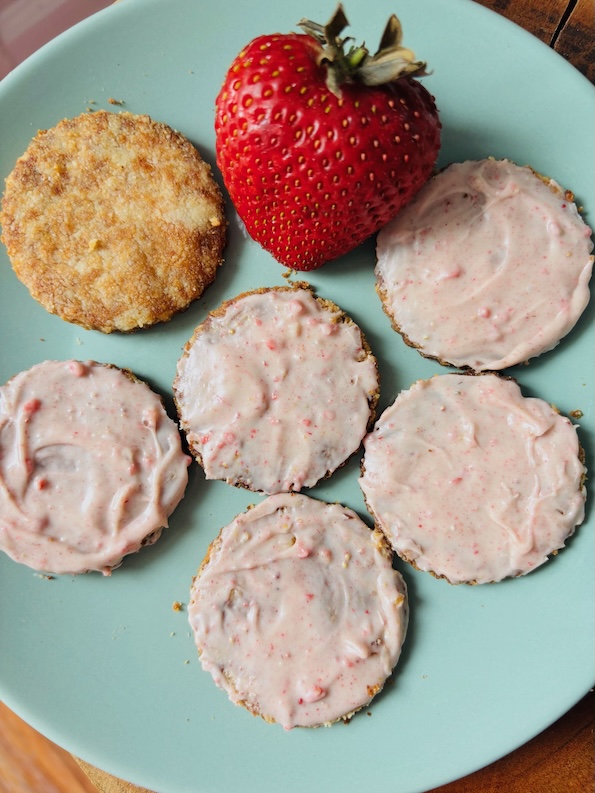
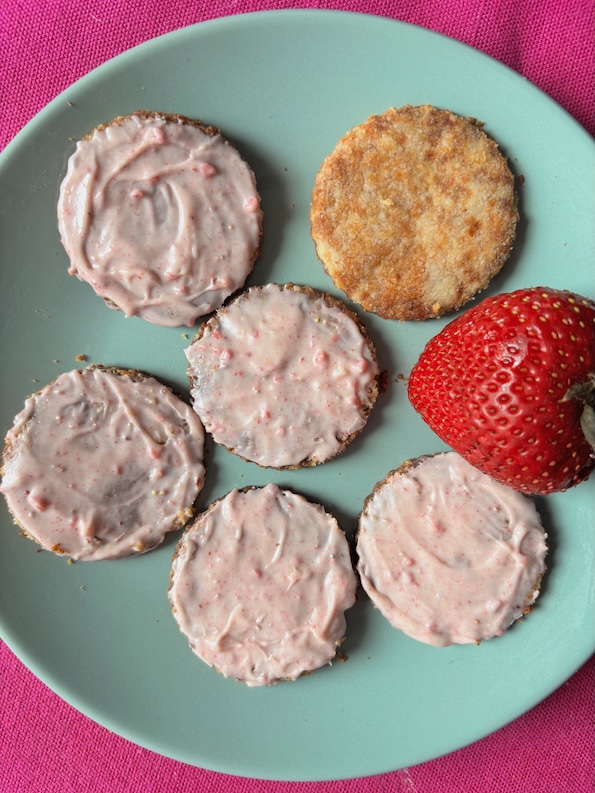
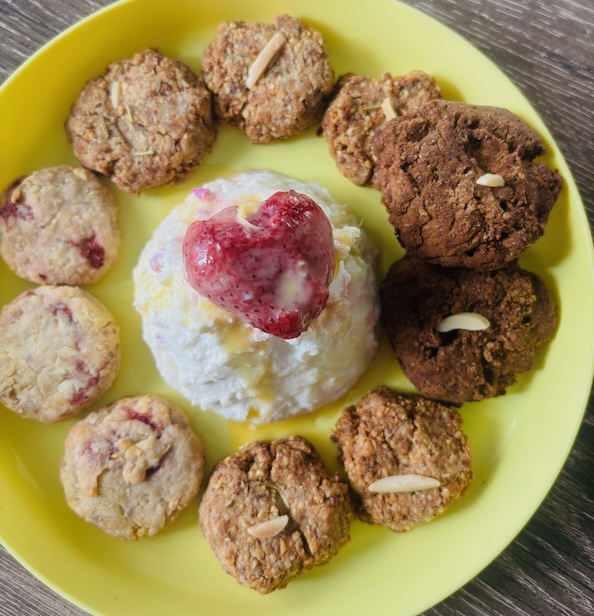
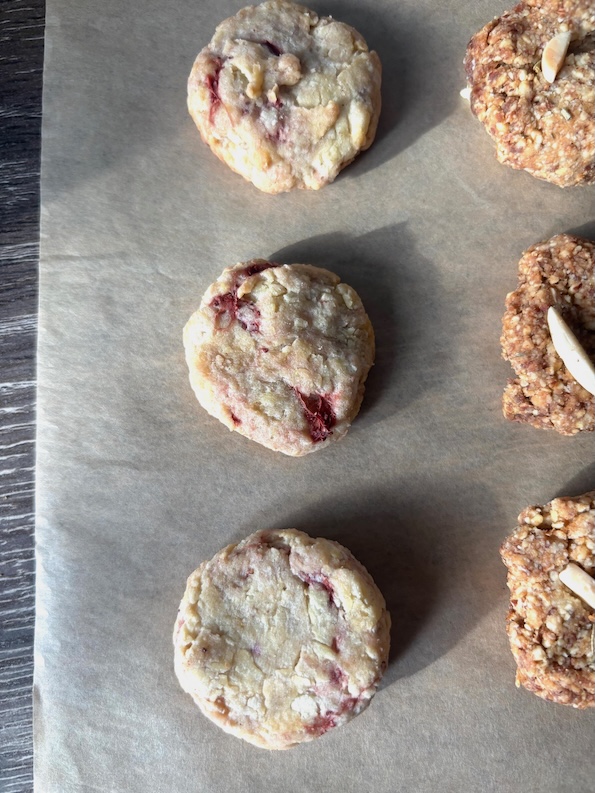
Like in this celebrational plate of healthy cookies with a strawberry lemon drizzle dessert surprise (made of Greek yogurt and buffalo mozzarella) in the middle.
Baking in healthy ingredients is anti-inflammatory for skin and gut heath.
And making a cookie without butter or white sugar of any kind — that’s also deliciously tasty, holds together, and is crunchy (wow, that’s a mouthful!) — similar to store-bought cookies, is a dream come true! 💕 ..
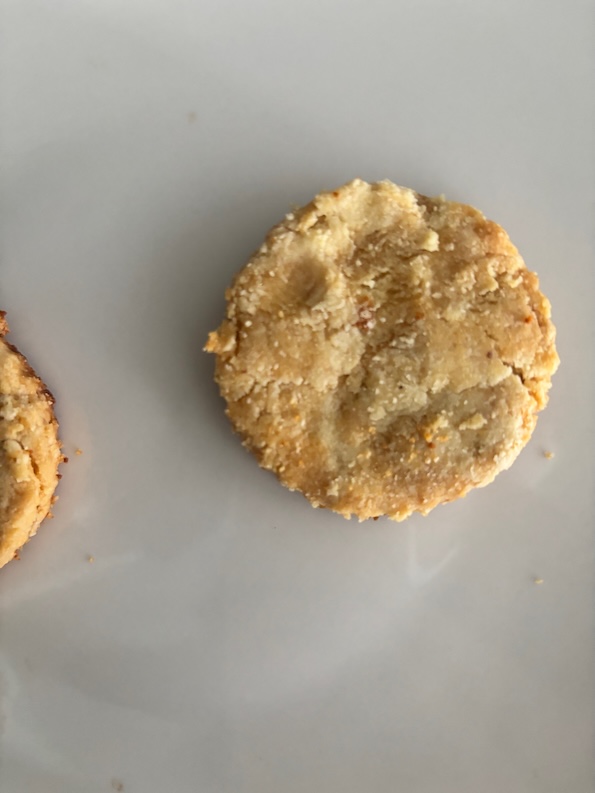
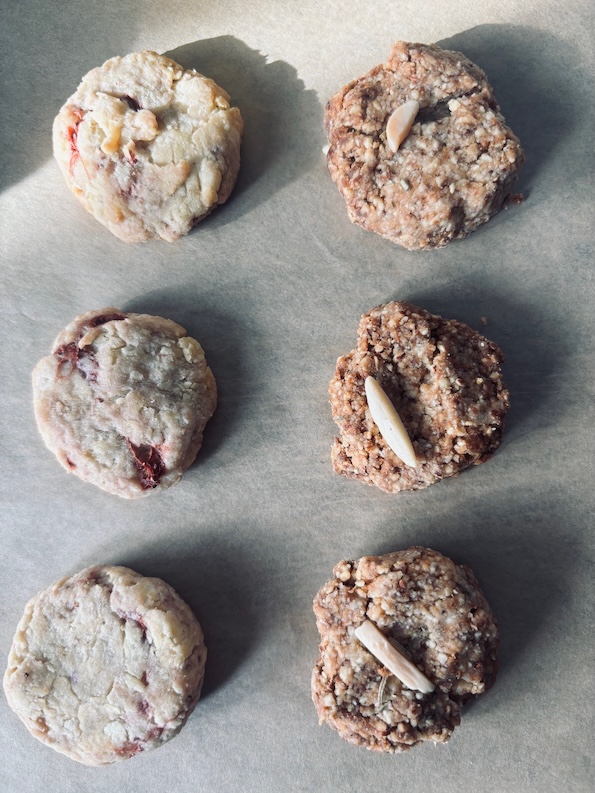
And these lemon cookies with strawberries 🍓 fit the bill. They’re zesty and sweet in every way…
…Maybe that’s where zest-for-life came from?
And you can make lemon cookies like these with mostly healthy ground almond flour where you can save money by chopping your own whole almonds with a machine.
Recipe below.👇
…Or you can make a thyme-rosemary lemon cookie that’s Mediterranean-diet-lemon-and-olive oil healthy.
Since you’re using oil instead of butter for this cookie, you don’t need to refrigerate or cool the dough before rolling out as an added bonus.
For the flour for those lemon cookies, use gluten-free flour like coconut or almond flour (again).
And for the sweetness, use a tablespoon of honey or maple syrup.
Those sweet ingredients also act as binders along with the olive oil. Honey is great for moisturizing in dry, winter months and maple syrup for cooling down in hot months. But either are great year-round!
You can measure the healthy EVOO, but it’s much more fun if you look at cookie making as a new adventure like the wonder you had as a kid. 💭
…In your wonder, you can take a cup of flour and make a mound. Then, make a small well in the middle (like you would if you were making pasta) and add a tablespoon of olive oil in the well and start combining… and see what happens.
You’ll probably see that you need more oil to hold the flour together.
Try another tablespoon of EVOO. Then add a tablespoon of honey (or maple syrup).
Then add lemon zest from one lemon, and you can also add your herbs like rosemary and thyme.
Keep combining and adding a little bit more of the ingredient amount you need, like more olive oil…
Cookies are super forgiving. 😋
When the cookie dough can hold together with crumbly bits falling off, that’s when you know you will have a good cookie crunch when fully baked.
Place a piece of plastic wrap or parchment paper on top of your dough, and roll out the dough (or flatten dough with the palm of your hand for imperfect cookies).
Then you can form your cookies into the shape you like by hand or cookie cutters.
Bake on 325°F on the higher baking shelf for about 12 minutes. I like to flip the cookies (from bottom to top) about 5 minutes before they’re done so they are baked more even as the bottoms get brown faster.
Lemon cookies also tend to burn quicker than darker color cookies like gingerbread cookies, another favorite for this ‘lil Miss Cookie Monster! 😋
Use a chopping processor machine to chop almonds to a fine almond flour or use store-bought almond flour. Combine with all ingredients except bench flour to make the cookie dough.
Add bench flour to your working surface and roll out the dough to about 1/4 inch thick. Cut out shapes and add to a baking cookie sheet with a non-stick surface (Silpat or use baking spray).
Bake on 325°F for about 12 minutes or until sides are golden brown.
Fruit roll up is a happy memory from when I was a kid. 💭
They were a sweet and light snack from the grocery store that melted in the mouth.
It was (and is) a cross between fruit + candy.
They came wrapped up in their own packaging and were attached to cellophane that I liked to play make things with when I was young. They were rolled up like scrolls.
Almost like the Dead Sea Scroll minus the ancient writing.
…And not that far back, my young days was when posters were the rage so anything rolled up meant happy entertainment or enjoyment.
Playing around, I haven’t had a fruit roll up like those until now as an adult. 😋
Decades later and these parchment paper looking treats are naturally preserved…
These were like the ones that ruined me to never want any other fruit roll up wannabes. 😅
These are the REAL DEAL.
Making these fruit roll ups bring me joy (...and maybe for you too?) because they resembled packaged old-fashioned fruit roll ups that you would buy at the store… minus additional sugar that’s not needed for these.
As thin as they are like sheets of music, these stack up nicely! 🪵…
Thin as paper and pretty as rice paper too.
They’re as durable as leather.
Technically they fall in the leather fruit category but are as smooth and supple as suede.
My mom was a dressmaker, so she played a role in influencing my fabric choices where I learned lighter materials are usually higher quality.
And I’d agree about that with this light leather fruit material…
These feel light and feathery (not leathery) and are very apple healthy! 🍏
Plus, they last for weeks at room temperature.
Made with apple they are a great fall snack that can be made year round.
It’s almost like wrapping paper… or maybe it’s an old map or a key to hieroglyphic history. However you want to call it, it’s a SWEEET fruit roll up.
Oh, and kidding aside, the BEST part is (…can you tell I’m getting excited that it just gets better? 😊)…
You can make these in your home oven in one hour and 20 minutes with just 5 minutes of prep time.
How’s that for predictability?
…Seriously it’s that easy!
They are fun (and dare I say relaxing) to make and everyone of all ages will love them! 💕
They make a great sweet snack without any artificial ingredients.
And actually just 2 sweet and natural ingredients that make a perfect duo. 🍏🍯
Using applesauce, you don’t even have to turn the stove on to cook down apples and de-core them… and they will turn out even better. Because for one, the apple fruit roll up will be more even.
…The first time you make them, don’t freak out because they turn transparent on a baking sheet.
Don’t worry, it’s there. 😀
…I tried that once with Aquafaba because I heard you could make meringues that way… and POOF! I wish I could say that was magic, but it was more like a trick. 🪄
They dissolved into thin oven air… but I digress.
These fruit roll ups will turn out… I promise.
These are the proof…
I’m so happy to share these with you through the screen. And I hope they make your day like they did for me the first time I made them. 🍥
(And maybe this will keep the kiddos staying happy and cavity-free as low-sugar goodies with plenty of sweetness… that are substitutable for a certain candy holiday 🎃).
And if you’re into experimenting (like I am gladly doing with sweets), you can try other flavors.
Keep in mind they will take longer to bake with more complex ingredients.
You will know when you touch or look at the baked fruit roll up whether it’s dry and done, or half-baked and almost there….
In this one, you can see here that the dry section is on the upper right area and the rest of the fruit roll up is not done… simply pop it back into the oven.
Change the time but don’t mess with the temperature.
This one took another 20-25 minutes to finish… and was worth the wait. ⏲️
These are no fuss-no muss apple fruit roll ups you can bake in under 2 hours. This will make 4 - 4 inch roll ups that are about 9 inches long.
Course Snack
Cuisine American
Author Brandy @ Healthy Happy Life Secrets
Equipment
Silpat silicone baking mat on sheet pan
Ingredients
24 ounceapplesauce cups, unsweetened
2tbspraw honey (high quality)
Instructions
Thoroughly combine apple sauce in a bowl and add honey. Tip: use a high quality honey with a smooth consistency.
Smear the mixture into a thin layer on a Silpat (silicone sheet) laid out on a baking pan. Tip: Use different light to check that there are no "holes" that show up with shadows.
Bake on 200°F/100°C for 80 minutes. Tip: if you add or experiment with other more vibrant colors and flavors, they can take significantly longer. You'll know it's completely done, when the fruit roll up is one uniform color and dry throughout to the touch.
Let cool completely and then start to peel at one corner and then slowly peel up the entire fruit roll up. Roll up, slice, and enjoy!
Coffee milkshake is a nice option along with many coffee drinks out there… coffee lattes, macchiatos, cappuccinos… and the list keeps growing as coffee interest grows. ☕️
I was a late coffee bloomer if there’s such a thing… starting a morning routine decades into life.
It was a bitter acquired taste to my younger self.
But I realized after some years into the happy habit, around the 7-year switch (like allergy changes), that my gut couldn’t keep up with my cup o’ java demand… so I switched to homemade cold brew coffee.
Because I didn’t wanna give up my new healthy routine.
Afterall, black coffee is a healthy plant-based antioxidant beverage choice. Tea has its own special place in my drink world, but after noon. 🕛
…And with a cold brew coffee milkshake, you don’t have to choose, you can enjoy anytime of day!
It’s a great treat option (…yes/maybe?) especially when it’s still warm temperatures outside. And that can be closer to year round in these climate change days.
And just seconds if you’ve been on the cold brew coffee bandwagon for a while, and have your setup and coffee grounds available.
…I could make you a nice cup in a minute and it’d be ready to drink in that same minute. 😊
I started making cold brew daily in 2019.
That’s when I discovered that I could not have a regular morning coffee routine because of the acidity. Whether it was the fasting day next morning or it was breakfast time, my stomach needs water and food first!
…Maybe yours is like that too.
But I can enjoy cold brew coffee at ease with some small food (like a banana, yogurt, or some fiber) in the gut.
So if you have a sensitive gut or lining, that’s something to consider… and maybe you don’t have to give up a coffee habit or coffee morning routine if you don’t wanna.
…And this light creamy coffee milkshake is a nice complement.
You can keep adding cold brew to your milkshake that can be a breakfast shake (or more like a light cappuccino). 🧋
And it’s a healthy breakfast dessert drink because it’s light but also has egg protein. 🥚
With a plant-based milk like almond milk added, this does your body good. 🌱
Since cold brew coffee is less acidic in the process, you can start your morning with any ground coffee that you can sift through the coffee filter, that is “the brew” process in cold brew.
You can use light, medium, or dark black coffee grounds. Whatever suits your fancies.
And to top it all off, the optional sweet zhugh is chocolate shavings. If you use dark chocolate then you gain some additional healthy polyphenol anti-inflammatory points. 🎉
That’s all the sugar needed in this coffee milkshake drink, if any.
It’s not loaded with sugar like so many cool coffee beverages you buy that give even my inner child a sugar skin crawl attack just looking at how many grams of sugar. 😮
This milkshake can have no added sugar and be wickedly good!
…And not only is this a low-sugar beverage, you gotta love that this is 3-ingredient easy shake steps… where you focus mostly on the drinking enjoyment!
And in that spirit, this week I’m sharing about an American baking tool that I love, that has been tested over the course of baking time.
Keeping them around has sentimental value. Some tools can last a lifetime and are especially worth investing in!… 😀
And some lives last over a century, like Centenarian lives in Blue Zone regions, such as Sardinia where they make weekly sourdough and the starter is passed down from generations.
Some of the greatest baking finds are not new ideas, and get better over time.
That’s the scrapbooker memory keeper in me. And the baker …I’m a long-time Martha fan admirer for all the baking and home making skills she brought to the table.
This was a photo of me sitting in her TV audience back when her Martha show aired. She looks almost exactly the same… and now I’m dating myself. 😊
Which btw, did you also hear about Martha Stewart’s Great American Tag Sale? If you’re into antiquing and knick knacks, her team setup great big giant tents of original stuff from her homes and collections so others could enjoy while she’s still busy working in her gardens.
… I would have loved to have picked through all that cookware and home decor, and maybe have picked up a cute Grandmillennial mint vase or even her butter knife she uses 😉.
But oh well, next time…
Speaking of big white tents, they aren’t just in America. We can watch TheGreat British Bake Off aired as The Great American Baking Show.
I had my own bake-off time this week for a chilled dessert good for brunch or any low-sugar break time you have a sweet craving.
Favorite American Baking Tool
Here’s what I do on baking day (or baking game day) that for me is weekends.
I start out by pulling out my baking tools in the morning. If there’s a crusty trace of ingredient love from my last baking, I like to take a pick and do a little grooming.
That’s meditation time spent in the kitchen.
Some pans are meant to be better over baking time like stoneware. The more worn, the better the bake taste. And some tools need a little TLC (tender loving crusty bit cleaning).
One is my favorite baking tool that you likely have in your stash. It’s the thick Pyrex measuring glass that many American kitchens have.
It’s great for one-bowl bakes for one person bites or when you have a sweet hankering. Like a giant healthy oatmeal chocolate chip cookie that you can take a bite out of for breakfast.
I used to eat the DoubleTree cookie kind when I worked in catering management there that led to my passion purpose. 🍪 Back when comparing grocery cookies was something I would do.
The measuring glass baking tool has proven its usefulness many times over. It’s labelled for conversions from mL, to ounces and cups.
It’s useful for measuring liquids in bakes. That includes oils for less spills and more thrills.
If you’re thinking of investing in this kitchen tool if you don’t already have one, don’t get the plastic version… get the real deal.
It will stand the test of time.
Glass is eco-friendly, great for heat, dishwashers, and easy cleaning.
Glass is also breakable but the glass Pyrex is durable and thick and can sometimes survive falls to the kitchen floor.
Quality ware is part of the hand-me-down-culture that you don’t want to discredit.
A good Pyrex glass pan makes a good hand me down and a Bundt pan is always a great gift to a new baker.
Baking Organization
Early in my baking years, I didn’t bake often enough to practice good baking habits and organization. There was no method to the madness!
Habits and practice help for easy bakes when you don’t wanna think too much about what you’re making. You want to enjoy your music or what’s going on in the background.
And the Pyrex measuring cup can help you with this.
My Pyrex faux pas (lesson learned) early on was that I was using the measuring glass all wrong.
I used it for measuring baking ounces.
Baking recipes these days are usually in cups, grams, mL and/or teaspoons depending on the recipe (if you’re using one).
I used ounces because I first learned to read in ounces that’s still commonly found in traditional American cookbooks like the red and white tablecloth cover Better Homes New Cookbook.
So… often I was looking at the ounces and wrong measuring line and doing manual conversions in my head.
In baking, that can be a disaster and result in a bake that gets “well, at least it tastes good!” There’s a fine line difference between a creative and tasty bake and well-done bake.
This is a low-sugar dessert treat good for brunch as it has egg whites, Greek yogurt, and ricotta. It has a chewy light and spongy texture that's great served chilled or cool.
Course Dessert
Cuisine American
Author Brandy @ Healthy Happy Life Secrets
Ingredients
1cupGreek yogurt (whole milk)
1cupricotta cheese
black cocoa
3eggs
Instructions
Separate eggs. Tip: It's easier to separate eggs when they're cold and then let them sit until room temperature.
Combine yogurt, cheese, and egg yolks by hand.
Mix egg whites for about 5-7 minutes until whipped up. Optional: a few teaspoons of monkfruit or fine sugar. Depending on your baking pan/vessel size, you will have extra and can make meringue cookies with the extra.
In your baking pan, add a layer of black cocoa (or regular cocoa will work).
Add your yogurt dairy mixture layer.
Add your egg whites and spread out evenly on top of the dairy layer.
Bake on 325°F until set or the meringue is not too soft and sides may start browning.
Let cool and serve chilled. This can be paired with ice cream.