UA-141369524-4

How Ayurvedic Habits Are Useful (Part 1)

Ayurvedic habits was introduced to me 13- years ago to date when I embarked on a new healthy way of doing life. Yoga was still a new concept to the western world. And I was about to start my first blog.

ayurvedic habits

Those were the days before personal awareness, #metoo movements, and before western Ayurveda ways caught on with some (like me and maybe you?).

I’d been striving for balance ever since the day I realized I didn’t have any, and in my memory as far back as when the popular Friends sitcom show first came on.

Those were pre-internet days where you never saw a laptop at the Central Perk television set or anywhere for that matter ☕️

You and I can laugh at the wired phone cord that would be fun to untangle now. Phones back then weren’t wireless or smart. And watches were used to just tell time.

Technology and life are interesting in how it’s constantly evolving, and never going backward. Along the way, your tastes and wants can also change as you grow up.

I’m not a traditionalist,  so I lean towards growth and doing things differently. 

…but I started out on a traditional college to the corporate work-life path (with no work-life balance). And through life’s swerves, hidden turns, and purposeful career switching, I gradually turned around the tide.

You know when you don’t have the life you want when you run into dead ends, and that makes you search for the unknown. You know there has to be better if you use the right optimistic attitude. That btw, teaches you to steer away from sarcasm and Murphy’s Law thinking that was common during the Friends and Seinfeld show era.

Starting out in my career in hotel catering management taught me that not filling hotel rooms with guests was the biggest (opportunity) cost to the bottom line. I carried that way of thinking into my life even back then when I wasn’t aware. I realized not doing my highest and best use (that was taught in college) was my biggest loss.  

That concept became my motivator to leave jobs I was unhappy or miserable with that had no rewarding path I could see for personal growth or in their business improvement.

In my late 20’s I wanted work-life balance, and to end the 50-60 hour workweek rut I was in walking around like a zombie in my downtime, that I started out with. 

I kept the mantra running in my mind that I would not get my time back…and when I saw no way out, I found a way out. 

And that’s how I switched industries into corporate tech office work. There I experienced newfound balance, and after I got a taste of that, I wanted more.

I went from not-so-healthy to balance, healing, and eventually wholeness. It was an overnight change that took over a decade.

And somewhere in that mix, the economic downturn hit where I went back to where I began in hospitality work. I had changed but the industry had not, so I moved on yet again.

And that’s why I believe for everyone, Life is meant to get better despite the curve balls thrown at you.

Yes, you age, but you grow wiser and smarter. And you can adopt the right attitude if you help yourself to get there. I would never want to go backward in time.

…and I know now time can be underrated, and that it’s our most valuable asset (especially as you enter your 30’s and beyond).

I also now know that time is well spent when all 365 days of the year, I practice healthy and happy balance (that means green smoothies, food variety, and never changing Strawberry Twizzlers!). Plus, daily reset and renewal, and Ayurveda prevention and restoring ways.

….And that last one is what I’m most proud of for taking care of my body and mind.

Learning Ayurvedic habits was a new concept for me as a mid-adult who had lived around suburban malls and eating prepared foods in popular restaurants (and some that I couldn’t resist as I marketed their foods).

So then when I switched to Ayurveda I had choices (it’s not a diet, as I don’t believe in those). It encourages you to lean into your body’s natural desires, and often those are against the popular culture desires or what you think you want, like restaurant food (where you have no control over the cooking and ingredients).

I like to think of modern, western Ayurveda as a flexible lifestyle where you choose balance. You have a healthy plan and you enjoy what you like that you don’t regret.

For example, you won’t see me ordering or drinking a coffee drink with 53 grams of sugar. If it starts out that way, I will order most of the fat and sugar off, or just choose a black cold brew. That’s how I roll.

And that’s an ingrained habit.

But someone may say, “that’s no fun.” And I would say, “it is for me. I want to feel and look good, and for a long time. Then I can have more fun!”

We’re a much more health-conscious society now, but you still have critics and that can be the one sitting on your shoulder giving you internal debates on choices. 

These days, I prepare at least 80% of my meals (and 100% in the past year). And Ayurvedic habits have helped me with balance, prevention, and restoration. And they can help you too!

Western Ayurvedic Habits

The Ayurvedic habits I do are not new to our western culture like they would have been a few decades ago. Like: the neti pot works for preventing sinus infections and doing regular yoga helps with balance, flexibility, and strength building.

Sanskrit is not my native or secondary tongue, so some rituals I’ve walked into that I wish I didn’t. Like: incense (…you might as well smoke a pack of cigarettes.. thankfully you rarely run into either and if it’s a certain church occasion where incense is, you know to expect it).

Another less than desirable one is chanting, like in a new yoga class that gives me an eerie feeling. I don’t participate.  The mystical woo stuff doesn’t woo me.

I like to have my feet planted on the western ground unless I’m doing fun acrobatics (photo up top and here). Just kidding.

ayurvedic habits

So some Ayurvedic habits and ways stuck with me and some didn’t, and from the beginning so I knew that they were meant (or not meant) for me.

And if you’re trying to figure out what Ayurveda or healthy lifestyle works or would work for you, then you can use your preferences as a natural guide if you don’t have a coach or someone helping you.

Essentially, Ayurveda is what’s healthy and natural to you, your body, and mind-body, so you can’t go wrong if it’s a healthy choice you like.

And when creating Ayurvedic habits, some habits need more practice to fully adopt than others.

In his NY Times bestseller, Atomic Habits, habit advice expert, James Clear, describes that habit stacking is an easier way to have a habit stick.

An example of this is: I conveniently have a yoga mat rolled out near my bathroom with a side door, so that I can do a few yoga stretches before I start my day and after brushing my teeth (habit stacking). For some people, that’s enough of a reminder to create a habit.

But for a heavy Vata mind-body where routine (and sticking to the same way) is not a natural friend, I tweaked this idea to work for me…

A few days later after the novelty of the yoga morning activity wore off (and the habit broke), I rolled up half the mat, which triggered me to see the mat change when I had to look down so I didn’t trip over it.

That reminded me to do yoga. And then slowly but surely I didn’t need to look down anymore because I knew where the roll ended. So I then took the half-rolled-up mat, and rolled it back down, and then rolled it in a different way several days later. I mixed it up. And now I have a mat under the mat to keep things interesting… and to keep me interested. That forced the habit to start, so it had a chance to stick. 

I then reinforced the habit further with a set alarm. ...Phew! That was a lot for just one habit. But it’s worth it.

And you know what’s worth it for you, what works, and what it takes for you to create a habit! The harder part I think is figuring and finding out what habit to even start. And, knowing why you’re creating a habit.

Overall in the long run, when you do better habits, this keeps the healthy balance. You also improve and run your best marathon.

This is also how you keep growing. Keep trying new things (a Vata’s motto) until it becomes unhealthy or non-serving. Then in awareness of what you previously tried and want to improve, tweak again. 

A good goal is to find what makes you happy, healthy, and whole, because without good physical and mental health, you can’t really optimally grow and contribute in your highest and best use way (maybe this is important to you too).

In the beginning, when I was forming Ayurvedic habits and concepts, I still felt stress or anxious even though I knew how to restore those feelings. I just hadn’t practiced enough. 

And then I learned what worked for those symptoms and that became old hat like learning to ride a bicycle. And then I would feel other emotional symptoms like feeling irritated or judgmental. So then I fixed those.

While the symptoms were obvious, the changes were subtle (going in and out of moods). In those cases, I could’ve chosen to do nothing.  And that’s what I think most people choose.  

But that my friend (if I can call you that)…  is not the highest-quality life, and maybe even semi-existence. I know because I lived that way in my no work-life balance-joy-robbing time that I will never go back to…

Feeling down, self-(fill in the blank ____),  or negative thoughts and other big mood swings taking up mind real estate during prime leisure time and at night. But, I guess I was aware enough to do something about it. There’s always a silver lining. 

For me, it would start with getting internally upset, angry, or irritated about something… and on and on it would spiral out of control spewing in my day and mood. 

And I know that’s how a lot of people operate some of the time. And, that’s too much time!

There’s a much better way. 🎉

Transforming these ways has been worth going through the trials (to not lose any more valuable time), so that some of the time, becomes rarely or never when we learn better habits and ways.

These days, I choose peace. It’s a habit. Like most people, I have emotions running all the time and even more thoughts. And you can’t control how others behave towards you and some situations that happen to you. But you can control how you respond and react. So that’s what I do (and I encourage everyone to do that, so we can live our best lives now).

Ayurvedic habits allowed me to tap into daily peace, joy, and love that I already knew was there. That sounds so cliché and Hallmark card-ish, but that’s the nitty-gritty truth and what good habits can do for you.

You can get happiness (joy). Because if you find those things in you, your wants and feelings change. So the secret ingredient is getting healthy control over your thoughts and feelings. Letting go of the negative, and holding on to the good. And you can more easily get there if you’re healthy and balanced.

When you can remove (and nip in the bud) non-productive or toxic feelings and moods as soon as possible, you can avoid mental stress and stress on the body that can lead to inflammation.

And maybe that’s why I’m passionate about a balanced life. Because I know it’s in the palm of each of our hands and the ticket to true life’s success and happiness.

It took me not having it to discover it in a much deeper way.

So when I tested out new habits from the better information I gathered, I found it worked like a magic wand over the imbalances I had. It was like a magic pill without any pills or drugs. I didn’t know I had so much power to control.

Thirteen years in, it’s very easy for me to tell what’s happening in or out of balance for the mind by actions, and for the body by symptoms. And since my 20’s I’ve always been discerning and aligned with living balanced as my compass pointing north.

But I know not everyone is like this and many do better with boundaries and strict rules. And some do better with something they can relate to, like this car and body analogy…

Car and Body Analogy

Your Body is Like a Car (except it’s so much more valuable and you only get one in your life).

When you’re getting your car regularly maintained, the car shop can ask a few questions, and they can tell what’s wrong based on the slight off-ness.

All cars are not exactly the same as no one body is alike, even though you and I could both be Vata.

And all cars have wheels and need energy to run. And all our bodies alike have the same running parts like a heart, brain, and skin, with different product needs. Like, we all need moisturizers but in varying degrees to our dry vs. oily skin, and the ingredients that our specific skin likes.

And certain things happen as we travel around, like our bodies age and a car gets out of alignment with mileage and wear and tear. But the symptoms can appear the same. That’s why a doctor or a mechanic can diagnose ailments from inflammations or problems down the road.

And we humans living in our bodies can diagnose and restore our non-serious body irregularities.

When you have Ayurveda habits, you are intentionally preventing stress or letting your body get aggravated.

Next week, I’ll share my specific ayurvedic habits and routines and talk about the Ayurvedic body type habit nuances. If you want to be notified when that and future blog posts come out, you can sign up in the upper right-hand corner of the main/home website page.

And, if you want to get information about how to restore your current body imbalances, take my  What is Your Imbalance Type? 2-minute body balance quiz.

ayurvedic habits


Cold Brew Coffee – How to Make Foolproof Without a Machine

Cold brew coffee from scratch when you have no electrical power may seem impossible especially with your dead machine staring at you with no lights on.

How to make cold brew coffee from homemade scratch is with a jar, filter, coffee filter, water, and your favorite ground coffee.

But not only is fresh coffee possible, it’s healthier.

I’ve been drinking cold brew coffee (or homemade coffee) from scratch coffee as my possible and preferred way since 2019 when I was in Italy. And lights were on.

Coffee shops are on every corner, but I couldn’t drink a coffee in the AM on an empty stomach or with a sugary pastry something (customary in Italian culture 🇮🇹).

Because empty calories don’t soothe the gut (or my gut, in this case)… and sometimes feeds the bad bugs. The gut has a a big role in our health and our happiness (where most of the happy hormone, serotonin is made)

…And on that note, I’m a drink-coffee-in-the-afternoon type-of-girl because the caffeine messes with me and my upcoming sleep. And I didn’t grow up drinking coffee. I started drinking coffee later in life.

And after I discovered that it’s a healthy plant-based drink (polyphenols) in many ways… it also has the downsides of being acidic. So on an empty stomach (with food as a cushion), it’s easy to feel the heartburn effects.

So I made my first batch of cold brew coffee in Italy, from store bought ground coffee and a paper coffee filter. I had a large glass jar.

That was like me being a kid scientist wondering if it would really work good enough to pass as a black coffee that I would enjoy.

…To my surprise, it did! And that became the beginning of cold brew coffee everyday. I think in some places they call that (manual) auto drip.

And I’m convinced this is how for centuries people have been making and drinking coffee long before fancy coffee bars and Mr. Coffee machines existed. …And before modern stoves and microwaves were invented..

With an easy homemade cold brew coffee from scratch, even a child can make the adult drink safely at home.

And if your power is out, unlike a pour over coffee, you don’t need heated water.

Below are the easy make cold brew coffee recipe steps to make an organic healthy batch you’ll enjoy. You may even find it preferable to your current way (when life gets back to normal).

Cold brew coffee is the easy coffee you can drink daily if you’re a cuppa joe in the morning type of person and want to be self-sufficient (without electrical machines).

But first, here are some cold brew benefits vs. brewing regular (hot) coffee and how to optimize…

Brewed coffee (or the regular coffee process) yields a more acidic coffee than cold brew in the process.

So if you want a lighter feeling coffee with a medium taste, then cold brew has its body health benefits.

…And why I do organic coffee cold brew daily. 

Organic coffee is preferred because the bulk of coffee is sprayed with pesticides.

So if you’re noticing brain fog or blips in short-term memory has got you these days and you don’t know why, if you drink coffee, then the non-organic coffee could be the offender.

Just something to consider switching to organic coffee for a month to see if you feel a difference.

Organic coffee to buy can be more expensive and slightly harder to source, but you get to ask yourself what your health is worth and if you want to make the additional search effort.

What are the benefits of cold brew coffee? 

☕️ You can make and drink cold brew coffee faster than you can wait for hot coffee to brew (and wait for it to cool some).

☕️ Cold brew is less acidic than regular coffee. It’s less acidic through the cold brew process than regular hot coffee or espresso. This is good especially if you have a sensitive stomach or gut lining, and feel heartburn effects from coffee.

☕️ With cold brew, you may not need to eat your first meal first before your first cup as it’s more gentle and doesn’t need the food buffer.

…Many of us wake up groggy and tired, and we want our coffee first thing. But first we need a soft pillow of food in our stomach, that’s not the preference when you’re not quite awake and ready yet for eating.

So that’s where cold brew ROCKS… and is ready for you as you can make the day before or batches days or a week in advance and refrigerate!

☕️ If you gave up on coffee because it tears up your stomach or gives you heartburn, then cold brew coffee could be a good option so you can bring the healthy drink back. This point can’t be emphasized enough. ‼️

Or if you want a lighter cup of coffee during your day that won’t affect your sleep at night, cold brew coffee could be the way to go!

☕️ Cold brew coffee is great for hot weather days as your coffee is served cold. You make at room temperature and then refrigerate.

Making homemade coffee from scratch at home is also a mindful, relaxing activity. And it doesn’t have to end there…

If you know me, you know I like to zhugh up any food or beverages (probably from my catering background), so I’ll share how I do that too below!

How To Make Foolproof Cold Brew Coffee At Home Without a Machine

What you will need:

-Ground coffee

-Mesh catcher (with a lip or rim)

-Coffee filters

-Spoon

-Water

-Deep bowl at least 6” high/deep OR pitcher with a large opening almost or just slightly larger than the mesh catcher diameter is ideal (but as long as most the mesh catcher sits inside the pitcher, it’ll work).

If you use a pitcher, you won’t need another pitcher to pour your finished coffee into as your cold brew coffee can go straight into the pitcher and fridge.

Setup for how to make homemade cold brew coffee from scratch:

These are the simple items you will need (and probably already have in your kitchen or home) 😊:

Bowl: Find or buy a right-size mesh catcher that works comfortably for your cold brew coffee prep setup, where the coffee filter fits in easily.

Rest the mesh catcher to then rest on top of the bowl.

Set the coffee filter to sit in the catcher as flat or parallel to the table surface as best it can, so you don’t have coffee and water in the filter dripping or tipping over. Then you have your bowl setup.


Simple items you need for homemade cold brew coffee: a deep bowl, strainer, and paper filter.

Or…

Pitcher: You can put your filter-catcher ontop of a wider-opening pitcher. If you use a pitcher, you want most of the bottom half of the catcher to sit inside the pitcher so your coffee brewing doesn’t spill over in the sides when you pour water in.

This is a setup example of how to make cold brew coffee from scratch at home with a large jar that becomes filled with coffee.

So then you have your setup from one of the options above.

Good job!

Next thing, you can bring on the ground coffee grinds. See what I did there… ground grinds. 😊

I like to make homemade cold brew coffee from scratch in the morning to get a good whiff of the coffee grounds, and as an aromatic sensory experience and relaxing mindful activity.🧡

You can even pull out your setup the day or night before if you just want to make a cup in the morning or a coffee batch for a couple days.

Mind you, the fresh-made coffee will be room temps warmer than when you refrigerate, but that warmer room temp way is actually better for your gut in the morning when you’re waking up your stomach and getting your day started.

What Coffee Type For Cold Brew Coffee?

So then in choosing coffee types, use “ground” coffee types. It’s easy to get enamored by coffee flavors, packaging, and brands, but be sure it’s “ground” otherwise they’ll be “whole” beans and you’ll need to make the grounds.

If you purchase pre-packaged coffee, look for “ground” on the label. And if you buy whole beans like in in bulk, you can grind at the store if they have the machines beside the coffee barrels or bins. Select “auto drip” as the setting. The perfect grind for cold brew coffee won’t be too fine like the “espresso” setting or too “coarse” on the other end of the spectrum.

If it looks like fine black pepper, then it should work fine.

You can also at home mix a super fine ground coffee and a coarser ground coffee so the grounds don’t fall through the filter. This can take a little experimenting with the coffee you have on hand, but when you get the right drip color, you’ll know. For a dark coffee, the first mug cup should fill to the top with a dark brown color like you would expect for coffee.

For medium and lighter coffee types, expect a more caramel color or a medium brown.

Now, here’s how to make your first batch of cold brew coffee from scratch:

To start making cold brew coffee, pour your ground coffee mix (about 1/2 cup to ¾ cup coffee grounds total for a large batch) in the filter. Every coffee grind is different. You can use less if you just want to make a cup.

You can start with 1/4 cup coffee grounds to make a cup or two of coffee. These will be the strongest cups from the grounds.

With a spoon, mix the ground coffees up a little in your catcher-filter setup before you pour in water to possibly prevent fine ground coffee from falling through the filter.

Pour cool water over the coffee grounds. Filtered water is good. The cold water is the process secret to keeping the coffee from becoming more acidic (healthy benefit). You can use room temperature water and it will be fine.

After you refrigerate, it will be served “cold brew.”

In the beginning, the water will go through the filter fast and you will get a light brown/caramel trail of coffee water in your pitcher or bowl.

That won’t be the final coffee you’ll be drinking.

But if it does, start over. In other words, get another vessel (or mug of any kind), and pour the cold brew made through a second time. This usually does the trick (or else add more coffee grounds). You’ll get the hang of it with your favorite coffee grinds after a few tries!

When you keep pouring into the catcher-filter, then the darker coffee color comes out that you were probably expecting.

Troubleshooting: If your ground coffee mix sends some of the grounds through the filter or you accidentally spill some grounds in your ready-made coffee, then you can simply start over with a new coffee filter in a second bowl.

The second bowl can catch the second round of cold brew coffee being made that sometimes can turn out better. Pour your first setup coffee and coffee grounds into the filter of the second.

So back on track… from time to time, take a spoon and stir the coffee ground and water in your filter, trying not to have coffee water overflow.

Keep pouring water as it filters down. And if you pour into a cup, watch it drip  darker coffee after the first half of a cup or so.

More Cold Brew Coffee ideas and tips…

You can make and enjoyed iced cold brew coffee that’s different than iced coffee.  Learning the difference between cold and ice is in the preparation and process of making a cup of coffee even thought they can be the same coffee beans and grinds.

And with your coffee grinds, when you’re thinking ahead for tomorrow…

If you want to prepare a cold brew coffee batch for tomorrow and possibly the next few days, add more ground coffee to your setup.

This less potent coffee is good for lighter coffees.

You can make lighter cappuccinos with foam froth after the first two cups of stronger cold brew coffee that you can enjoy as black coffee if you like.

Or add a dash of healthy cocoa, cinnamon, pumpkin spice, or cardamom to change the coffee flavor.

If you make homemade cold brew coffee from scratch, you’ll never again be without coffee on-hand with flavor of your choosing if a coffee machine doesn’t work! And the power goes out. 🔌 It’s a backup plan too.

You can always make your own instant coffee without a machine as a coffee insurance policy 😉

As a planner-at-heart and former catering planner, this gives a sense of relief and keeps the relaxed vibes soaring and the panic anxiety down.

You can also pair your plant-based coffee habit to some great plant-based breakfast ideas to break away from the sugar breakfast habits or adding sugar to coffee. Sugar we know accumulates and works to destroy the biome.

So learning how to make homemade cold brew coffee from scratch and healthy eating together can be a better morning and daily habit. ☕️ Enjoy!

cold brew coffee
Print

How to Make Easy Cold Brew Coffee - Without A Coffee Machine (Good for When the Power is Out)

This is a recipe for how to make your first batch of easy and enjoyable cold brew coffee from your coffee of choice and whether you prefer a light or dark roast.
Course beverages
Cuisine American
Prep Time 10 minutes
Servings 2 cups
Author Brandy @ Healthy Happy Life Secrets

Equipment

  • 1 regular paper coffee filter
  • strainer for filters
  • pitcher or large deep set bowl

Ingredients

  • ¼ cup ground coffee for 2 cups of stronger coffee
  • water

Instructions

  • Setup your cold brew coffee maker with ar pitcher or deep bowl, metal strainer, and a paper filter,
  • Add ground coffee. Then pour fresh water through. The first 30 seconds of water pours will go right through. Examine if you're getting the medium to dark brown coffee color (if not, pour the watered down coffee into a temporary glass and then pour through again). If the coffee is too finely ground or too coarse, this can happen. If too fine, add/blend about a tablespoon of a slightly coarser ground coffee to the wet coffee grinds in the filter, and stir with a spoon. This should even out the coffee grinds.
  • Keep pouring water and pour your first cup of coffee (will be the strongest). You can keep going until the cold brew coffee is weaker strength or turning lighter color.

Notes

You'll notice the first pour of water goes through faster and then slows down as you pour more water and the coffee pouring out becomes less strong. 

Home Pizza Crust – Neapolitan-Style Recipe

Home pizza crust is easy and fun to make as homemade pizza dough. And it can be made with any gluten flour like bread flour that I love as more universal to use. You can make other bread types and not just pizza like with 00 flour.

Home oven made Neapolitan style pizza crust with mushrooms.
Neapolitan style pizza crust that looks wood fire oven charred, but is baked in an apartment oven.

Below you can learn step by step how to get the home pizza crust you want including a Neapolitan style crust that’s popular in restaurants with wood fire ovens… but that you can make even from an apartment oven! 👇

…Without waiting for one to be delivered.

This is impressive to your friends and learning how to make your own pizza crust is rewarding. 😋

…Pizza can be a healthy meal that’s filling for all ages. I have a homemade pizza recipe you can try along with all the detailed steps from scratch below…

And you can learn techniques from me, a once-upon-a-time  pizza maker teenager for 4 years who worked at the busiest Domino’s Pizza store and franchise in the world 😊… yes, in the world. 🌎

Back then, we would crank out over 200 pizzas an hour on any given Friday or Game Day Sunday. This was when the 30 minute guarantee still existed and then became a well-known business case study.

It was the funnest job I ever had… and very memorable decades later where I use my pizza learned skills to make home pizza today. Like these thin crispy or regular chewy pizza crust styles.


Crispy cracker pizza crust example.
Thin and crispy cracker-like crust.
Thick, soft chewy pizza crust.
Thick chewy crust more like a pan-pizza style with a toasty bake.

And which btw you can make your own special pizza masterpiece from start to finish, faster than you can order a pizza and have it delivered.

So let’s begin…

First, you don’t need a pizza kit.

To make homemade pizza, you just need two essential simple ingredients (flour and water) you already have in your house (or can easily get) to make the dough.

Plus 4 ingredients if you want a bigger crust rise (flour, water, instant or active yeast, and salt). Or you can let room temperature act as the growing yeast (like in sourdough).

Homemade pizza needs no long prep time like pulling out ingredients in advance, like in other baking recipes. So it can be making and baking EASY.

It also has an advantage over breadmaking: you don’t need to wait for hours for the pizza dough to proof.

Making homemade pizza dough needs only a few minutes. You can simply prepare, bake, and enjoy in less than an hour.

If you’re not a planner this can be a winner.

But then again, you’d probably buy store-bought or order delivery. …but then that would be no fun, and you wouldn’t get the healthy, homemade pizza.

So I’ll assume you’ll give it a try at least at some point. You’ll be glad you did! 🎉

Here’s how to make homemade pizza…

Before you do anything, there is one area to plan. You should consider what you’ll add on top of your pizza crust.

If you load with gobs of cheese, then you’ve added fat and dairy (…that isn’t always a bad thing as cheese has vitamins, calcium, other minerals, and satisfies cheesy craving…).

For a healthy recipe, use fresh shredded mozzarella cheese or sliced buffalo mozzarella like on a Margherita pizza. It’s one of the healthier (less greasy) cheeses if your stomach is sensitive and end up sopping up the cheese grease.

Now you’re ready to start and pull out all your homemade pizza dough ingredients.

Instant yeast. I buy the small Red Star packets. The yeast balls look like microscope-tiny, perfectly round khaki brown color beads. And a tip is if you don’t have instant yeast on hand, you can use baking powder that you would use for cakes. Yes, baking powder!

Water. 1 cup warm or room temperature tap water is fine. You may want to experiment as you know what they say about the famously delicious New York pizza crust (the rumor is that it comes from the water).

I’ve used seltzer and filtered water for pizza crust, and I find tap is still the best all-around.

Flour. You have options. Bread flour is the one for Neapolitan-style airy pizza. You don’t need special “00” flour even though you’ll find many recipes with this.

With bread flour you can use for other breads and it’s generally less expensive.

And if you aren’t doing an airy crust, other options are:

You can use a mix of regular or all purpose flour with whole wheat flour (that has a higher bread protein content). Whole wheat flour dough will be less sticky.

And if you use semolina flour for your bench flour, then that will help your dough from sticking to the metal pizza pan you use.

Another reason to choose whole wheat flour is the slightly higher, healthy fiber content. There are also gluten-free options.

In total, use about 2-1/2 flour total, but you will need more when you’re working with the dough.

You get better with practice and experience. You may be able to later eyeball how much you need.

Salt. 2 teaspoon table salt. You can use a little more salt if you use sea salt or if you plan to use fresh mozzarella (or buffalo mozzarella) that doesn’t have as much salt as some other cheeses. Kosher salt or a coarser salt will work well.

Optional: 1 tablespoon EVOO (helps with adding taste and less sticky dough).

Here are the 5 easy home pizza crust steps (broken down in detail):

Step 1: Make the pizza dough.

Add the yeast to water and let it settle/dissolve for about 5-10 minutes. The mixture will have a milky color and consistency. Set aside.

Separately, add the flour or mixed flours of choice to your mixing bowl (I like half and half whole wheat and regular or all-purpose flour). Add 1 teaspoon salt or you can use 1-½ teaspoon sea salt (if you want to use non-iodized salt as I use). Then add EVOO if you’re using, and the water-yeast mixture.

Dough by hand method: You can make the dough by hand, and if you do it that way, I’d recommend creating a neat flour mountain on a shallow baking pan where the flour won’t stick to everything.

Using semolina flour as a lightly floured surface is a preference.

Then add a dip in the middle of the mountain where you would add the liquids, like you may have seen or done at home making pasta the old-fashioned way (except there are no eggs needed in pizza making).

Dough with machine (recommended): It’s easier to use a mixing machine with the dough hook, like the Kitchen Aid mixer (I have a baby pink Cadillac color one… Paris Hilton and I have something in common, lol).  

With a machine, in a few quick minutes, the dough should be ready. You’ll know when it’s done when it’s not too dry, and not too wet, and has some good elasticity. Pizza dough is forgiving and is only part of the pizza pizzazz (say that 10 times).

Remember to scrape down the flour from the sides of the mixer. As you’re waiting for the dough to finish mixing, generously flour your pan.

I recommend a mix of coarser semolina flour and regular all-purpose flour for the bench flour.

When it’s ready, pull the dough out of the bowl. You’ll be able to form a small ball with the dough, and you may need to add more regular flour on the outside if it’s too sticky.

Form a dough ball and let it rest on the pan you’ve floured. Leave it sitting or resting at room temperature for 10 minutes.

Note, you don’t even need a plastic wrap or another container you’d have to clean like in bread making!

Step 2: Prep the toppings and the sauce.

While the dough is still resting, I get the topping ingredients ready.

I open the tomato sauce can (many restaurants use San Marzano tomatoes that I recommend), and I add finely chop anchovies with a serrated knife to the sauce as my secret ingredient (that’s not a secret anymore).

It adds salt and another flavor dimension (or you can just add a teaspoon of salt to the sauce if you prefer a saltier-tasting pizza).

Tomato sauce will add sweetness back. You can make your own tomato sauce but since it’s not the star of the dish, canned will work just great.

If you want a chunky style, Marzano tomatoes are plum tomatoes which are the kind commonly used in Italian restaurants. Or else use any tomato sauce or paste.

If you are using fresh cheeses like buffalo mozzarella, slice the cheese into smaller bits.

And if you use basil leaves, wet them a little like with a wet paper towel as they will settle a little better on the pizza. Alternatively, you can use spinach leaves like I use as healthy-alternative inspiration.

For any other wet ingredients like black olives, drain any excess liquid and dry them with a paper towel if you need to (as that would be a damper to your pizza… sorry, I couldn’t resist. Today is a fun day.).

By the time you finish this step, your pizza dough should be ready to work with.

A quick back story: I used to be a pizza maker (or pie maker as they referred to) as a teen before I could drive, and for the busiest Domino’s Pizza… not in the country, but in the world (yes the world! that is becoming smaller every day). 

I stuck around for 4 years until I took on other food-related jobs in college.

So, I still make the dough the way I learned from the modern pros!

We used to crank out 300 or so pizzas in an hour as a team during the busy football nights, and during the 30-minute guarantee years (you probably don’t remember!).

Our heads were down but it was fun energy in the shop![OK back to the business of making your homemade pizza]…

Equipment you need:

-Pizza pan. Any metal pan will work.

-Pizza cutter or pizza wheel (optional)

You don’t need a pizza peel.

Step 3: Flatten the dough into the pizza pan, to get it ready for the oven.

You can turn the oven on to pre-heat or you can wait if it’s your first time or so baking pizza.

Regarding temps, if you want to use 425 degrees (Fahrenheit, just to clarify for my Brit friends), that will give you a crispier bake like a pizza oven would.

If you prefer to cook under 400 degrees because it’s a hot summer day or your fire alarm can go off in apartment living, then you can bake with standard 350 degrees/180°C.

So anything in between 350/180°F and 425/218°C degrees will work. Remember pizza crust is forgiving (and I dare say easy).

OK, so here’s how to make the home pizza crust…

Fancy hand way: Take your dominant eating hand and place ontop of your weaker hand. Put your dominant index finger and middle finger below your weaker hand index finger and middle finger (crossing your thumbs). 

Or…

Simple hand way: Place your hands side-by-side, index fingers touching.

Either way, using your fingers, put pressure into the dough as you’re making hand imprints. Use enough pressure to make a dent, but make sure you’re not making holes in the dough, and it’s thick enough to hold the amount of sauce you plan to use.

If you get a hole in your dough, simply start over like you would with Play-doh. Roll the dough back into a ball and then flatten the ball with the palm of your hand (that you can coat with a little more flour as needed).

Push down on the dough and make handprints on every part of the dough.

Keep turning the dough 90 degrees while you move along and your hand is at a 90-degree angle (or at 3 o’clock clockwise or 9 o’clock counter-clockwise if you like clock descriptions).

For a right-handed person, you can turn the dough clockwise (and counterclockwise for a left-handed person).

Then flatten down the middle of the dough with your fingers and palm of your hand to get out all the trapped air bubbles.

Do this once and then flip the dough to the other side (back side), and do the same process. Add more bench flour underneath the dough as needed.

Keep working with it until it’s the right crust size for your pan or toppings.

If you want a super smooth dough crust without your handprints or blemishes, turn the dough with your gentle palms while lightly kneading, smoothing, and stretching the dough with palms (like you’re sanding it down).

I skip that part as a handmade-looking pie to me is part of the fun.

For basic round or irregular shapes, making the dough can take one minute or less with practice.

I know my instructions are descriptively long, but once you get the hang of it, it can be fast and easy!

In the beginning, take your time learning. It can be fun and maybe even a ‘lil therapeutic especially if you have some good music going on!

And, then here’s another important step/option that I recommend:

When you’re satisfied with your pizza dough that will be your topping base and crust, pre-bake the home pizza crust first (without toppings) especially if you are using lower baking temps.

This is necessary if you are using lower 350-degree temperatures, but you can skip this step if you want if you use much higher temperatures.

I use the prep-baking crust waiting time to clean off my dough hook, mixing bowl, and other supplies I’m finished with, so I have minimal cleanup later.

After 10 minutes (a magic number for pizza step waiting times), pull the slightly toasted home pizza crust out of the oven.

Let it cool for a few minutes, but you don’t have to wait until it’s room temperature again.

Then you can add your sauce with a spoon or ladle and spread evenly starting in the middle and applying less and less pressure towards the crust.

That’s the way we use to do it in the pie shop 😉

Btw, you can make other sauces like pesto, barbecue, or balsamic (that are other personal favorites of mine)! Maybe you too as you get to be a pizza pro?

…But here I’ll keep it super simple with the tomato sauce. And you can check out how to make a whole wheat flour veggie pizza.

Wheat pizza crust example.Step 4: Then lay your toppings on.

The secret for better baking through is to put the quickest to cook items on the bottom. So any thin, flat veggies (like black olives and mushrooms) and flat meats like anchovies, and then add the lumpier foods on the very top layer.

If you use buffalo mozzarella (the white ball kind), treat it like a topping instead of cheese. For shredded cheeses like regular mozzarella cheese, add as the first layer over the sauce.

If you want to use tomatoes that aren’t finely diced (tomato concasse in fancy Italian restaurants), bake them on the side in another pan as they could be too wet and create a mess on your pizza in the oven or prolong your baking time (sundried tomatoes are ok on the pizza).

For any meats, cook them through in advance especially if you’re baking your pizza on 350 degrees.

Now you’re in the home stretch! You just have one more step.

Step 5: Bake your home pizza crust (or cook your pie 😉).

When you’re happy with your fully loaded Picasso-pizza art, put it back in the oven on your lowest or medium rack, and if you’ve pre-baked the dough then you don’t need the pizza pan anymore if you want.

You can just set your pizza right on the baking rack. Sometimes I leave the pan baking just depending on the crust I want. Try it both ways.

And then bake for another 20 minutes to your crispy done liking (all ovens are different and depend on your dough thickness, ingredients, etc.).

Check the crust bottom to determine doneness and if it’s not yet done, but toppings are done or shriveling/drying up, then add a piece of aluminum foil on top and keep baking until the crust is done.

Don’t leave the pizza in there after you’ve turned off the oven, like you could in baking other goods, as this can dry out the toppings and the fiery heat will be gone from the crust which usually takes the longest to bake.

When done, pull out of the oven. Presto! Let it cool and then cut and enjoy.

If you want to add individual flavors, like if you’re feeding a larger group, you can have side parmesan-reggiano cheese, oregano spice, red pepper flakes, garlic, drizzle or olive oil, or caper ingredients (just to name a few ideas)!

…And then you will have 100% impressed your friends with your rock star homemade pizza baking skills ⭐️

The sky’s the limit! And while you’re waiting on your baking oven, you can do a few baking yoga moves, if you’re so inclined.


shittake mushrooms homemade pizza.
Shiitake mushrooms and apple cider vinegar cracker pizza crust.

And then when you’ve made easy home pizza crust, you can make your own mushroom Neapolitan-style airy pizza crust from your home or apartment oven, like you would get out of a professional wood-fired pizza oven.

homemade wood-fired pizza with mushrooms recipe.
Print

Neapolitan-Style Home Pizza Crust

You can make this Italian style pizza crust at home in your oven with mushrooms or any of your favorite toppings.
Course lunch, Main Course
Cuisine American, Italian
Author Brandy @ Healthy Happy Life Secrets

Ingredients

  • 1 cup bread flour
  • 1 tsp salt (coarser kosher salt works well)
  • water (start with 1/4 cup and add more)
  • 1/4 tsp instant yeast
  • toppings (e.g. mushroom, buffalo mozzarella cheese, and sauce).
  • 1 tbsp extra virgin olive oil
  • bench flour (e.g. semolina flour or bread flour)

Instructions

  • Make the dough. Add flour, water, salt, and yeast ingredients to a mixer bowl or bowl if you are making the dough by hand. You will use about 1/2 cup water per 1 cup flour.
  • Knead the dough, until a cohesive pizza dough ball can be formed. With a bread dough hook on a mixer, this will be about 5 minutes on high, 7 minutes on a medium setting (and about double time by hand).
  • Add some olive oil to a plastic container with a lid.
  • Place dough in container and let proof for at least 2 hours. Can be left overnight in the refrigerator and be sure to not let the dough dry out.
  • Then add some bench flour to your pan to prevent sticking (semolina flour is classic for Neapolitan pizza but any flour will do). I suggest a baking pan with a Silpat setup ontop to prevent the pizza crust from sticking to the pan.
  • Flatten the dough into the shape you want with your hand and fingers. Avoid the crust edges to create a more airy crust.
  • When you're happy with your pizza shape pre-baked, then place in center of the oven bottom rack and bake for about 20 minutes on 350°F/180°C oven. The pizza crust will not be finished but it will be hard enough on the crust bottom to be able to broiled without a pan.
  • Add sauce, cheese and pizza toppings.
  • For the airy crust and charring pizza crust marks, broil your pizza. For preparation, remove Silpat (if using)and your baking pan, and slide the pizza to the top oven shelf at least 6-8 inches away from the top of the oven where the oven heat will be coming from (not the bottom like baking settings). In most common ovens, the 2nd rung down for the top adjustable metal rack works well.
    Turn on the broil (caliente hot!) setting for 2-5 minutes until crust is slightly charred giving the wood-burned fire "effect." You'll see the heating source from the oven lines above that could take a minute to heat up (indicated by the top red heating element).
    Safety tips: Be careful and watch the broiling the entire time with the oven light "on," so you can be fully safe. Do not open the oven door at any time that the broil setting is fully heated or turned on. And do not turn your pizza without turning the broiling setting off and waiting for the oven to cool down before opening the oven door (and then turning back on). Test your oven for the best broiling time for your pizza crust, and do not overcook.

Notes

You don't want your dough to dry out, so be sure to add enough water so it's more like an elastic smooth skin versus stringy dough. And be sure to cover the dough.
If you do not have instant yeast on hand, you can use baking powder.

Fresh Orange Juice (No Juicer Needed)

Fresh orange juice is a popular, year-round favorite. In the winter, oranges are in season, so you can find an abundance of oranges.

orange juice

That’s also when most people load up on Vitamin C that they associate with orange juice, and why orange juice grocery shelves can be full or running empty.

And summer is a popular time too as it’s served in vacation towns and resorts.

I share below how you can optimize an entire orange in homemade fresh orange juice squeezed by hand.

If you’re inspired by fresh juices, this is a smart idea to save money, be healthy, and enjoy conveniently at home.

And speaking of enjoyment, last week I had a nice surprise.

I won a gift card to a local smoothie place I’m inspired by. They are my inspiration for tropical smoothies.

One day I saw someone coming out of a yoga studio in my town who was carrying this mermaid blue color bowl that’s the size of a large yogurt container.

I had to find out what this healthy ingredient is!

I learned it comes from an ingredient called blue majik (that’s the magic in the blue bowl). 🥣

The South Block smoothie chain also uses ingredients like camu camu and maca root.

You feel like you’ve been invited to a new array of rainforest superfoods shipped from an exotic locale in the world and infused in your made-to-order bowl or smoothie.

It’s dreamy, no?

OK, I could go on and on excited!…

But, today I also wanted to share how you can optimize oranges in a house-made fresh orange juice.

I’ve become super sensitive to how much sugar I consume and that’s healthy motivation.

And that hopefully inspires you to think healthy food and drinks at least most of the time (as it does for me).

Vatas are attracted to oranges and sugar so this is perfect for satiating sweet cravings.

Next time you think about getting orange juice from the store, consider making your own fresh orange juice from whole oranges where there’s no added sugar.

Fresh Orange Juice

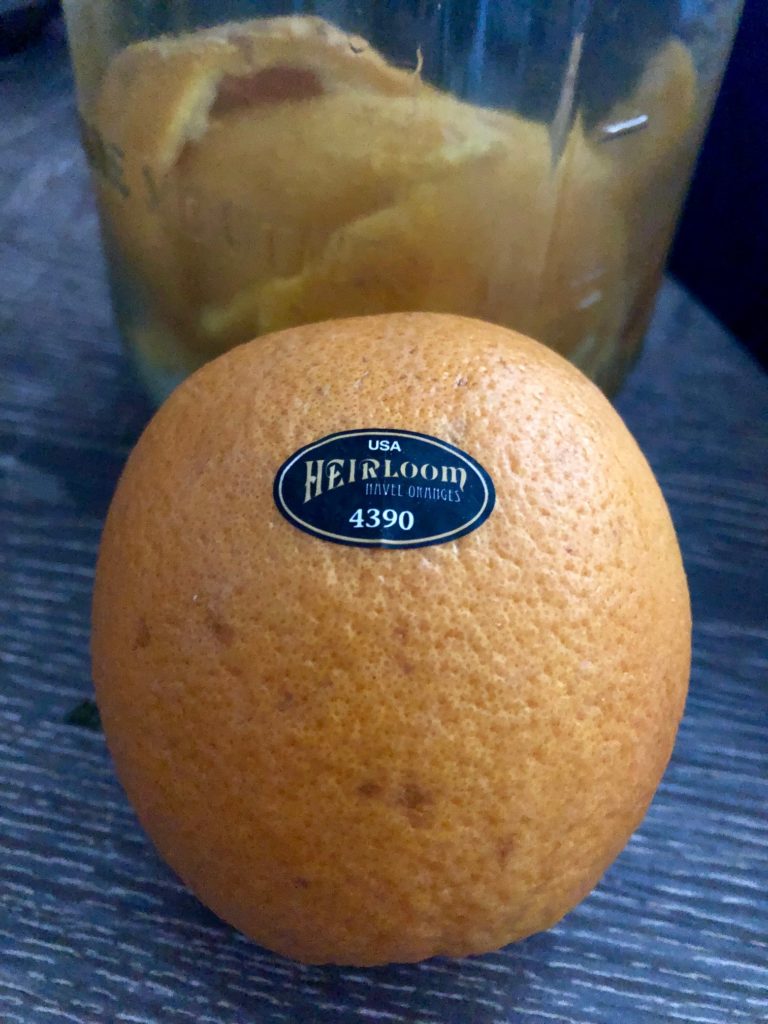
organic navel orange peel for fresh homemade orange juice.
Look for heirloom, organic, or local farmers market produce as in season (free of pesticides, good for us and the environment)

And oranges are one of my favorite fruits as I love the smell of oranges. Here’s why…

They are good for calming anxiety, aromatherapy, and if you’re leaning into the Vata mind-body ways or  wanting to restore any Vata imbalance.

If you can’t get the work life balance or life is stressful, keeping an orange near you to sniff and that’ll help calm you.

And making fresh orange juice will also in its healthy-balancing effects.

And if you feel it in your nervous digestive tract, you can try an orange elixir like this recipe:

organic navel orange peel for ayurveda drinks
Print

Orange Digestif Juice

Course Drinks
Cuisine American
Author Brandy @ Healthy Happy Life Secrets

Ingredients

  • 1 orange (pulp, zest, peel)
  • Apple cider vinegar (amount adjustable to liking)
  • 5 Spice blend (Five spice is star anise, cloves, cinnamon, fennel, and black pepper) - (amount adjustable to liking)
  • water (dilute as needed)

Instructions

  • Zest and peel an orange. Keep all the parts. Tip: use navel, Cara Cara, blood, or heirloom oranges. They are good for the calming (and good for parasympathetic nervous system also affecting good digestion).
  • Squeeze the pulp into your orange juice container (or enjoy).
  • Add your zest and peels to the container.
  • Add five-spice blend.
  • Add apple cider vinegar
  • Fill up with water. Shake and refrigerate. Enjoy when you have an upset stomach.

There are so many orange varieties to choose from. I love the Cara Cara sweetheart orange variety (common around Christmas) that can be juicier and sweeter than a California navel orange that’s in season a little earlier.

Plus fresh orange juice makes me think of my second home, staying in nice hotels! Once upon a time I worked in hotel catering management where I got my first taste.

And you may have seen out and about those gigantic commercial machines that crank out fresh orange juice from whole oranges. That would be a fun job for a day!

You may have seen one of these at selective grocery stores if you live in a larger metro area.

Fresh orange juice definitely ruined me for any added sugar orange juice that comes from a carton (like I grew up drinking).

Concentrated is high sugar and harsh on the stomach, and especially along with a morning coffee routine that Americans commonly do. That’s double acidity.

Plus ontop of that, most common foods are usually acidic.

And if that’s your typical morning routine…

👉 You can opt for making your own organic cold brew coffee and  diluting orange juice with water.

So let’s begin and get your fresh orange juice-on!

For equipment, you can use a citrus squeezing tool, which is one of my favorite kitchen tools because it’s bright yellow so I have no choice but to be sunny with the brightening citrus when I use it 😉.

And a zester microplane tool that looks like a zester.

Orange zest from a fresh orange juice.

These are the parts of the orange.

Orange Zest (essence). Before I cut into the orange for orange juice, I go around the orange peel, grating, and capturing all the outside orange zest as essence for zhughing up other sweet morning smoothies, dishes, and garnishes (that’s where my former-catering mind goes and yours can go wild too!).

Orange Pith. Most people throw the spongy, slightly bitter part out, but consider keeping.

This would good in the orange digestif recipe mentioned already.

The orange pith is high in Vit C (as is the juicy pulp) and anti-inflammatory flavonoids. For those reasons alone, it’s worth considering mixing in foods and drinks/smoothies.

Plus leaving no traces of fruit is good for not attracting critters. 😉

Orange Juice and Pulp. Then cut the orange in half (perpendicular to the top or the stem or from left to right).

I know it’s tempting to cut the orange any which way since it’s perfectly round, but cutting the right way lets you cut through each orange segment to maximize juice.

Otherwise you could get stuck on a pillowy-feeling orange segment.

Now you’re ready to squeeze each orange half or use a citrus squeezer tool, and squeeze away the juice into a tall glass.

Let go of all your stress squeezing oranges. Activating calming oranges around you is a relaxing sensory exercise.

Keep repeating until you have the amount of juice you want. Add back pulp as desired if you like high pulp juice.

You can also add some water to dilute some or stretch the juice out for more.

And enjoy!

No-Waste Eco-Friendly Ideas: Save the orange pulp if you prefer high-pulp OJ and add small orange pieces to your drink.

Save the seed to grow a plant. Save the pulp and zest for cooking and baking recipes. Save the pith that has the most nutrients for digestifs and foods. Save the orange sticker as a reminder for getting the Produce LookUp (PLU) item again. 😉

If you like fresh juices, you may want to give Fresh Peach Juice and Mango Juice other sunny yellow inspiring fruity juices a GO.

Healthiest Cookie and Nutrition Facts Low Down

Healthiest cookie vibes are almost unheard of, as they often have too much high fructose corn syrup, other sugar, fat content, artificial flavoring… and did I mention sugar? 😊

This spiced cookie is one powerful bite, loaded with anti-inflammatory spices. Recipe below. ⬇️

But, I share a piece of good sweet news… today, you could look for the healthiest cookie that tastes good (and not like the box it came in), and then feel better for your reduced sugar choice.

Included below is a helpful sugar content list next time you’re out cookie grocery shopping.

If you were born with a sweet tooth (ahem…Vatas!), eliminating sugar from your diet, may be one of the worst food elimination news you could hear.

But wait!… before you give up on all sugar, know that your natural makeup and desires are there for a reason, so you don’t have to give up all your sweets if your body and health allow.

Instead, you could look for better, daily choices so you don’t have to give up entirely one day.

Cookies are one sweet type and if that’s not your go-to sweet, what are some of the other daily sweet delights? Ice cream, cakes, pies, candy, and donuts.

Sugar is sugar. But some sweets are better for you and they originate in nature and from plants.

If a piece of dark chocolate or a juicy piece of fruit will give you the same effect, learn to let your healthy taste bud rule over your eyes that plays tricks.

Because the truth is if you or I tell ourselves, no, we can’t have that sweet piece of joy, then we just want it more as we have an internal debate.

And once we get a taste of the tasty stuff, our brain’s pleasure center can easily tempt us to go overboard in a weak moment, even if we consider ourselves self-disciplined in every other way.

That’s why lose weight diets (a.k.a. yo-yo or fad diets) don’t work long-term or lifelong because we feel we are missing out on what our mind and body know is out there. Short-term diets are not natural to our bodies. We want real tasty foods that we crave.

But, if you want to fit into that special dress or get your bathing suit body ready for the summer season, you’re better off doing it naturally so that you can stay the same size year-round.

Thankfully our abundant society has wised up with better accessible plant-based and healthier ingredient options (from farm to store), than when we were kids.

We can start with a plant-based breakfast.

Decades ago, I wrote a lifelong diet guide with recipes that included enjoying more or less one day “off” a week.

A few years before then I had gone on a diet of eating low-fat cookies that came from a dark green healthy-color box (that was anything but healthy or plant-based).

I don’t see those cookies on the grocery shelves anymore, but they were a terrible food substitute that led to weight gain and adding unhealthy processed ingredients to my body. I learned the hard way, but that saved me a lifetime of going down the wrong eating path, and from then on, I wised up.

And I try to save others from making the same mistakes I made.

I still very rarely eat red meat, dairy, or more than one or two bites of a sugary sweet, not because I don’t like those foods or can’t eat them (au contraire!), but because I choose to, now knowing what I know. And like Oprah says, “when you know better, you do better.”

And you can do the same with knowledge and a little discipline, which then becomes second nature where you don’t even want those foods anymore because you know they don’t make you a healthier being and that is more satisfying to you.

There’s no guilt, either way… it’s just a choice.

Plus, as you get older, the bad foods and sugar your body could tolerate in your 20s aren’t the processed same in your body so you’re better off wanting to change instead of having to or being forced to.

So that’s where cookie consciousness came into the picture for me.

My sweet weakness is cookies (and decadent cakes and cupcakes). It’s wired in my DNA.

But, I’ve learned to be discerning and find the best ones out there.

I enjoy the cookie if it tastes great and has low sugar content, or if I make my own in a controlled sugar baking environment.

And mostly bake my own cookies or biscuits like these biscotti that uses natural sugars (fructose) to sweeten. The nutrients also offset some of the sweet downfalls without compromising adult taste! 😋

Black and white chocolate dipped biscotti.
Print

Biscotti (Low Sugar) - Black and White Chocolate Biscotti

A healthy biscotti is great for dunking in your healthy beverage.
Author Brandy @ Healthy Happy Life Secrets

Ingredients

  • 2-1/2 cup flour
  • 3 tsp baking powder
  • 1-1/2 tsp aniseed, crushed
  • 3/4 tsp salt
  • 1/4 tsp cinnamon
  • 1/4 tsp nutmeg
  • 1/2 cup coconut oil
  • 1-1/4 tsp almond extract
  • 2 eggs
  • 1 cups blanched almonds
  • 2 tsp milk
  • finely choped dates, orange zest, dried fruits as sweet

Instructions

  • Make your dough with the ingredients. It should be cohesive and sticky enough to become a dough. You may need to add more oil or can substitute with yogurt or apple sauce.
  • Roll out one or two rectangular rounded loafs (for mini biscotti) about an inch thick for the classic biscotti shape.
  • Bake in 350°F oven for 25 minutes.
  • Let cool completely. Then use a serated knife to make even-cut biscotti pieces.
  • Flip over biscotti and bake for 10 more minutes (for "twice baked").
  • Let cool and dip in melted chocolate (optional).
  • Refrigerate and then dip in white chocolate for duo-chocolate.


Keeping it real to yourself is what it’s all about…

And also celebrating your efforts, leaves you happy, your mental health improves, and your body benefits, so you want to balance health and happiness (btw, my blog name is healthy and happy 😊). I mostly do this through modern Ayurveda that my blog is about.

I also like to balance rules because they keep life simple.

So looking at nutrition facts is one practice that I like to do (and seriously I do find fun in a mature, adult sorta way).

And I started out my career out as a catering manager at a DoubleTree Hotel where they’re famous for their c.c. cookies you can make healthy 🍪 but yeah the original ingredients in the official recipe is not listed on the fresh brown paper cookie bags.

I know because I sat next to them and used them as a pound of butter paper weights for my BEO contracts I had on my desk, taking a bite here and there to curb my breakfast appetite.

Gosh, those were the early days!

And, on that note…

Quick trivia question:

Which of these cookies was famously credited as the first?… is it the Fig Newton, Animal Cracker, or Chocolate Chip Cookie? (Keep reading, as the answer is below ⬇️).

Choosing the Healthiest Cookie

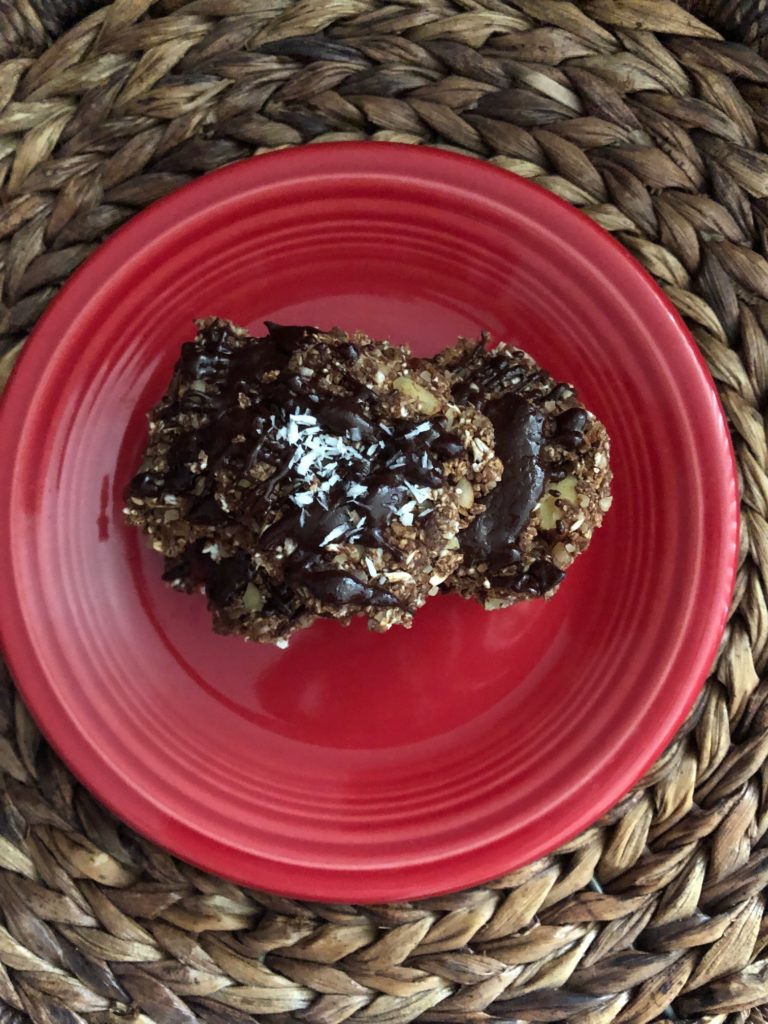
Healthiest cookie goes to one with no white flour, no added white sugar and no butter. But still tastes amazing like this flourless oat based chocolate chip cookie.
This is a healthy chocolate chip cookie without added butter, white sugar, and flour.

In choosing cookies, the first step is acknowledging that all cookies are not created equal. You know this without having to think about it twice.

But when you’re in the grocery aisle, do you make mostly sensible decisions… or sensory-driven decisions?

If you’re not sure or your answer is it can vary, then take a photo of your grocery cart at the check-out line and evaluate when you get home.

Do some grocery introspection.

Take a look at the Nutrition Facts on the back of the food packaging as though you’re looking for the healthiest cookie out there that you want.

When you look closer and compare, you may find an oatmeal cookie may not be lower in sugar count than a chocolate chip cookie. So you are now informed and can make a better decision next time.

In those pleasantly surprising fact discoveries, if nothing else you get what you want and are happier for your choice! And sometimes you’re shocked at what your old favorites tell you.

You can also compare cookies in the same brand like a Girl Scout Cookie.

One GSC can be lower in sugar and another one can be off the charts. They may be made from the same factory, but they have a different makeup.

You can continue reading below how they rank in sugar content as I’ve included in the list. Today, gratefully we have so many healthier choices and from the same brands.

If the food item looks similar to another, the ingredients could be completely different, change over time or the next time, so it’s best to keep doing your due diligence.

This can become a healthy habit and you may end up doing a food pantry audit that’s not a bad thing.

It actually helped me when I discovered it was bothering my skin later in eczema where sweets or over-sweets could exacerbate flare ups. And any inflammation is not a good sign.

If you love a crunchy-style cookie, the list below is meant to open your horizons in search of the tastiest and healthiest cookie (best value). And one day, you may want to switch to even healthier options like making your own savory, plant-based, healthy good recipes and low-sugar summer desserts.

The average cookie listed here has 2 grams or less of added sugar. That’s pretty darn good in cookie terms!

Keep in mind, if a sweet food item or cookie has no sugar or low sugar, it could contain sugar substitute ingredients.

Sugar for sweetness I believe is the safest bet out there (next to pure juices and zests that come from whole fruits, or unprocessed honey or agave).

Be sure to read the actual list of ingredients and pay attention to artificial ones. A general rule of thumb: the fewer ingredients the better (closer to natural vs. processed or store packaged with additives for better taste or preservatives).

In Search of the Healthiest Packaged Cookie (That Tastes Good!)

If you want to be healthier driven, here is a better grocery list with less than 2 grams per cookie (but you should always do your research as cookies change):

Annie’s Chocolate or Neopolitan organic cookies –7 grams of fat for 31 cookies. (Compare that to other store-bought cookie or a deceptively high sugar-filled fig newton)

-Stella D’oro Stella cookies – 8 grams per 3 cookies (I wish they’d bring back the one in the assortment with the fruit in the middle)

-Stacy’s Cinnamon pita chips – 5 grams of fat for 7 chips

-Honey Teddy Grahams- 8 grams per 47 pieces – (wins the sugar healthiest cookie award from this list)

-Dansk Danish cookies (royal blue round tin) – 8 grams per 4 cookies

-Loacker Quadratini wafer cookies – 9 grams for 8 cookies

-Mulino Bianca Batticuori – 1.8 gram per cookie (when in Italy, you may want to stock up on this one)

-Girl Scouts Savannah Smiles – 11 grams per 5 cookies

-GS Trefoils – 7 grams per 5 cookies (the original is the GSC’s healthiest cookie by sugar count… go figure!)

-GS Thin Mints – 10 grams per 4 cookies (my fave stored in the freezer!)

-Nabisco Animal Crackers – 7 grams per 14 crackers

Compared to Not the Healthiest Cookie (above 3 grams of sugar):

-Vienna Fingers: 10 grams per 2 cookies

-Oreo Cookie: 14 grams per 3 cookies

-Chips Ahoy: 11 grams per 3 cookies

-Tate’s Cookies 11-13 grams per 2 cookies

-Carr’s English Tea Cookies (Ginger Lemon Cremes) – 11 grams per 2 cookies

-Girl Scout Do Si Do (peanut butter) – 11 grams per 3 cookies

-GS Samoas – 11 grams per 2 cookies (..was a personal fave until I learned the truth!)

-GS Tagalongs (chocolate/peanut butter)– 8 grams per 2 cookies

-GS S’mores – 10 grams per 2 cookies

-GS Toffee-tastic – 7 grams per 2 cookies

-Pepperidge Farm Soft Baked Oatmeal Raisin – 7 grams added (12 grams total) per cookie!

-Pepperidge Farm Verona Thumbprint/Brussels/Milano – 11 grams per 3 cookies

-Pepperidge Farm Mint Milano – 9 grams per 2 cookies – (…glad I got this one out of my system as a kid!)

-Pepperidge Farm Milano Dark Chocolate – 7 grams per 2 cookies (…huh, dark chocolate is less? – ok..noted.)

-Keebler Sandies shortbread – 7 grams per 2 cookies

-Keebler Simple Made butter cookie – 6 grams per 2 cookies

-Biscoff shortbread cookie 12 grams per 4 cookies  (…good to know as you’re often handed these on some European international flights that don’t include nutrition facts)

-Honey Maid graham – 8 grams for 4 squares (2 whole rectangular pieces)

-Stella D’Oro Swiss Fudge – 11 grams per 3 cookies

Changing Your Sweet Habits

…If your fave is on this higher added sugar list (as my childhood ones are), maybe there’s a lower-refined sugar one in the list above it you can learn to love… maybe?

Just remember, sometimes all you need is a ‘lil something sweet. If you reach for a few raisins or a small handful of low-sugar cereal, that could do the trick to satisfy your want (and add some fiber at the same time ;-). … or maybe all you need is a juicy apple to satisfy your sweet tooth?

Have you ever tried an apple with all-natural peanut or almond butter? I think it’s delicious. If you choose a Granny Smith apple then you get a sweet and sour symphony of tastes, that’s better than a green apple Jolly Rancher… and can be very pleasing to a Vata.

What I’m suggesting here is a lifelong and year-round approach for your health success, and not a list of don’t do’s.

When you start looking at Nutrition Facts sugar content, then you get sugar conscious. Not eating high sugar foods helps you stay healthy and fit, lose weight, and reduce body inflammations (that are no fun).

When you do your household shopping for products at Target or wherever you go, on your receipt printout, most individual items are under say $10, but all those little costs add up… it’s the same with your daily sugar. It adds up daily and your body keeps score. Keep that in the back of your health-conscious mind.

Here are a few additional sugar rules I’ve created for myself and maybe you want to adopt in your life…

1.Be picky about your sugar choices. Think of your dessert as a treat for the day or week. When I was younger, I could’ve had a sugar IV drip in my vein and be happy eating spoonfuls of white sugar.

Weaning yourself gradually to better sweets is a better strategy than eliminating, especially if you have a sweet tooth (remember, the fad diet example I gave above).

2. If you don’t see the Nutrition Facts, ingredients, and the full-sugar content on the food packaging, skip the choice.  If you order groceries online and the photos don’t show the written facts, keep going.

3. Eat candy sparingly, and maybe this is a good one to eliminate, as there’s no healthy nutritional value in candy. I think you can get a smile on your face another way. I know that one can be a downer as we all love candy (for the memories if nothing else).

When we were kids, our caretakers/role models could’ve helped us out if they informed us that candy is for kids. I’m serious. When you were a toddler, you were planning to get new adult teeth so cavities didn’t matter. That was the time to enjoy candy galore, not as an adult.

And If you love strawberry Twizzlers like I did and still do, you can stretch out your candy treat choice in moderation. It brings out the inner child happy in me.  👧🏻

You can be smart with your choices and find treats that have a longer shelf-life (e.g. keep in the freezer) so you’re not tempted to just consume more before your treat loses its freshness.

You could also buy a smaller quantity if the item is perishable. Remember telling yourself no, can backfire.

4. And finally, stay away from the gas station junk food aisle. I know that’s a no-brainer for healthy conscious thinking. You aren’t likely to find the healthiest cookie anywhere near those places, but reach for the healthy bar or nuts, or even a Hershey’s dark chocolate bar to fill you up if you get low blood sugar or feel you’re getting hangry with no other food source in sight.

Ok, so now you may know a little about sweet changes you could evaluate/make, and healthier cookies (and not-so-healthy cookies) out there.

Oh, and I didn’t forget…. here’s the Trivia Question Answer (from above):

Depends who you ask, but the Fig Newton made a debut in 1892 from Nabisco (The National Biscuit Company). Then Nabisco came up with the Animal Cracker in 1902. Chocolate chip cookies became famous in the 1930’s, credited to the (Nestle) Toll House Restaurant. You probably know which of these is lowest in sugar content… I’d choose the Animal Crackers.

And if you want a beautifully spiced cookie that’s usually a resurging trend around Christmas but you can enjoy year-round is a spiced cookie.

Print

Pfefferneuse Anti-Inflammatory Spice Cookie

This is a punchy and classic Christmas cookie that's anti-inflammatory
Course desserts
Cuisine American, german
Author Brandy @ Healthy Happy Life Secrets

Ingredients

  • 1/4 cup molasses
  • 1 large egg
  • 1-1/4 cup honey
  • 1/4 cup butter, cut in pieces
  • 4 cups almond flour (or combo of flours)
  • 2 tbsp cocoa powder
  • 1 tsp baking soda
  • 1/2 tsp ground cardamom
  • 1/2 tsp nutmeg
  • 1/4 tsp allspice
  • 1/4 tsp cloves (in addtion to the allspice)
  • 1/4 tsp black pepper
  • pinch of salt

Instructions

  • Mix 3 wet ingredients on low. Then add dry ingredients until well-mixed.
  • Bake at 350°F for 11-14 mins.