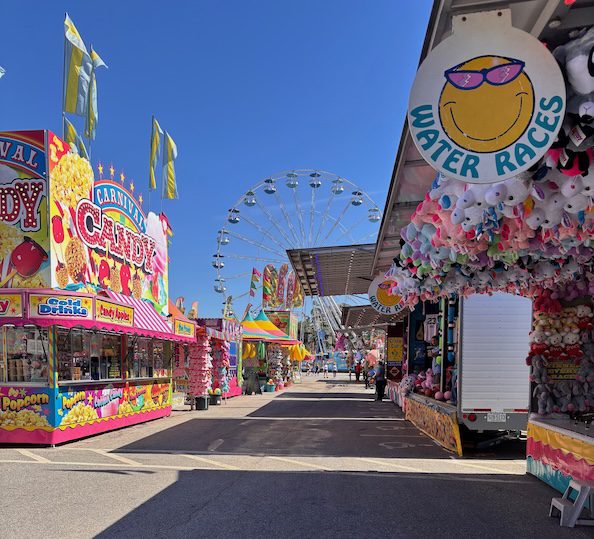
UA-141369524-4

Baked Alaska (Oven Method) Made Easy

Baked Alaska is one of my food dreams I’ve had ever since I started my career in catering after graduating college. And I finally made my own and you can too with just your oven! You don’t need fancy fiery equipment. The easy steps and healthy ice cream cake recipe 🍨is found below.

Jump to Recipe

baked alaska slice

And I get excited dishing on the Baked Alaska dish! 🎂

It was served on a dish in hotel events I worked hard in.

And I had been thinking about it, but didn’t try one until two decades later. 💭

…Can you imagine!? My mind and stomach never forgot and when I tried my FIRST ever celebration for my birthday at the swanky DBGB DC restaurant.

…Say that 10 times! I don’t think I can… but I think I can eat it 10 times. 😊‼️

My memorable Baked Alaska experience that became experience-sss did not disappoint.

…So I was inspired to make my own. I mean… what’s better than cake and ice cream, I scream! 😀

baked Alaska in the freezer before going in the oven. How dramatic!
The freezing before the oven broiling… how dramatic! 🎂

Because when you look at this cake as an ice cream cake, it makes it so much less intimidating.

And I can tell you, it’s much easier than you may overthink like I did.

If you’ve worked with meringues, you’ll be golden… as in golden brown flecks on the meringue.

The bombe effect may be a little more effort, but you can make the ice cream cake part and then decide if you want the fireworks. 🎆

And this recipe is Baked Alaska in the oven.

If you were like me on my first Baked Alaska bake, you may have wondered how the ice cream didn’t melt…

A-ha! I figured out why…

The magical oven 🪄 doesn’t melt ice cream that is sooo cold (as has been in the coldest back part of the freezer for hours). Something to do with 32°F melting points and not reaching that limit… but scoring baked (Alaska) points.

…And btw, the dessert is named after the purchase of Alaska in case you’re wondering.

That was a celebratory reason to have cake. As much as end of summer, new season, or a birthday is. 🎂

And for your Baked Alaska, you can start with a boxed cake… but I think you’ll find baking a homemade chocolate cake easy and simple for your first one.

You can try a healthy chocolate cake with eggs or healthy chocolate cake with no eggs recipe.

You can even use a NO-BAKE rainbow cake that’s called a rainbow cookie… you decide!

And for ice cream, you can use store bought ice cream or make your own ice cream that’s so easy to make…

You can make the ice cream dairy free with coconut cream. You can even make this a Neapolitan (strawberry, vanilla, chocolate ice cream trio)… up to you! Or add a soft serve ice cream.

With cake and ice cream prepared, you’re ready for the meringue.

So here we go with the steps.

First off, grab a big bowl like one you would put a big salad in. It won’t be baked but it will need to be freezer safe. Be sure to clear enough space in your freezer for your Baked Alaska dessert.

Add a plastic wrap layer to line the inside of the bowl. I use a stainless steel round bowl. Those were the kinds I saw in hotel and restaurant kitchens I worked in, so I know they work well.

Or you could use a glass Pyrex or freezer safe one as all glass are not created equal. And some could break in the freezer. But then that’s why I used stainless steel.

Then make your meringue and add a layer to the plastic lined bowl. You actually don’t need to freeze your meringues at all. But for a better effect, you can freeze for a few minutes.

Another tip is to make your meringues and ice cream ahead of time. That’s the planner tip to do less in one swoop. That way you can enjoy the assembling on the day you want to enjoy your Baked Alaska (aka baking day or Alaska baking day!).

This is a great dessert to celebrate holidays, change of seasons, and flavors that are calling you like cinnamon and/or a healthy chocolate cake made with coconut oil that was on my mind. You get the picture! 😁

baked alaska cinnamon ice cream on chocolate cake.

Flavors like chocolate, coffee, vanilla, Neapolitan trio, or cinnamon (my fave 🍥) always WOW 🤩 and work for a Baked Alaska.

Also, if you love the idea of a Baked Alaska ice cream cake, you’ll probably also love to make an easy and fun party tartufo dessert.

baked alaska slice
Print

Easy Baked Alaska (Apartment Oven Toasting Method)

Baked Alaska is my favorite celebrations cake hands down and you can make your own cake, meringue and ice cream. I heard about the dessert working in catering and waited until I was ready to have the best cake slice of my life at DC's DBGB restaurant in 2015.
Course desserts
Cuisine American
Author Brandy @ Healthy Happy Life Secrets

Equipment

  • bowl to fit the ice cream shape
  • cake stand or plate

Ingredients

  • meringue shell
  • ice cream of choice
  • cake of choice

Instructions

  • You can make or prepare ice cream and meringue a day ahead or a few hours in advance.
  • Bake cake. Let cake cool or set aside covered in fridge until you're ready to bake. Cut the cake around the circle part of your bowl you'll be using.
  • Line your bowl with plastic wrap. Make meringues and add a meringue layer as thick as you want (up to 1" recommended). Cover with fanciful swirls if it suits your fancies.
  • Add ice cream until the bowl is full. Flatten out the top of the bowl.
  • Freeze meringue and ice cream at least 2 hours in the back of the freezer (but before/without icicles forming that would add unwanted moisture). Bake same day.
  • Lower top oven shelf low enough to cover the height of the Baked Alaska plus a minimum of 6 inches from top of oven to broil.
  • Pull ice cream/meringue bowl out of freezer and place into oven. Broil for several minutes until there's a toasted top. Safety tip: do not turn or move the cake (optional) in the hot oven without turning OFF the oven first! Then wait for the broil setting oven to cool down before opening oven door and turning oven/broil setting back on (optional). Watch the broiling for several short minutes until lightly toasted pretty, that happens quickly.
Share this

Strawberry Banana Smoothie – Frozen Anti-Inflammatory

Strawberry banana smoothie is one I can get behind. It’s a great start.

frozen strawberry banana smoothie

For frrozen smoothies, frozen strawberries are a reliable source. They are a high source of Vitamin C.

For bananas, you don’t have to wait until they are ripe for a smoothie as texture best. You can go ahead and add your just bought bananas to your freezer.

Peel the banana and add to a freezer safe bag. The bananas will turn brownish black but they will be a good taste and soft texture for your smoothies. So like strawberries you can freeze or buy frozen, you have your bananas ready.

I learned this after I had been using fresh bananas that were too soft to eat by themselves. I like bananas when they are firm and about a day away from their green unripe peel.

And if you’re picky like I am with banana brown spots, if you freeze them you won’t have to deal with them. The entire banana will be brownish.

Print

Frozen Strawberry Banana Smoothie

This is a reminder of childhood popsicles.
Course beverage
Cuisine American
Author Brandy @ Healthy Happy Life Secrets

Ingredients

  • 3 frozen strawberries.
  • 1/2 medium banana
  • almond milk (or milk of choice)
  • basil, mint, or cilantro.
  • orange juice
  • coconut oil (optional)

Instructions

  • Blend the ingredients. When you add the herby flavor, it gives a third dimension. Mint will be mildest, basil is middle of the road, and cilantro will the the most pungent. Save Money Tip: you can freeze your fresh organic strawberries when they are in season.
  • Pour about 3/4 full, leaving a little room for the orange dreamsicle layer.
  • Mix orange juice and milk about half and half.
  • After frozen, pour the orange layer on top.
  • Freeze again or add crushed ice to the top layer
  • Enjoy!
Share this

Summer Cool Tips and Good Reminders ☀️

Summer cool tips are needed during the scorcher months. Our bodies are screaming for cool and hydration. And our minds are looking for adventure and outdoor exploration where excessive heat and humidity causes havoc on our bodies.

I think and feel for the Tour de France cyclists 🚴 who rode in all weather conditions over mountains ⛰️ and uphill Montmartre Paris narrow neighborhood cobblestones that look like these whole wheat peach cobbler cobblestones.

Can you imagine what that would be like? I can’t …and to feel the impact less, below are 12 cooling tips to help soothe the mind and body… plus highlights of past blog post articles with good healthy summer reminders.

For starters, you can enjoy your summer by leaning into Ayurvedic ways like a cool and refreshing bowl that can help drive away heated Pitta season moods. You can easily save money and make your own chocolate ice cream …and not be disappointed that the soft serve machine is broken at the drive thru. 😊

summer cool tips include cooling foods.

And when you’re packing and getting ready for your hot day, these are 12 good summer cool reminder tips:

1.      Keep aloe vera near you. Aloe helps with burns, heat rashes, and to instantly cool your skin. That’s like giving a spa water bath to your body when it’s thirsty for cool relief. Many moisturizers have aloe barbadensis leaf juice ingredients, but I like to go straight to the 100% ingredient source.

2.      Bring a water spray bottle that comes in handy. You can hang it to a beach bag or something in case you run out of car cupholders, and so you don’t have to go rummaging for it like a regular water bottle.

3.     Start your day with a smoothie, that has chilled ingredients like nut-based milk, bananas, coconut, and berries. Try frozen smoothies. Let them cool you down as they defrost. 🧊

…Up for it? Try a sweet smoothie challenge.

The point is to lower sugar intake and increase fiber and nutrients. For sweetener, try adding maple syrup, honey, or fruits instead of white table sugar. Did you happen to see my blueberry cobbler recipe that has no added sugar?

4.      Take cool showers or end on a cool setting for 10-30 seconds. This is can keep you chillin’ down to the bone. 🚿 You can feel cool inside and warm to the touch on the skin. To lock in skin moisture and help stay hydrated cool, moisturize right after showering when the skin is still moist.

Movin’ on, now we can talk about the fun stuff… food! (I think fun, anyway!).

5.     Use cooling spices like cumin. Adding a Pitta spice like cumin is going to help your body stay cool. You can add to a hummus dip or a beet cauliflower soup that can be served cold (or served warm if you’re feeling fall Vata cold in the summer… that can happen). Mint herb is another great cooling add… that goes well in a pea bowl.

6.      Eat foods that hang between a fruit and a veggie like beets, avocados, and medley color tomatoes. Many are vibrant in summer colors as well as nutrients! And you can always freeze produce and add them to smoothies.

If you’re on staycation or grocery shopping, you can also challenge yourself to these cool smoothie and healthy beverages.

7.      Cut up summer tropical fruits like a mango, guava, dragon fruit, passion fruit, coconut, and pineapples that are eat-from-the-rainbow 🌈healthy. For more happy vibes, you can make a tropical fruit salad or tropical fruits pie.

8.      Add refreshing whole fruits to your list like peaches and plums that are usually summer abundant. Handing them out to others in the car is always fun and well received. And you can make and take healthy peach juice and drink ideas 🍑

9.      Add and eat hydrating juicy fruits like watermelon, kiwi, pears, grapes, and oranges that can go in a salad and make great food garnishes too.

10.   Bring out cool veggies that win you plant-based points. Like raw carrots, lettuce, and celery that are easy to transport. You can make a memorable Italian bean salad or no-bitter radish salad.

11.   Bring along a cooling towel or T-shirt. A day or two before, roll up a towel and leave in the freezer or fridge, and then bring along with you so you can wrap around your neck or put on and quickly cool you down.

12.   Use an aluminum water bottle that keeps water and beverages cold longer. Sometimes all day.

Another cool item from the fridge I like to bring out, are high antioxidant-rich fruits like sweet-scented pineapple chunks or tart lemons. Not for eating, but I can  run one down my face for a hydrate cooling moment and get a Vitamin C fruit facial.

It’s a topical tropical 🍍😎🍍

And when you’re out and about, think of healthy drinks such as coconut water. Some have electrolytes. Check the label also for low sugar content.

Instead of water or milk, you can add coconut water to smoothies like a watermelon smoothie, tropical smoothie with dragon and passion fruit, and mango green smoothie. 🥥💧

A smoothie is a way to squeeze in more antioxidant foods that help the skin and protect the body from chronic damage that shows up as aging. Unlike juicing, you keep the food fiber that’s also good for weight loss.

You can also get food shopping inspiration from this eat-from-the-rainbow 200 anti-inflammatory grocery food list.

Hope you enjoyed these summer cool tips.

Have an excessively cool week! 🍉 …and if you’re driving or sitting down a lot, reminder to do a ‘lil seated yoga to help unwind and build up flexibility!

Share this

Peach Cobbler – Low-Sugar Healthy

Peach cobbler is a fun dessert especially when peaches are in season. And this one is made with whole wheat so it’s darker color that work for cobblestones! And this one is low-sugar.

There are so many peaches to choose from. Eastern peaches are common and Georgia is a the Peach State and prime producer.

Peaches stand out as the star ingredient.

And adding a peach cobbler is all the more fun as they look like cobblestone taking us back to Southern places like Charleston. South Carolina is another state that’s known for being the Peach Capital.

And it can be made as a healthy peach cobbler dessert and a light one without any fat… no butter, no oil, nothin’

So in staying on the healthy theme cobblestone path, whole wheat flour is used instead of all purpose flour.

Whole wheat flour also has more fiber and protein if that matters to your healthy tastes.

And by adding a low sugar (or a fraction of a cup of sugar), that’s always more healthy. Because the sweet comes from the baked peach slices and dripping juices.

If you don’t add white sugar, then you appreciate whole peach fruit sweetness that peaks abundant in hot summer months. 🍑

I added only 1/2 tsp brown sugar which is about 1/2 a turbinado (Sugar in the Raw) brown sugar packet ontop to zhugh up the cobblestones… and to give them a crunchy sweet bite, as ontop the sugar won’t melt in the oven and will stick to the cobblestones in the baking process.

To make the peach cobbler:

First off, cake pans works great as they are round and fit the semi-circle peach slices. You can use a rectangular pan also that would make a neat design when you partially stack the peach slices.

I like to make the peach design first because then I get a waff of the sweet juicy peaches. Then I make the dough. But that’s up to you in what order you prefer! 

The dough will be a little sticky and easy to make into a ball.

peach cobbler dough.

Then use a scooper or spoon out scoops onto peaches. Since they’re cobblestone shaped, they don’t have to be exactly all the same size or shapes. Oblong or round will work!

Then bake and enjoy!

Print

Whole Wheat Peach Cobbler - Low-Sugar Healthy

Peach Cobbler is delicious when you taste the sweet peach variety of your choice.
Prep Time 15 minutes
Cook Time 25 minutes
Total Time 40 minutes
Servings 3
Author Brandy @ Healthy Happy Life Secrets

Ingredients

  • 3 peaches, whole and then sliced
  • 1/2 lemon's juice
  • 1 egg
  • 1 tbsp almond flour
  • 1 cup whole wheat flour
  • 1/2 cup Greek yogurt, thick part (strained)
  • 1 tsp cinnamon
  • 1 tbsp maple syrup
  • 1 tsp turbinado sugar (optional)
  • 1 tsp baking soda
  • pinch of salt

Instructions

  • Cut up peaches with skin into thin slices semi-circles. Arrange in a pattern around your baking pan. Evenly add the lemon juice and a few sprinkles of almond flour to the peaches to absorb some of the juices. You can also use tapioca flour for the same healthy effects.
  • Make your cobbler scoops. Add whole wheat flour to a bowl. Evenly whisk in baking soda.
  • In a separate bowl: beat up egg with a whisk and then add yogurt and maple syrup.
  • Combine wet ingredients to dry ingredients with a spoon or whisk, and add the salt. This will be a sticky wet dough that's easy to make a dough ball.
  • Add scoops ontop of peaches.
  • Bake at 350°F for about 25-30 minutes.
Share this

Blueberry Cobbler – Applesauce (Low-Sugar)

Blueberry cobbler is a dessert that can be made with low-sugar and no butter. And this one is made from unsweetened applesauce as a substitute.

Blueberry cobbler with unsweetened applesauce and no butter for low fat and low sugar.

This is also a blueberry recipe that can be made all healthy with no-added sugar (only blueberry and apple 🍏🫐), and all gluten-free if you want.

You can super easy mix this in one bowl and in less than 30 minutes from start to finish (prep and bake). 🏁

Pre-heat the oven to 325°F/165°C while you’re gathering your ingredients.

It’s that simple…

And with just 5 primary ingredients that  you probably already have in your kitchen: flour, applesauce, frozen blueberries, maple syrup, and milk.

The star ingredient is the blueberries. I’m wild about the wild ones (…you too?).

Blueberries are super healthy foods with their anti-inflammatory eat-from-the-rainbow polyphenols  🌈 Anthocyanin flavanoids are also found in blackberries that can be added or substituted in this dessert.

Berries paired with applesauce is loaded with vitamins, minerals, and fiber… and you’ll taste all that natural goodness in a blueberry cobbler dessert.

Fruit cobblers came from England and word got around and traveled to the U.S. southern states where it’s a dessert staple.

And that’s where I made this simple and healthy blueberry cobbler version.

The mixed batter will look like pancake batter if that makes you happy!

blueberry cobbler batter looks like pancake batter.

And it reminds me of the batter I made for my first blueberry muffin pan. That was the first dessert I ever made as a teen. I remember the box with the small aluminum can of blueberries inside that was cracked open with a can opener.

Those baking memories inspired me later on to make more blueberry inspired desserts like blueberry pancakes. And then blueberry became wildly popular as a touted super food.

So I added in my blueberry cheesecake. And a blueberry smoothie too.

And if you use frozen blueberries, you don’t have to drain or take out in advance. You can just add them from out of the freezer. And you always have them available like ingredients in your pantry (like applesauce that’s also a great item to always have on hand).

I like how they leave a little blueberry streak as they defrost.

You can even make a blueberry swirl pattern if you like by slightly squishing the blueberries as they warm up to room temps, and then taking a knife to swirl the juice.

But there’s nothing a full on blueberry look… it’s dramatic and you can make no mistake… it’s blueberry!

blueberry cobbler with applesauce after digging in.

applesauce blueberry cobbler with no butter that's low fat and low sugar.
Print

Applesauce Blueberry Cobbler (Low-Sugar)

This berry delicious cobbler is made with applesauce fewer calories.
Course Breakfast, brunch
Cuisine American, southern
Servings 2
Author Brandy @ Healthy Happy Life Secrets

Ingredients

  • 1/4 cup buttermilk (or milk)
  • 1 oz applesauce, unsweetened
  • 1/4 cup frozen blueberries
  • 1/4 cup flour
  • pinch of salt
  • 1 tsp baking powder
  • 1 tbsp maple syrup
  • 1 tsp brown sugar (for top)

Instructions

  • Combine dry ingredients and wet ingredients. Pour batter into small baking dish.
  • Add blueberries ontop.
  • Sprinkle brown sugar on top.
  • Bake at 325°F for about 20 minutes or until top is golden brown.
Share this