Coconut milk is delicious when you make it yourself. You can buy it at the store but sometimes you don’t want a whole carton or you don’t have it on hand. And you can make coconut milk from your dry pantry ingredients. See below.
First off, coconut milks can be confusing. And then there’s coconut water. So I’ll break down the main difference below that’ll help you in making coconut milk.
At the grocery store, you find coconut milk in the milk refrigerated section usually on the perimeter inside the store.
And you can also find coconut milk in the canned aisles or international sections, usually for cooking, soups, or baking needs.
Then there’s coconut water, that’s usually found in cartons in the beverage aisles.
The first two kinds of coconut milk are from mature coconuts. It’s from the white flesh parts that you probably are familiar with. 🧉
And coconut water is from young or baby coconuts. You can usually find those in international or Asian grocery stores that look like straw husk wrapped coconuts.
Coconut water is more pure tasting and goes well by itself or in a tropical mango drink.
And this recipe is all about coconut milk that you can easily find ingredients for in your weekly grocery shopping. And it comes from none of the sources above.
Because all you need is shredded or flaked coconut. I discovered this because I’m a baker.
So naturally I like looking at baking ingredients. And as someone who likes coconut flavors, making a coconut smoothie or a coconut fruit cake with coconut flour… making homemade coconut milk from pantry ingredients is right up my alley!
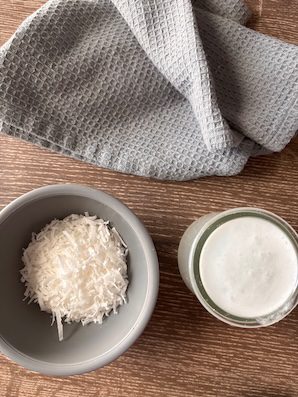
So I’m sharing how I do this with dry, unsweetened coconut, also known as desiccated coconut. These are the dry coconut flesh shavings.
There’s also sweetened coconut that looks more moist in a bag. It has extra sugar and preservatives, so I recommend using the unsweetened version for the healthier reasons.
To make the coconut water: add half dry coconut shavings (or chips) and fresh water to a cup or bowl. Refrigerate overnight.
Then bring out and blend in a Magic Bullet (or blender_.
Next, pour the coconut and water through a sifter. I have one that I use for loose tea and you probably have one if you look around. You can also use a colander or cheese cloth.
As long as you can pour the water through and sift out the coconut, you can make coconut milk.
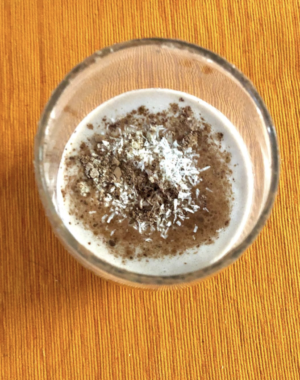
And voila! you have a delicious coconut milk with a white color and slightly opaque-sides. It’s really quite pretty like a dove or ghost color. 🕊️
And it tastes coconut pure, like a young coconut’s water.
So that’s where it’s fun because you’re getting a milk hybrid from mature coconut flesh, but the sweet pure tasting vibes of a young flesh (like in coconut water). Best of both worlds 🎉
You can then re-use the wet coconut shavings in your breakfast bowls and other uses. Maybe a coconut smoothie?
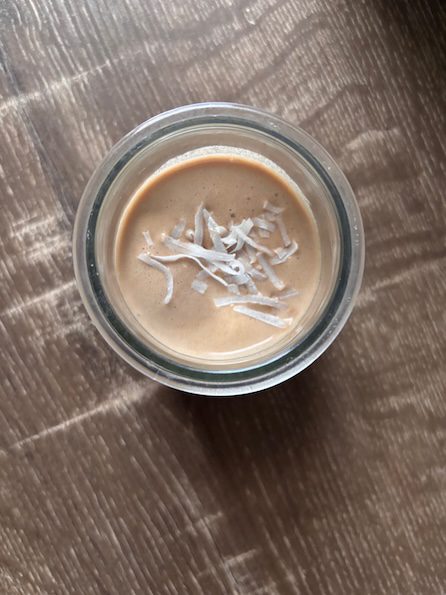
Coconut chocolate smoothie is a refreshing, low-sugar smoothie that tastes like a chocolate bar you drink, but without all the calories. And is anti-inflammatory in the unsweetened ingredients below.
In a smoothie, you get a smooth and satisfying taste of chocolate decadence with a little coconut vibe. 🥥
Coconut milk works best but you can tone down the coco-nutty tastes with other milks or nut milks like almond milk. And you can make your own coconut milk if you don’t have any on hand.
You can also make your own nut milk like almond milk or pecan milk.
It’s like milking your own cow or cashew. 😊
Or you can make dairy-free oat milk that can be as good as store-bought for a substitute, or homemade oat milk in case your power goes out. You make it ahead of storms, then store refrigerate and/or freeze. Frozen, it will stay good for at least a couple hours.
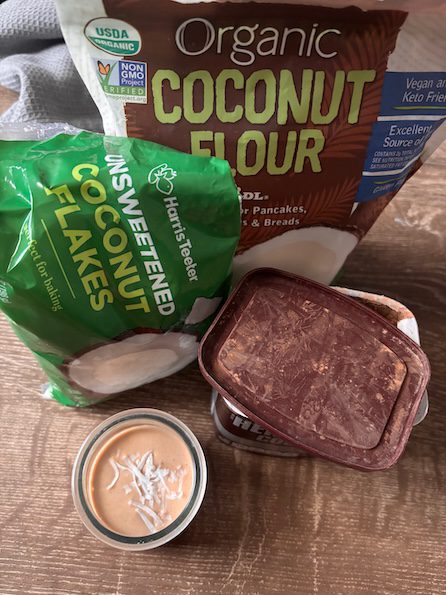
And then for the coconut chocolate smoothie dry ingredients:
You can grind coconut into fine coconut flour. This is from the coconut meat, same as shredded (or desiccated coconut). But much finer ground into flour.
These days, it’s easy to source the gluten-free flour at the grocery store.
And if you’re wondering what to do with the extra coconut flour you have in a bag after you baked with it (like in a gluten-free fruit cake), then a coconut chocolate smoothie is an even better (maybe novel?) idea.🧋
Cacao is the second dry ingredient. It’s a superfood and less processed than cocoa (Dutch processed). They’re related.
I recommend unsweetened cacao as the raw pure tastes come through in the smoothie. If you think cacao is bitter, you can also add a drizzle of raw honey to sweeten.
Both cacao (loaded with healthy catechins) and coconut are anti-inflammatory foods that are good for soothing the skin.
If you have dry skin common in weather climate changes, this smoothie supports healthy skin.
These are the simple ingredients for the magical smoothie with healthy Almond Joy tastes:
1 cup coconut milk
2 tsp cacao powder, unsweetened
1 Tablespoon of coconut flour
Shredded coconut for zhugh topping
This is the smoothie recipe formula I use and is delicious, but I think if you eyeball the ingredients you’ll do just as good. Smoothies are forgiving.😊
That’s something to love about smoothies!
They will turn out delicious even if you don’t exact measure like in baking. Because the individual ingredients are tasty (the parts make up the sum or whole).
And in this Coconut Chocolate Smoothie, coconut and cocoa are the amazing pairing duo. This makes it great for an afternoon chocolate fix or a bright start to the morning.
If also you want to make it a trio (or add some healthy fat), then nut butters would be a good add. You can add 1 teaspoon of your favorite natural nut butter that will thicken the smoothie.
A banana (or half a banana) also is an optional flavor layer that will add the unique banana fruit sweet taste that only the tropical fruit can do.
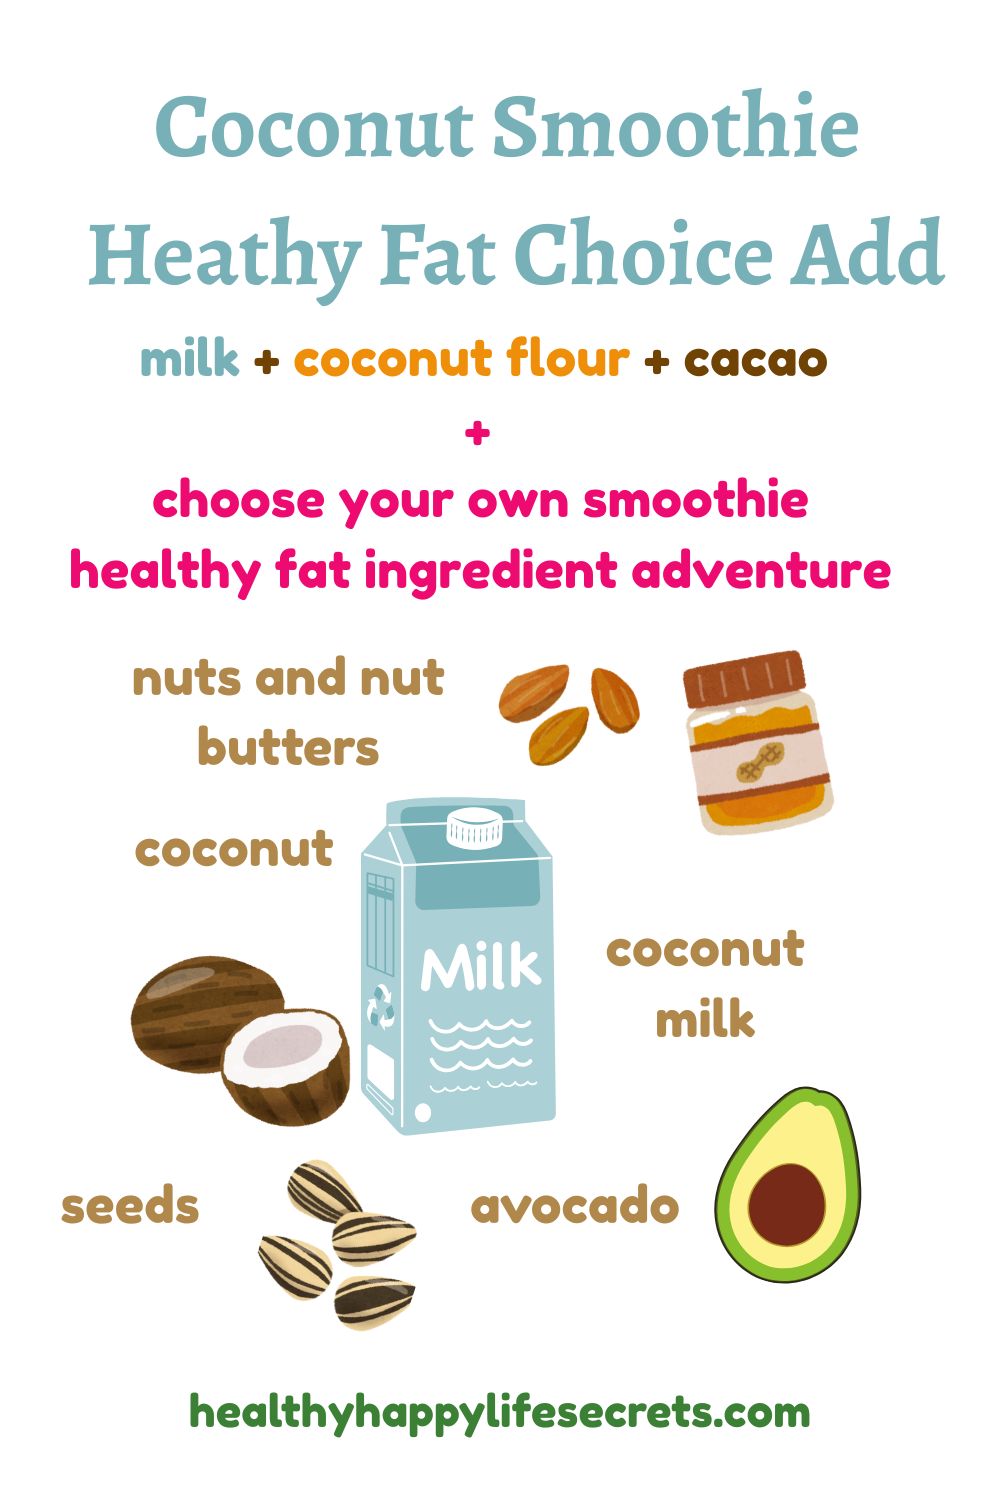
And if you take fat-soluble vitamins (e.g. Omega-3), this is a good time to consider what healthy fat is in your smoothie?
Is there a nut butter? Is there coconut milk fat? Is there shredded coconut in smoothie (…yes, counts as healthy fat)? Are there seeds? Or did you add avocado 🥑 (…another wildcard add option!)?
These are other options…
These are all healthy fat decisions you can make to your healthy and happy (joyful) smoothie.🧋
If the answer is no, you can choose to add a little MCT oil that supports more energy and weight loss. For higher MCT versions, you can look for “coconut” as an ingredient. That’s high in saturated fat, but metabolized quicker for energy.
And if you’re starting your year or season with new friend or healthy groups, this smoothie joy is one that you can sip on while you think of these fun or interesting facts:
Coconuts are not nuts, but look like them with a hard shell like walnuts. They’re fruit, and specifically drupes (stone fruits). And the candy bar Almond Joy was named after the almond nut and coconut where the “nutty” pairing 2-ingredients represent “joy.”
You may have seen “joy” defined in the Bible, where it’s seen over 200 times.
Joy gives us hope, and this is a hopeful drink you make your own.
This is a smoothie that has chocolate, almond, and coconut tastes.
Course Breakfast, Dessert
Cuisine American
Prep Time 5 minutesminutes
Author Brandy @ Healthy Happy Life Secrets
Ingredients
1cupcoconut milk
2tsp100% cacao powder, unsweetened
1Tbspcoconut flour
1Tbspshredded coconut flakes, unsweetened (plus additional as zhugh on top)
1/2banana (optional)
Instructions
Blend ingredients and enjoy!
Notes
The main ingredient for a magical Almond Joy chocolatey-coconut smoothie beverage, is coconut flour, and can be gluten-free. If you don't like coconut, then make a chocolate smoothie beverage without the coconut ingredients.
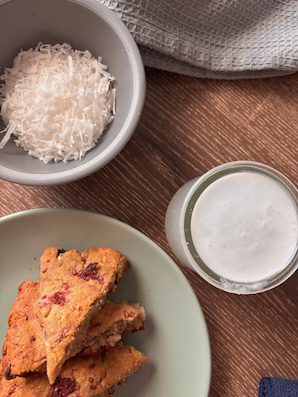
Berry lavender tea scone can be a low-sugar healthy dessert. When I don’t know what to bake, and have a sweet craving, it’s a scone!
Whether you pronounce it sgonn or scone, it’s a score that will be gone soon!
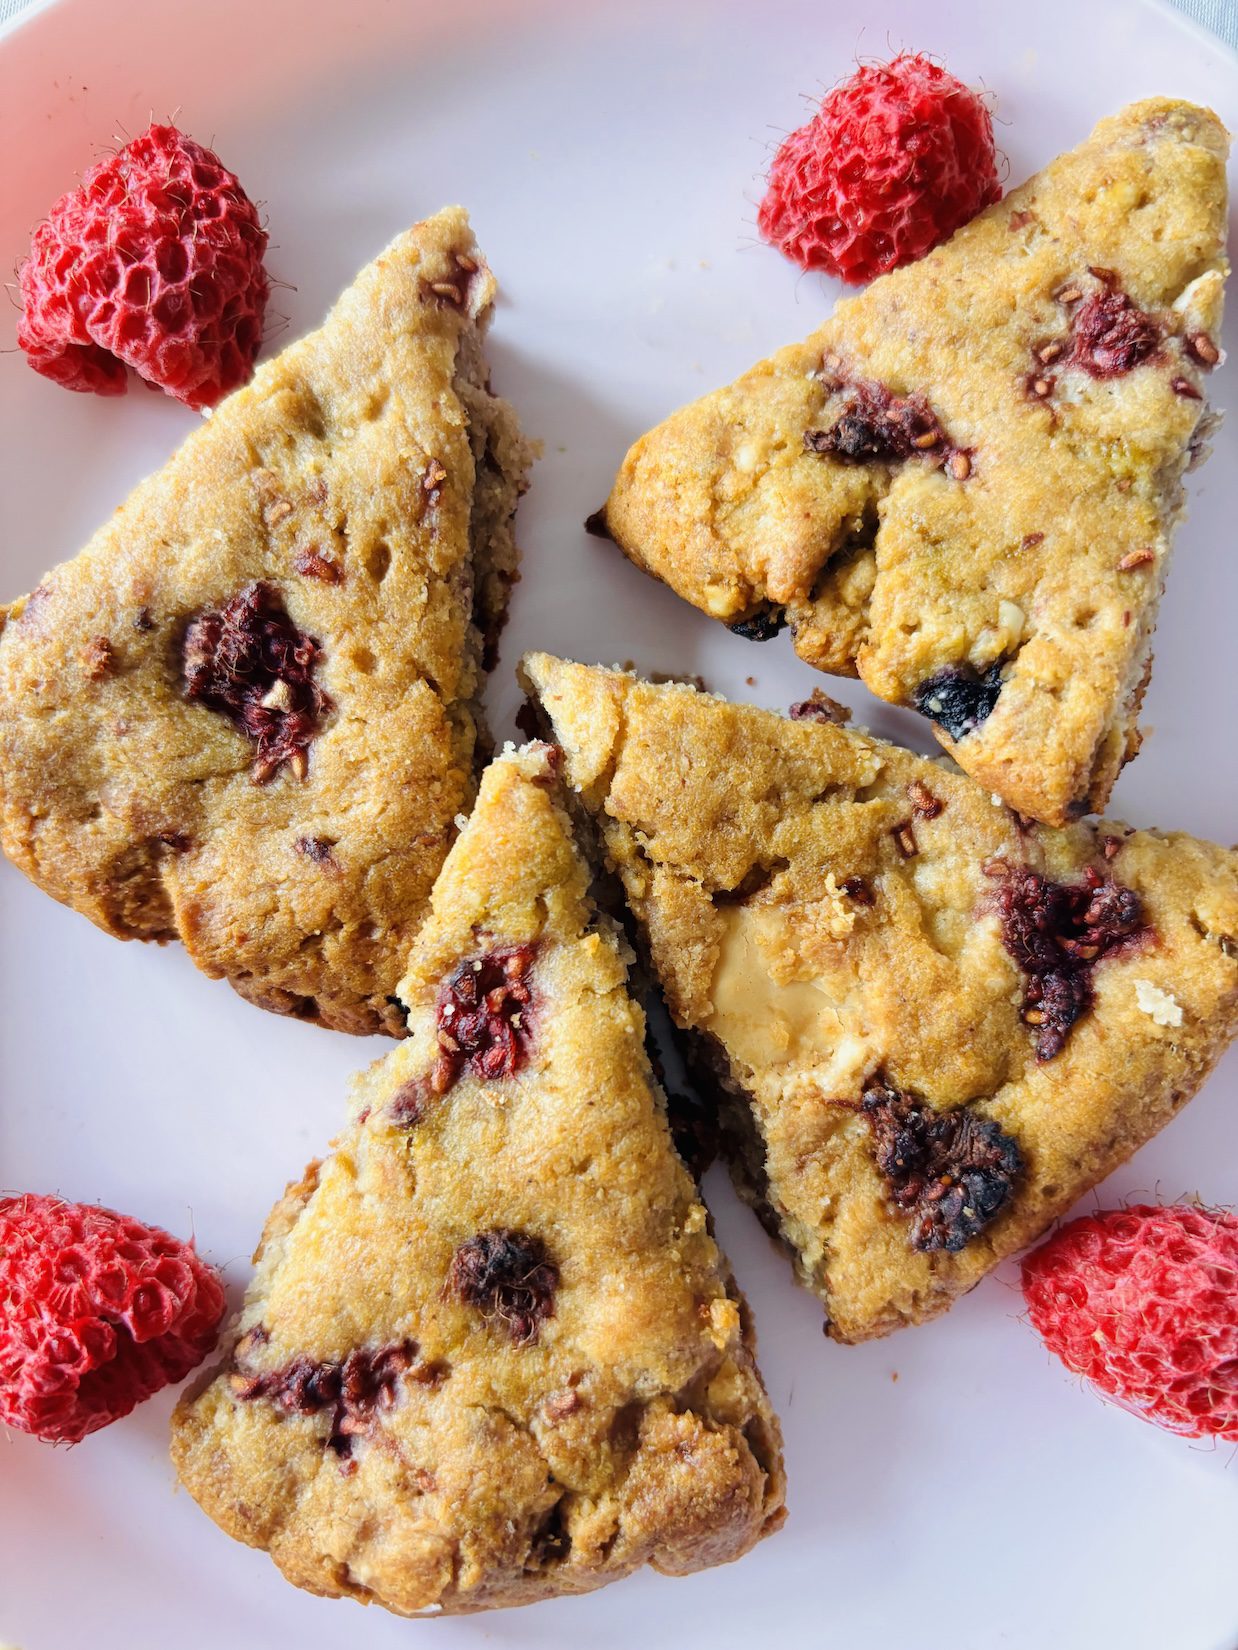
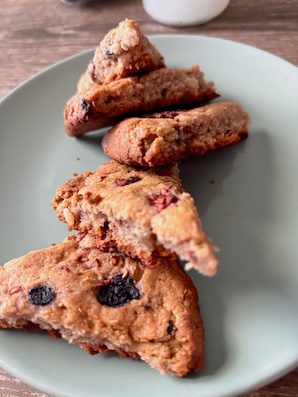
…Like this raspberry lavender tea scone plate that’s irresistible during heart month and for a Galentine’s dessert 💕
Pair heart healthy raspberries and dark chocolate (with flavanols that improve blood flow) for a tasty anti-inflammatory effect.
And if you’re wondering what separates a scone apart, here’s my take…
A scone is a breakfast pastry, a sweet snack like a cookie, and more elevated than a bar. It’s also an EASY bake you can make low-sugar and healthier with your delicious flavors!
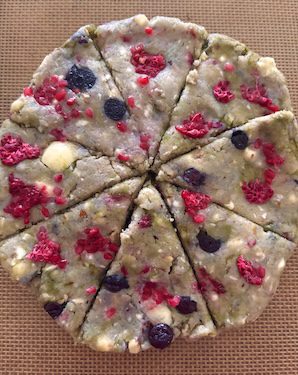
Cut round like a pie, but looks flat like a pancake (before the oven)… a scone comes out of the oven wedge heel-raised elevated, puffs up in the center, and crunchy inside and around in all the right places.
You can be creative and dream up your own easy scone flavors to life. This is the new food wheel… with berry and white chocolate. 😊
And if you cut the wedges before it goes in the oven, like this…
…You’ll have less crumbs on the baking board and more in your mouth.
Plus with cut wedges, whether you share or not, you’ll know how many wedges are left… before it’s sgonn. 😋
That I’m sure is fast. It’s a good idea to go ahead and make 2 scones side-by-side to anticipate its appeal.
And if you have an event you need or want to bring a dessert to, a scone is a smart, foolproof one!
You can’t mess it up, and it will be a hit 🙌
On that note, the reason I really like a scone is you don’t have to do any prep work.
For starters, the few, small pats of butter you use can be straight from the fridge or freezer and works better.
Because cold keeps the fat separate with small pieces in the dough, so that when it goes into the magical oven, steam happens and creates air pockets so you get an airier scone like you expect in breakfast pastries.
That’s the fascinating baking science part.
And with the texture working for your easy berry tea scone, you can add almost any sweet food ingredient that inspires you.
Think of the variety of tasty, healthy anti-inflammatory flavors (aka flavanols).
…Like spices, healthy smoothie powders, extracts, berries, honey, tea, and fruit. And for the wet ingredients, you can use tea like Early Grey bergamot or lavender that I added.
Perfect pairings for weekend Sunday brunch or afternoon tea! 🫖
A technique I like: in a mug, add warm tea water to honey to liquefy, plus the tea all together. Let it cool and then add to the dough mixture.
You can also shredded coconut or zest like in a low-sugar orange scone (that’s like confetti 🎉).
Think also of healthy cake ingredients you can use.
…But without any egg or milk (if you choose).
Which means a easy berry tea scone can live longer if you want it to last on a room temperature plate.
All in all, this is a delicious dessert for any occasion that no one will know there is very little sugar (and no table sugar) if you choose.
Shhh!… unless you tell ’em.
Because honey and butter alone are a delicious pairing that is enough for a delicate and decadent pastry.
But why leave it there? Healthy tea and fruit in an easy berry lavender tea scone adds an elevated taste.
And while I pulled 13 pantry and fridge ingredients in total (in the recipe), you can make this with half as many ingredients or less if you want to keep it simple… starting with some flour, butter, liquid, and sweet.
And to keep it healthier, use a healthier flour blend (e.g. almond or gluten-free flour), less butter, honey, and brewed tea. Up to you!
One thing in common is your easy berry tea scone will be delicious. See what you can come up with using my recipe as inspiration. 🍥
This is a berry tea scone that you can make your own flavors and ingredients with the instructions provided
Course afternoon tea, Breakfast
Cuisine American, british
Servings 8pieces
Author Brandy @ Healthy Happy Life Secrets
Ingredients
3/4cupalmond flour
1/2cupall purpose flour
2Tbspbutter, cold small pieces
1tsplavender tea (brewed and cooled)
1-2tspraw honey
1Tbspblueberries
1Tbspraspberries, dried or fresh
additional berries for tops
1/4tspcinnamon spice
1/4tspsalt
1/2tspbaking powder
1Tbspwhite chocolate (optional)
1tspvanilla extract
Instructions
Fully hand mix ingredients into a 4" dough disc. If you find that the scone dough is too dry (and won't stick together), add a little inspiring liquid that can be water, or flavored teas to get a dough that sticks together and slightly moist to the touch. If you find the scone is too wet or sticky, add some dry ingredients like spices, almond flour, and/or healthy powders.
Press additional sweet ingredients like berries randomly to the tops.
Cut 4" scone into 8 pie wedges.
Bake at 325°F/165°C for about 35 minutes (or until browned all around).
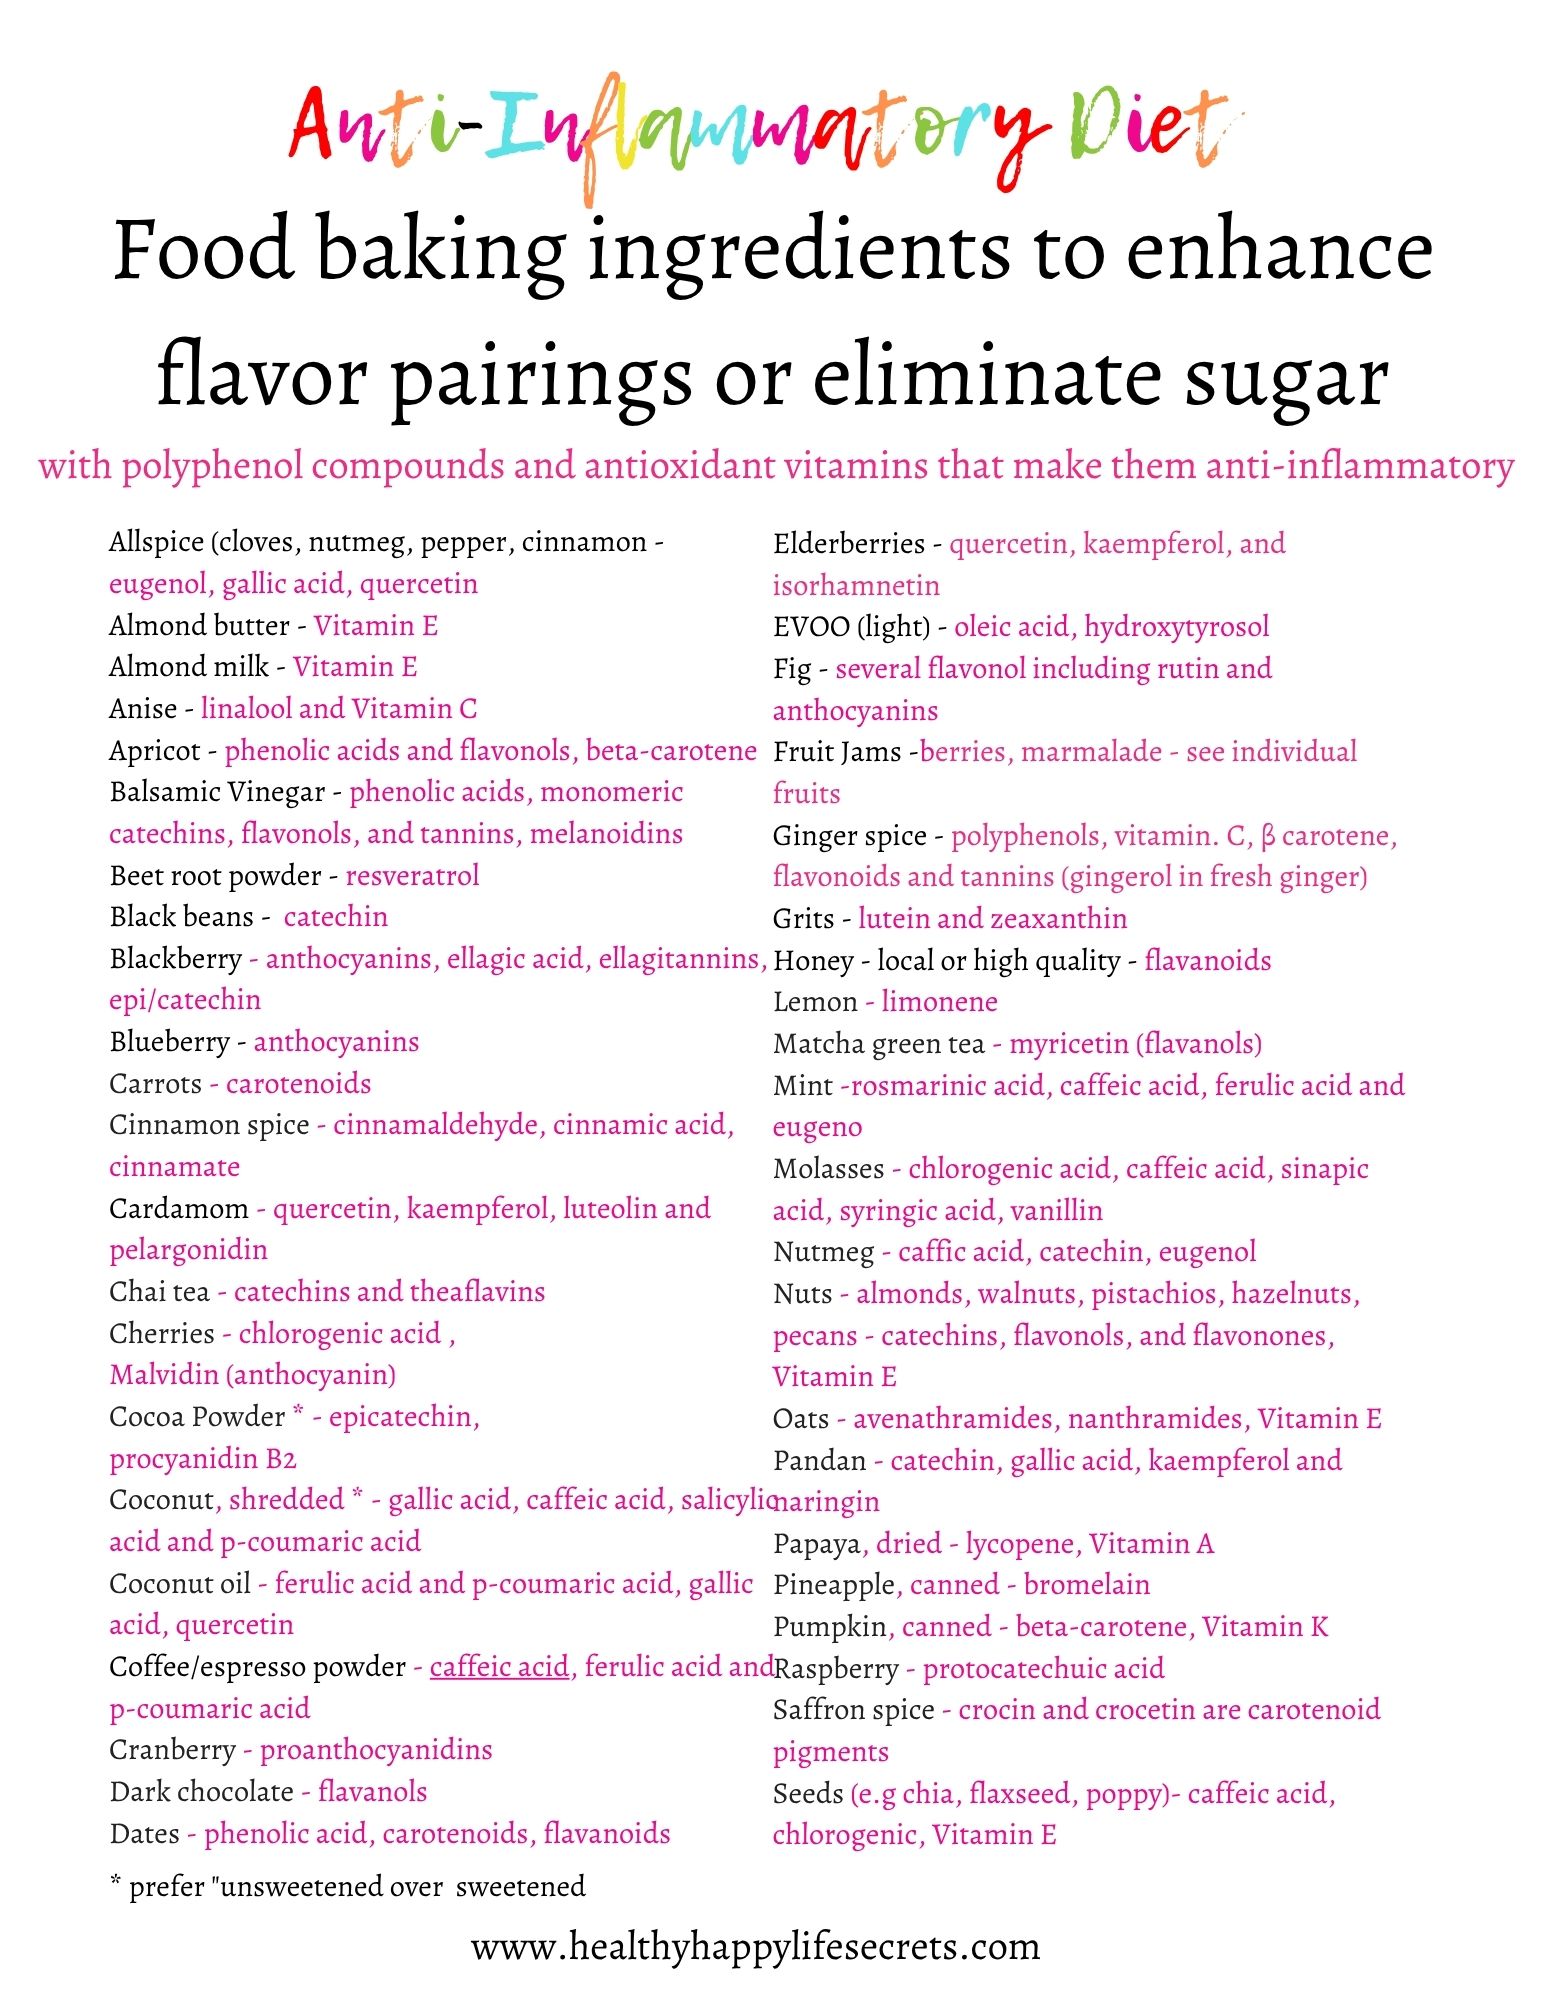
The adult eczema that I first experienced in 2020 and then recurred in 2021, I’m happy to say has never made a significant return. Embracing an anti-inflammatory diet and changing my sugar habits I know has supported this.
Especially foods and baking ingredients that have eat-from-the-rainbow polyphenols 🌈 and antioxidants.
…And below 👇 you can learn how to get better informed about anti-inflammatory foods to choose from in my free anti-inflammatory diet guide offer. 🌈
Because you get to choose and be your own health advocate.
And now after some years of personal history for me to look back on, I can share what has worked for me in my eczema skin flareup prevention journey.
…And I think could definitely help others… maybe you?
My hope is that I can inspire a healthier eating anti-inflammatory lifestyle for everyone.
And at the very least (if you find skin unwanted challenges), you know that the foods you eat can help be the transformative solution.
Because skin irritations as warnings are no fun.
And common eczema (that’s irritating) is different for each affected person, as we each carry a different body that expresses inflammation differently.
Looking back to these more recent past years, there were moments when I saw the pink irritated skin wanting to flareup, but know better now since I nip-it-in-the-bud by preventative skin moisturizing (generously using daily lotion and self-care).
So any eczema possibilities went away within a TV commercial break. The main point here is: eczema is about self-care. 🫶
And information is power.
It’s self-empowerment.
When you know what to do, that’s the difference between guessing… and maybe exacerbating the issue… or staying stunted, not knowing what to do or which way to go.
And specifically for eczema that’s a dry skin issue.
That can worsen with hot or cold weather that’s often on the forecast.
Our skin is the largest organ in the body. And it needs lots of moisture.
Anything preventing that can be a culprit to disturb the balance in any part of the skin that covers our entire body.
Sometimes we forget… and can detail care for our cars or belongings better than our own bodies. Reminders are good.
And eczema skin can be sensitive like new baby skin, so it needs TLC.
It’s tricky because it shows up differently and on different parts…
Where it can look like a sunburn or frostbite, or acne variations. Either way, I knew the irritated skin cause is from being outdoors earlier that day or pollen-related allergies.
But that hasn’t stopped me from all day hiking… I think you gotta live a little, weigh the benefits, and pick your battles wisely!
Again, this is how being informed is power.
Because you’ll know it’s the same cause.
…Like when there is irritation on my typing fingers. That’s where eczema began in 2020. And now when I see a pinkish glow light up there, I know right away what to do…
I reach for moisturizer as the quick remedy.
So if you ever have question about whether it’s eczema on your skin, maybe this could be the answer…
Give your skin a drink of a water with (non-clogging) moisturizers (like you would consume for your body and to avoid headaches). 💦 Water is life.
Then repeat.
And even better, you can prevent eczema flareups with the foods you eat. And specifically anti-inflammatory diet foods that I’m passionate about.
Sugar for me is the biggest no-no. And I know this is true for many other sweet tooths out there.
A little sugar is okay, but the 25 grams (or about 2 Tbsps) allotment mentioned per day is too much for eczema (and anti-inflammatory living) from my experiences.
…And is why I created my own baked low-sugar desserts that are based on my sweet childhood dessert and catering work memories.
Because I would see on television food shows that I love, to add 1 cup of sugar in the mixing bowl or thereabouts, and sometimes more. And a cup btw is 200 grams of sugar per recipe that would be doing your body no favors especially if you didn’t share the dessert.
And how do I know that too much sugar exacerbates eczema?
Because when I tipped the scales on my body, enjoying the happy foods with sugar (that could easily be store-bought fruit juice or candy), I got the pink light warning.
…The same warning that I accidentally itched when I didn’t know better in 2020.
I connected the dots.
And as sugar can show up on irritated, crawling skin, it’s even worse undetected in the body. Diabetes 2 is one of the fastest growing lifestyle diseases (that’s preventable).
So with body inflammations, it’s about playing a game of not-tipping-the food scale (with inflammatory foods).
Any person who can’t eat sugar (diabetics) or is borderline can tell you how reading ingredients and labels becomes an active part of grocery shopping life and daily meal prep.
And along those connecting-the-dot lines, eczema is a pre-health inflammatory condition warning.
…Where I’m actually glad I got that warning (as uncanny as that may sound as I ended up in the hospital)… because it got me to change my eating habits one food at a time. And grow even more healthy conscious.
Acute inflammation is a warning to chronic or recurring inflammation, that’s a leading cause of chronic diseases (that are the highest causes of mortality).
And an anti-inflammatory lifestyle will help prevent this, that we’re not usually taught to do unless we’re intentional.
So before eczema, I believed in an anti-inflammatory diet and that was the only diet book I followed… and then after my first eczema experience, I was completely sold.
And eating less sugar aligns with an anti-inflammatory goal of eating healthier.
All sugars are not created equal in inflammation. Some types are perfectly fine for me (…and I’ll spell that out further below).
Even though moderation and mixing-it-up (variety) is still a smart, healthy strategy.
So giving up all sugar is not really what I’m suggesting… I think that would be NO FUN and missing out on daily joy. Plus nature put sweet taste buds on the tip-of-the-tongue for a good reason.
And on my sugar journey, years before I did a sugar fast as part of the start of a new year with my church 🎉 and by my 30s, had cut out sodas, donuts, and drank less juices.
I hadn’t arrived to my desires, but year after year I was heading in the healthier direction.
And then many years later in 2020, I started learning to bake sweets I’d never made before.
Today, all I make for sweet bake consumption are low-sugar recipes. Small amounts of fruit, honey, cinnamon, and monk fruit sugar can be all the sugar add.
You can always zhugh the sweet at the end, on top, or individual consumption.
Like for picky sweet eaters.
…Let them candy bar their own tops. 🍬
That’s something I learned about working in catering and party planning for hotels and restaurants for years. The zhugh is important.
It’s part of what is remembered in a celebrated way and special. And each day should be an event.
In catering, I learned food details are the cherry on top. And love is in the details. A little sparkle you add that can be a honey glaze, orange zest, or a dusting of cinnamon can be the healthy dot and dash. And to prevent eczema with exclamation points. ‼️
It’s the little things that add much (but not much to eczema).
Balancing happy and healthy (and moderation) eating is how you strike the sweet spot.
Where you can splurge one day, challenge yourself to fast on the splurge the next day, and maybe upcoming days.
A sugar fast is a good challenge.
It starts in the kitchen.
I don’t have a bag of loose sugar waiting to be used and am intentional about what sweet snacks or ingredients I bring home these days.
Like coconut flakes or a variety of nuts that are just as easy to source gather.
I leave them in plain sight as healthy-somethings food inspiration.
And those as examples of simple ways I gradually got control of my sugar cravings.
It doesn’t have a hold on me or my taste buds. And it doesn’t have to on yours either.
I’ve learned to confidently bake without table sugar from all my fun kitchen experimentation (that’s now been in 4 different home kitchens)
Being aware, aligned, and focused on inflammatory prevention is how I can breathe sigh-ingly… and report no lasting effect eczema flareups.
That aligns with healthy eating and an anti-inflammatory diet that focuses on food-as-medicine and eat-from-the-rainbow 🌈 healthy principles. All while enjoying delicious food pairings that pleases a foodie.
Early in my 20s, I learned about antioxidants in a college semester I took off, pre-anti-inflammatory diet living. I volunteered for the American Cancer Society down the street, where I remember their bright fruit food poster hung on my wall (for future inspiration?).
And funny (or ironically), whole foods didn’t go out of style. Decades later, they’re still around… and are still the superfoods. There’s so much nutrient-dense food variety to choose from that the body loves.
It’s a winning proposition because the body and person is happy. 😊
And on that mission, I invite you to learn more about an anti-inflammatory lifestyle diet, eat-from-the-rainbow foods 🌈, and how to wisely eat your way toward anti-inflammation, anti-eczema, and your longevity.
You can get the FREE informational anti-inflammatory food guide that has hours of research condensed to easy food lists and charts, to inspire and align you to what healthy foods to choose from when you’re grocery food shopping and preparing meals. 🍽️
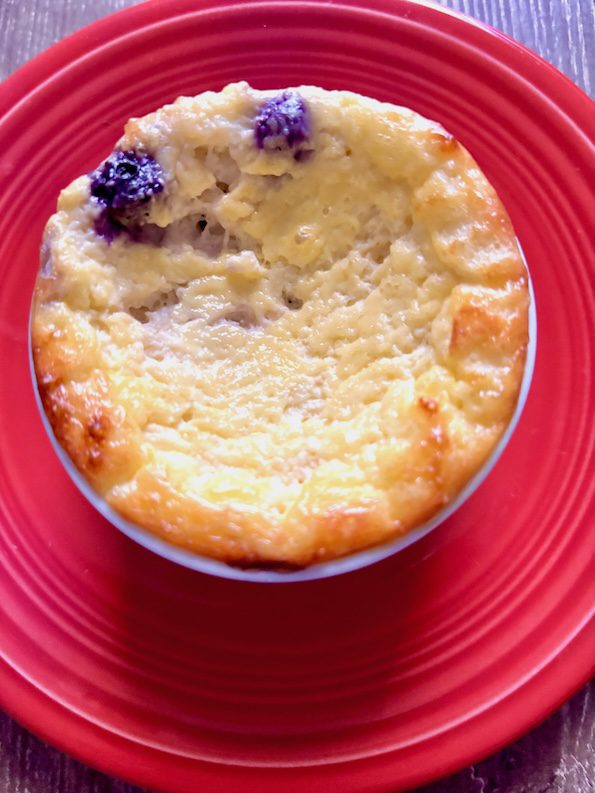
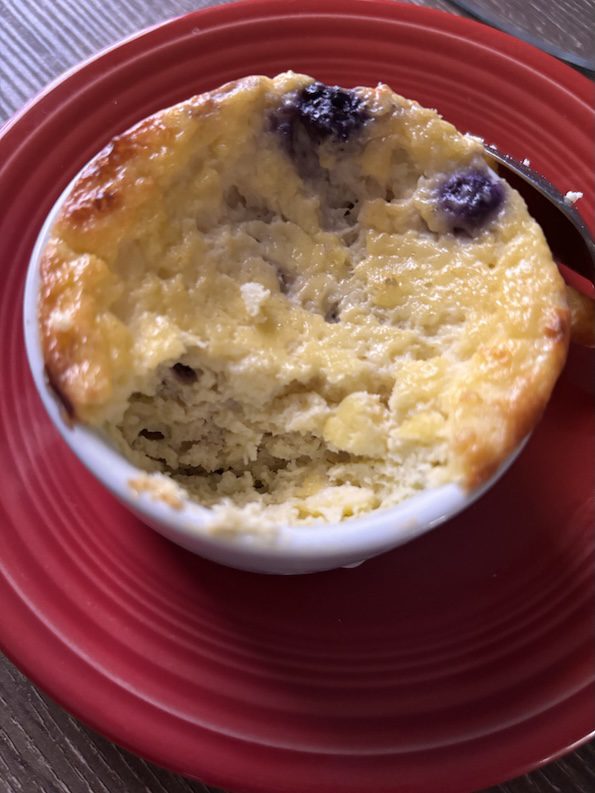
Cottage cheese in a cheesecake sounds like a lot of cheese, like this oozing over cake you can see below. But it’s actually a healthy way to get protein.
And a way to hide the cottage-y cheese texture (especially if you’re not a natural cottage cheese fan). And in this dish, you’ll get a smooth texture you’ll love!
Use your Magic Bullet or food processor and add 1/2 cup of cottage cheese and one egg.
Pulse the blender with cottage cheese and egg a few times to smoothly blend. This will make enough for an individual portion.
You can bake into an oven-safe mug if you don’t have a baking vessel that’s the exact right size.
Anyone can make this! 😊
It’s a quick (quiche?) way to get protein that’s sweet or savory delicious and healthy.
You decide!
And this is where it gets fun because you get to decide if you want a sweeter cheesecake (dessert) or savory cheesecake with healthy veggies or more proteins, like that you would add to a quiche.
Either way, it’s about 14 grams of cottage cheese protein and much lower in calories and fat… in case that’s important to you. And the egg adds another 6 grams, so this one individual portion has 20 grams of protein, plus any other proteins you add.
The Breakstone’s 2% milk fat cottage cheese I used had 13 grams of protein, but was only 100 calories. Some creamy cheese can be more than double or triple those calories.
I went sweet (the blueberries are a hint) and I added 1 tsp of maple syrup and some berries and surprise-inside cherries. That’s it.
The bottom was brushed with coconut oil. And if you go the savory route, you can make this a Mediterranean diet olive oil serving as an option.
Oil helps for a non-stick bottom that’s baking-desirable and improves the overall bake texture.
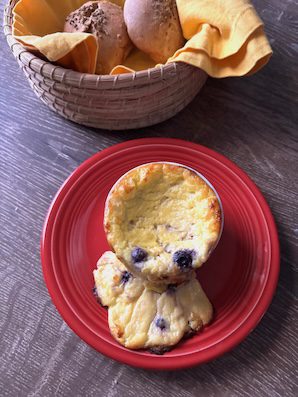
And since I used an under 2-inch low baking vessel (that’s shorter in height than a drinking mug), I got the anticipated dramatic spillover effect that’s fun and adds a lava effect.
Like an oozing fall “lava” cake or a French Onion soup that’s baked in another baking pan to catch the flow. I used a cake pan and carried over the spill to the plate (that was scrumptious too 😋).
And you can simply cut off the baked lava or leave on for an ahhh…
After exiting the oven, you would think this dish is made with fancy cheese like Gruyere (or other fondue cheeses) that are usually more expensive per ounce and higher fat calories. You’d never think it was easy-to-source cottage cheese.
And you may at first think that using cottage cheese as the main ingredient doesn’t give a delicious bake… but not here in this cottage cheese cheesecake where it’s controversially satisfying.
Give it a try yourself. Your friends will never guess it’s cottage cheese… unless you tell them. 🧀