UA-141369524-4

Glycemic Index, Vitamins, and Minerals (Vs. Diets)

Glycemic index is an anti-inflammatory measurement good to find a variety of healthy foods.

The first time I learned of the concept of a food’s glycemic index, I was intrigued by the idea of lowering blood sugar spikes as a healthy good food consumer, and a sugar lover at the time.

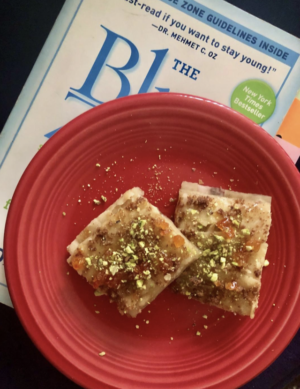
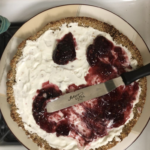
…And learning that dark chocolate (like that used in my baked dessert photo above) has a lower GI score than milk chocolate, puts a smile on my face. 😊

The opposite of… feeling hangry and light-headed energy with low blood sugar, that I’ve felt before too. And make GI talk relevant for so many.

Glycemic Index (GI) measures how food carbs affect blood sugar as a nutrition score indicator. It has been around for decades, but still isn’t a common household food tool used today.

But I DO think it will be a well-known future nutrition trend for 3 big reasons:

-Diabetes rates around the world are on the rise, and most cases we know are preventable through lifestyle changes (where food can have the biggest impact).

-Glycemic Index brings awareness to the order of foods you eat based on blood glucose spikes and glycemic response. And also how foods can impact inflammation.

-The growing mention of gut health in our modern news, and as we approach newfound scientific discoveries on gut-brain health. Progress being fueled by more data and scores.

There’s no shortage of healthy research progress that keeps us on our toes.

And yet, today the Glycemic Index is not even on the daily radar for most of us that consider ourselves health-conscious.

We’ll read the Nutrition Facts label and how many carbs are on a food package. Many of us pay attention to macros and calories. But we don’t consider the Glycemic Index score mostly because it’s not on the label, but is now on your map if it wasn’t before.📍

The tricky part is, GI scoring with accuracy is complicated.

Here are a few examples why…

If you eat unripened green bananas compared to the ripe, mushy ones that are preferred in a smoothie or banana bread recipe, the GI score improves.

Ah… and a banana has no Nutrition Facts label. A banana is a banana, and best to keep it simple.

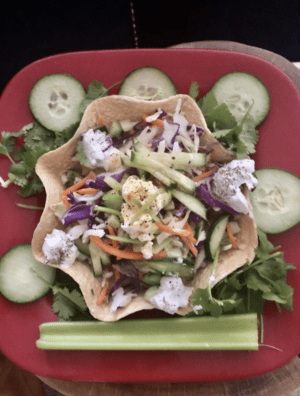
Or if you eat a salad before the higher Glycemic Index ranked food item like a potato, then you can create a nice fibrous buffer cushion that your body likes. Then, if you eat the potato skin (cushion cover), even more so.

…But like with a bed pillow, people have different responses, so the scoring is different per individual. Each body keeps different scores.

But Glycemic Index info. (that let’s be clear is not available on a food package item today) would help us, consumers, to put relevance to the order in which we eat foods and what we choose to eat.

And bring awareness to us about what’s overall churning good in our gut from our internal healthy body’s perspective.

We’d make some better healthy food choices besides what our minds tell our taste buds we want.

And well… we would be better informed.

And that’s how progress works, as we’ve come a long way…

For me and those in my U.S. generation, the 4 basic food groups literally changed overnight to the Food Pyramid of 23 servings per day by the time we were young adults.

Without the internet, I learned this in school with many others. There was always some undesignated student who casually made big news announcements around the lockers during class breaks.

That was our modern social media news medium (post styrofoam cups with a string era). 😁

And that specific news was a massive dietary recommendation disruptor. The shock was the stark contrast, from basic eating to grazing on food all day like a cow chewing grass.

Adding convenience foods could be a solution just to fit in a serving about every 1.4 hours you were awake. You could eat 23 almonds as one serving… then you would have 22 servings left to go in other food categories. But then the other snag was, back then, nuts and all fats were put in the “eat sparingly” category. That was a ‘lil nuts. 🤪

So with all that stacked up against meeting new dietary goals, the health-conscious supplemented with vitamins. Organic foods weren’t popular yet, so food quality wasn’t as important as type of calories that are still important.

And diets existed back then, and they meant eating less and less fat to lose weight, that’s more or less like today.

And there were new (but different) diet fads coming out similar as today. Here today, gone tomorrow.

The Atkin’s Diet comes to mind as every year there’s a ridiculous hot dog eating contest, that’s anything but healthy.

Many diets in general for losing weight out there are health dangerous long term. They cut off calories and starve the body from essential vitamins needed to function.

And while they’ve changed, they haven’t solved the problem.

And makes you wonder…

Why haven’t diet plans gotten smarter?

The Diet Problem: Modern Diets Are Missed Opportunities

The word “diet” has two meanings regarding meal references in the English language. Going on most diets (eating less to lose weight) is often a missed opportunity for nutrients and healthy food calories. Elimination diets are ways to scale back that are meant for a season or a few weeks.

While eating a healthy diet is a positive way of looking at (enjoying) meals and energizing the body for life. So in one “diet” meaning, it subtracts (e.g. most food is bad); and in the other, it satisfies and sustains life.

The Solution: You can find a happy medium in eating less with a healthy diet and making healthy eating habits.

Because from our decade’s past diet lessons, we know yo-yo diets backfire as we eventually want the foods we tell ourselves we can’t have.

So, choosing one that isn’t long-term restrictive that works for your body and tastes is going to do you best.

Like no-rules vitamin-rich antioxidant foods and meals that can be dressed up with anti-inflammatory flavors and spices.

Because even healthy restrictive diets don’t always translate or work well.

Like a Paleo diet today doesn’t suit many of us like it did our ancestor’s generations. We can love a grandmother’s recipe, but their ingredients were processed differently than the same written ones today.

And earlier cavemen’s processes of cooking fresh quality meat over a fire from free-range sources is not the common feedlot mass production we have today.

Despite these lesser quality food process changes, food today is helping our generation’s lifespans because overall the nutrient-dense food options available to us help offset what our ancestors couldn’t get into their bodies.

They lacked sufficient vitamins that come from foods. And one good way to get daily needed vitamins is in complex carbs available comparatively abundantly to us these days.

So, cutting out minimally processed whole grains that come in a bag or box and that carry the most natural vitamins of grain options, is a healthy miss.

The point is, that many of the lose-weight diets today are trying to cut out most carbs.

Kinda like how nuts I mentioned above were once deemed as bad because they’re fat (and there was no healthy fat category), and now starchy carbs are marked as the bad calories.

When actually complex carbs give us energy and essential B vitamins we need for daily life and I think essentially undermentioned in today’s healthy conversations, along with the Glycemic Index ones that I started with.

Keeping foods like sprouted bread, quinoa, barley, tri-color pasta, and rice in the diet are good ideas. And some fit nicely in a pantry.

Plus, they’re good sources of fiber that’s helpful for any diet.

And provide often forgotten about minerals that work with vitamins to make you and I tick.

Vitamins and Minerals Smart Knowledge

If we only read the vitamin and minerals food label section on packages, we miss the opportunity to apply and reap food vitamin-mineral synergies that optimally keep the cylinder wheels turning in the body when they’re purposefully taken together.

If you’re curious about vitamins, minerals, and Glycemic Index and getting quick knowledge in those areas, they’re part of the anti-inflammatory food list.

And speaking of love, a sustainable, life-giving diet is a healthy approach to life (and to keep a consistent, year-round healthy weight if that’s another goal).

The best part is you get to choose from so many diverse and delicious healthy foods… AND they have anti-inflammatory protection benefits.

…So your relationship with food can’t be much better! I’m gonna pop some polyphenol-popcorn over that🍿

Plus, some common healthy foods are anti-inflammatory “super” foods that go beyond antioxidants and polyphenols.

They also have high protein, fiber, vitamins, and/or minerals that help the body function better in more than ways than just one.

To me and you (…maybe?) who is passionate about healthy eating, it’s a no-brainer choice to make anti-inflammatory meals.

And over the past couple of years, as I’ve been contributing to writing food articles for health and wellness publications, I can dig into new research and appreciate healthy food innovations on the horizon, which gives us more to look forward to in our future new world.

Look out for more super at 100 (Centenarian) secrets and evidence in our daily news.

Super Centenarians are living proof and our hope that it’s possible to live optimally in old age and not miss a beat with tasty-nutritional meals, so we can enjoy the moment.

They teach us how to spruce up their anti-inflammatory meals so they’re deliciously prepared and flavored with spices. They do more from their natural lands, with less.

Next time, I’ll share some good tips on how to save grocery money with healthy eating, especially with all the grocery food prices and availability changes (yikes!) impacting us all.

Healthy Chipotle Menu and Fast Food

Healthy Chipotle menu, healthy fast food, and healthy eating are all related. Chipotle makes healthy chips and chic beans in a pot. And they make it all so tasty good.

healthy chipotle inspired home baked tortilla salad bowl.

These are the same type of ingredients used and eaten that the longest living people on the planet today enjoy.

These folks are also some of the poorest which debunks the myth that you have to be wealthy to be healthy.

And one of the plant-based healthiest meals that’s full of protein amino acids is the 3 Sisters dish traditionally with corn, tortilla, and beans.

When you’re not at home and making eating out food choices, eating whole grains and more plant-based is part of healthy eats, and the Chipotle menu is one menu to consider for a fast lunch.

I wish they were around when I was younger. For elementary school field trips, we were asked to bring a bag lunch to school (…you may have done the same).

Most schoolmates had white bread sandwiches (the magical Wonder Bread enriched white bread) and were less likely to stand out and be judged. For lunch hour, your pride and identity were wrapped up in 2 slices of bread, lol.

Today, bread shaming doesn’t cut it …but I know the feeling as my sandwiches were made of whole wheat. Back then, I guess that was better than the occasional super healthy alfalfa-stuffed and sprouting kind where apparently the parents were on a healthy agenda (and didn’t get the memo).

And once in a while we had Taco Tuesday lunches where they offered hard tacos. Some preferred soft tacos. It was kinda like white vs. other breads.

These days we’re open to anti-inflammatory variety, and being more planet and health-conscious. And that’s reflected in our visible fast-food options.

Besides just breakfast, lunch, and dinner, sugary dessert yogurts have been replaced by fruit smoothie energy-vit-enriched powders, as nice in-between options.

Growing up in the DC suburbs, we didn’t have healthy build-it-meal places like Cava, SweetGreen, or Chipotle, or fast food places that offer plant-based meals.

No fast food place offered salads or greens, or at least fresh ones you wanted to try. And that’s coming from an area considered a cultural mecca (and foodie hub). Many field trips were to the DC national museums where we only had time to eat what we brought.

And health-conscious calories and nutritional meal information weren’t anywhere to be found (heck, we didn’t have internet). We’ve made leaps and bounds to become a more health-conscious society.

Living past 90 and 100 is a higher probability than it once was. And from all the living longer information available to us, we know life expectancy and maintaining ideal body weight is mostly determined by personal lifestyle choices.

So thankfully our society and the food community are rallying to help this cause. Aligned to this, the Chipotle menu offers a line called Lifestyle Bowls for healthier eating habits (that end up as regular eating behaviors).

Our bodies are resilient, and we know we know we have some control and can restore our imbalances through the mind-body (or body-mind connection). We also know our thoughts turn to feelings and our feelings to thoughts that can help us most if we’re aware.

These concepts I’ve grown intimate with because I’ve learned they are keys to helping unlock happiness… why live a day here dissatisfied if you don’t have to?  And what you store inside impacts your health, in the one body you’re given.

And today and every day is a new day that can be a fresh start in a healthy new year or new season. It can be a good time to welcome changes. Food is a great place to start. And I think we can learn a tip or two from the Chipotle menu whether we eat out or cook in…

At Chipotle, like most fast-food chains, you get consistency and know what to expect. Here are some Chipotle menu healthy ingredient inspirations (from building a lunch meal bottom-up):

You could start with a tortilla or with a bowl of rice, where you get to choose white or brown (kinda like the white or whole wheat bread kinds we’ve known since we were kids)… And in adult wisdom and healthy gratitude, we know choosing brown rice goes much further in the healthy zone! 🦷

Chipotle also offers beans (that are often found in Mexican dishes). They offer two types (black or pinto) for simplicity, but did you know there are over 16,000 types of beans (and 40,000 varieties if you Google it)? In a Western diet, you and I have probably only encountered or eaten closer to 16 kinds. 😊

And just looking around, our American diet isn’t a bean-focused society like other countries. Chili is the glorified bean meal we tie to social occasions and sporting events. But, on the Chipotle menu, you also get the choice to add beans as a rice topping, plus another protein choice that’s considered the actual meat or star protein.

The added beans on the Chipotle menu are subtle but may be your only bean source for the week or month if you don’t get them anywhere else. Just sayin’.

And if keep going down the build-it meal line, you can add guacamole that has tasty value. You don’t necessarily think of the Hass avocado source that’s the add-on’s main health benefit.

From there, you can build in green lettuce, a corn mix, and other daily made healthy toppings with herbs like cumin, oregano, and thyme. And all kinds of mild to hot peppers.

That’s as close as it gets to healthy fast-food eating out.

I compare that way to my restaurant event planning days where I was around exotically delicious food all day (Spanish, Lebanese, Italian, and North African cuisine), but not all of it was healthy. It was a mixed bag mostly from the fried methods or rich sauces.

In the Chipotle recipes, they make a point to use health-conscious sauces. Soffrito is a Spanish sauce and Chipotle has sofritas as a plant-based protein option.

And now they have a second-plant based protein: chorizo (plant-based inspired sausage). Seeing a trend emerging?

In my area, you don’t have to go far to go to places like Cava, where you’re getting fast-food metro- suburban Middle Eastern chickpea falafel. You can also go from bean to chickpea legumes on fluffy basmati rice that you can  make at home. Or make cute and easy 2-step rice balls.

Or choose Sweet Greens, a salad, and green-grain bowl place that loves heirloom veggies (like in their Harvest Bowl). Ordering can feel like you’re picking from a California leafy green and veggie garden (and even close to the ground with their Shroomami or Curry Cauliflower bowls).

Then when you’re ready for something sweet, you can find smoothie places with tropical fruits and powder infusions. In city-metro areas, there are many to choose from, and you can add your chia, flax, and sunflower seeds. These are all mainstream now, but once upon a time they were exceptions.

Maybe reflecting on your food journeys and looking around your neighborhood food options, you’re a bit more inspired to eat a little more healthy Chipotle menu-inspired.

That could be a healthy step forward in your home tortilla meal and bowls.

You can get inspired by the healthy Chipotle menu when you're at home with your own bean, veggie, and plant-based ingredients.
You can eat more beans, tortilla, and plant-based goodness that good for you and the planet.
Print

Baked Corn Tortilla Salad Bowl

This is a healthy bowl with a corn tortilla.
Course lunch
Cuisine American, Mexican

Ingredients

  • tortilla (yellow corn tortilla is more healthy)
  • beans, veggies, salad, and egg
  • whole grain rice, cooked

Instructions

  • Bake tortilla at 200°F in bowl shaped baking pans or oven-safe bowls for about 60 minutes. Tip: since you will baking at low temps you don't have to go out to buy special pans if you don't have them. Many eating bowls have oven-safe labels at the bottom of the bowl.
  • Fill bottom of baked bowls with cooked rice.
  • Add beans and veggies. Enjoy!

Healthy Foods Substituting Ingredients

Healthy foods can substitute processed and other ingredients that your body doesn’t use as nutrition.

The Great British Bake Off does substituting ingredients. But healthy substituting, I’m not so sure about 😊 because that’s not their point.

Getting to love healthy foods can take gradual changes.

And food variety and curiosity can create opportunities.

Eating healthy got me interested in cooking healthy foods and using healthier ingredients later in life post-catering management work days.

Those days, I rarely cooked as I was always around decadent foods from a hotel kitchen.

And then stepping away from party planning and then into the pandemic days, I started to home cook and bake daily.

One ingredient at a time, I exchanged filler and not so great ingredients for healthy ones.

It started with interest and fascination with  exchanging a simple ingredient like  yeast for eggs, gives  you risen bread instead of pasta.

That’s the same sort of small ingredient change that you can make in daily meal planning (even if you don’t cook today), that can make a big difference in your health.

But first, you need to know what to do.

“When you know better, you do better.” -Maya Angelou 

Btw, as of today, Maya Angelou is now appearing on minted quarters (so her legacy advice is even more valuable!).

But anyway… long before I learned to cook, I didn’t care so much about the quality of ingredients as I did the final product taste.

And for work, I planned catering events in hotels and restaurants, and I can’t think of a single instance where there was a request for a full-on healthy party menu (over good tasting meals).

That theme never came up in conversations. In throwing successful events, enjoyable and making happy memories in those situations means serving an unforgettable mouthful of delicious.

Once in a while, sprinkled in the mix, there would be a request for healthier alternatives because of food allergies, or for a raw vegetable crudite platter that was considered veg-forward, and to start the party off on a light note.

Or for conference event planning, where the catered food was the main daily food the guests were eating and the host planner wanted healthier energy and “brain food” served. But those were the exceptions.

And that’s partly because eating rich foods for a day or eating out for a few days doesn’t have the same consequences as it does for daily eating that become the routines and habits.

When you have an overall goal to stay healthy or be health-conscious, you care about the overall weekly diet and the ingredients.

And if you’re the one cooking and adding the ingredients, you get to decide how much of this or that you add to meals. That can very rewarding and I share a few tips below whether or not you cook today.

…You just never know what will be a good source of inspo to get you cookin’ and as I found on my journey.

I never say never, but if you live near a city especially, gardening isn’t usually the main source for full-on meals.  But many of us cook regularly as we want to learn how to make new dishes and develop cooking skills confidence.

So that’s my first tip for anyone: to try and cook more often even if you don’t think you can boil an egg or make a box of pasta. We all start somewhere!

When you make, cook, or bake your food, you start to think about your foods more than when you’re just eating, heating, or ordering food in.

Then that brings more awareness to eating healthy foods if that’s a goal you have.

And in that case, making everyday recipes that have sticks of butter or shortening just won’t cut it.

At first, you can be feeling at odds following recipes that have a mix of healthy and not-so-healthy ingredients. That’s part of the journey.

I always start with the ingredients.

If I don’t like what’s in it, then I just skip the recipe or food. But when you’re starting out, following a recipe is easier and can be more fruitful… just in case you needed some cooking encouragement to keep trying.

Our olive oil EVOO society has also made it easier. That’s what I call it because EVOO (thank you to the Mediterranean diet) is often used in restaurants over butter, that used to be the standard.

Healthy fat foods and  healthy monounsaturated fat like EVOO (as in EVeryday olive oil + extra virgin) used with a light hand drizzle is going to be a good substitute for your body health.

Just add a few drops and then spread it around the pan with a baton flick of the ninja cooking wrist 😊. Just sayin’ too much of a good thing is too much.

But a little bit benefits your cooking too. Besides food flavor and a glisten, this keeps your food and pans from cooking heat burns.

The biggest goes to body health of course. So, my second tip is to substitute butter with healthier ingredients like applesauce or yogurt for baking, and ghee or EVOO for cooking when you can.

Traditional Christmas Cookies are the sweet recipe exception I have found that isn’t the same without the buttery taste-texture.

But even in that context, I still think (and from my own baking experiments) know that butter can be substituted, and still be just as delicious and enjoyable.

You may just have to get a ‘lil more creative with the cookie decorating.


…I made these (above photo) bak-love-a layers with light EVOO (that’s great for sweet and savory baking). I only used butter to add on the top layer glaze to please my younger self.🤷🏻‍♀️

Just an example that balanced moderation can be effectively added into recipes where it doesn’t have to be all or nothing.

I find hard and fast rules can fall flat and in the category elimination diet that I tend to stay away from.

I think eating diverse, mostly plant-based, and moderation for most everything else is the way to go and the way I go. Especially if you have food allergies and sensitivities.

But, this is a healthy leap from when I started my baking journey using ingredients like shortening that you still see in Southern comfort cooking recipes.

Aah… but, when I knew better, I did better. And that could be your journey.

Like I learned butter is made from heavy cream and if you keep whipping, it easily turns to butter.

It’s lessons like this where you can get revelations like I did, that an ingredient’s makeup and consistency is (ex)changeable. And so, ingredients are not fixed as what we know them as. They can be substituted and swapped in recipes.

A good example would be substituting sugar with healthy foods like dried fruits, fruit zest, or honey (that can help allergies too).

These types of little changes make big difference to health, and how you feel in your day. And, maybe the bottom line… or the waistline (yay!).

Or, maybe you’re a natural Vata (or know of some)…that’s me too 🙋🏻‍♀️, where you may have inherited the thinner genes and higher metabolism. You still have to watch the fats.

If you’re a female adult, you wanna make sure you’re not “skinny fat” that’s a good healthy measurement.

You can do this by comparing your waist to hip ratio (where most women can aim for under 80%).

There are no shortcuts to good health as your body has a different opinion on what it needs that’s different than our tastes and wants.

Another healthy substitute is oats and grits for pie crusts, cookies, and brownies mixed with apple sauce or yogurt and honey. When you bake, then you can make these swaps pretty easily, both butter and gluten-free (without flour).

Healthy foods like grits can be used as the pie base.

But when you shop from grocery shelves that’s a different story as pie shells look harmless, despite not-so healthy ingredients. And healthy foods don’t jump off the shelves either.

That’s how I started, not really paying attention to nutrition labels and ingredients.

Then along my healthful journey, I decided not to choose Mister Donut of any kind, fresh or not, because I knew and know what’s in them.

Besides taste, very little. And lots of sugar and fat. And I trained myself from awareness to look at them like that, and see the missing-ness through the hole in the middle.

But for others, and you, that could just as easily be another processed food item where the consequence is known and inevitable.

When a tradeoff is determined as individually undesirable, then you beneficially want to give it up (and don’t HAVE to give it up that can cause an internal conflict).

These btw (below) are healthy “donut hole” inspo w-hole bites and balls of energy that anyone can bake and substitute for high-sugar and fat.

When you pause on the processed foods, you can gradually not desire to eat the super-sweet stuff anymore. It can work if you work it. And then you actually like the taste of healthy foods.

Your habits then become your choices.

If you’ve ever fasted, then you probably know the feeling… because after a while you can stop caring or obsessing about eating (like I did in fasting experiences). I’m not a good faster but I’ve attempted fasting sweets.

After a day or so, you can stop craving whatever you’re fasting from because you, your mind, and your body are in agreement that you don’t need those foods (at least not now).

So, then you’re satisfied.

And that’s all you need to care about when it comes to eating enjoyment. Being content to be happy.

…I remember the days when I got teased by friends for eating healthy and selecting healthy food choices. I felt bad they didn’t know what I knew in nutrition, and sadly, that adds aging stress on the body.

Our bodies are tricky and complex and has a different daily systematic agenda that doesn’t necessarily like our unhealthy choices after swallowed or initial taste bud food changes that we choose (that can be unhealthy or healthy foods).

I knew back then (even if it was subconscious) that I wanted to live without eating regrets or damaging the one body we’re given, so I followed my instincts and those became habits.

When you don’t take for granted your body’s resiliency, that can help you to want to be healthier.

Plus, we have so much more food sources and healthy information available to us now that allows us to buy ingredients in person, online, and from global sources.

When your body is used to you eating healthy, another healthy food strategy (and final tip) is to switch up the healthy foods and ingredients regularly. Switching up foods is fun.

It’s an enjoyable game you can play that you’ll never get sick of and is what your body wants for you as it craves good taste and healthy variety.

Plus, if a food is labeled bad or good and that evolves or changes, like nuts used to be deemed bad and now are great healthy fats, then you haven’t put all your eggs in one basket 🥚🥚… you know what I mean, Jelly Bean 😉.

Cold Brew Coffee – Homemade With No Machine

Cold brew coffee from scratch when you have no electrical power may seem impossible especially with your dead machine staring at you with no lights on.

Homemade cold brew coffee from scratch even when the power is out with a jar, filter, coffee filter, water, and your favorite ground coffee.

But not only is fresh coffee possible, it’s healthier.

I’ve been drinking cold brew coffee (or homemade coffee) from scratch coffee as my possible and preferred way since 2019 when I was in Italy. And lights were on.

Coffee shops are on every corner, but I couldn’t drink a coffee in the AM on an empty stomach or with a sugary something (customary in Italian culture). Empty calories don’t soothe the gut… and I’m not a drink-coffee-in-the-afternoon type-of-girl because the caffeine messes with me and my upcoming sleep.

So I made my own cold brew coffee from store bought ground coffee and a paper coffee filter.

This I’m convinced is how for centuries people have been drinking coffee before fancy coffee bars and Mr. Coffee machines existed. And before modern stoves and microwaves were invented..

With an easy homemade cold brew coffee from scratch, even a child can make the adult drink safely at home.

And if your power is out, unlike a pour over coffee, you don’t need heated water.

Below are the easy make cold brew coffee recipe steps to make an organic healthy batch you’ll enjoy. You may even find it preferable to your current way (when life gets back to normal).

Cold brew coffee is the easy coffee you can drink daily if you’re a cuppa joe in the morning type of person and want to be self-sufficient (without electrical machines).

But first, here are some cold brew benefits vs. brewing regular (hot) coffee and how to optimize…

Brewed coffee (or the regular coffee process) yields a more acidic coffee than cold brew in the process.

So if you want a lighter feeling coffee with a medium taste, then cold brew has its body health benefits.

…And why I do organic coffee cold brew daily. 

Organic coffee is preferred because the bulk of coffee is sprayed with pesticides.

So if you’re noticing brain fog or blips in short-term memory has got you these days and you don’t know why, if you drink coffee, then the non-organic coffee could be the offender.

Just something to consider switching to organic coffee for a month to see if you feel a difference.

Organic coffee to buy can be more expensive and slightly harder to source, but you get to ask yourself what your health is worth and if you want to make the additional search effort.

These are just a few organic homemade coffee from scratch (cold brew) benefits:

☕️ You can make and drink cold brew coffee faster than you can wait for hot coffee to brew (and wait for it to cool some).

☕️ Cold brew also has health benefits. It’s less acidic through the cold brew process than regular hot coffee or espresso. This is good especially if you have a sensitive stomach or gut lining, and feel heartburn effects from coffee.

☕️ With cold brew, you may not need to eat your first meal first before your first cup as it’s more gentle and doesn’t need the food buffer.

…Many of us wake up groggy and tired, and we want our coffee first thing. But first we need a soft pillow of food in our stomach, that’s not the preference when you’re not quite awake and ready yet for eating.

So that’s where cold brew ROCKS… and is ready for you as you can make the day before or batches days or a week in advance and refrigerate!

☕️ If you gave up on coffee because it tears up your stomach or gives you heartburn, then cold brew coffee could be a good option so you can bring the healthy drink back. This point can’t be emphasized enough. ‼️

Or if you want a lighter cup of coffee during your day that won’t affect your sleep at night, cold brew coffee could be the way to go!

☕️ Cold brew coffee is great for hot weather days as your coffee is served cold. You make at room temperature and then refrigerate.

Making homemade coffee from scratch at home is also a mindful, relaxing activity. And it doesn’t have to end there…

If you know me, you know I like to zhugh up any food or beverages (probably from my catering background), so I’ll share how I do that too below!

What you will need:

-Ground coffee

-Mesh catcher (with a lip or rim)

-Coffee filters

-Spoon

-Water

-Deep bowl at least 6” high/deep OR pitcher with a large opening almost or just slightly larger than the mesh catcher diameter is ideal (but as long as most the mesh catcher sits inside the pitcher, it’ll work).

If you use a pitcher, you won’t need another pitcher to pour your finished coffee into as your cold brew coffee can go straight into the pitcher and fridge.

Setup for how to make homemade coffee from scratch:

These are the simple items you will need (and probably already have in your kitchen or home) 😊:

Bowl: Find or buy a right-size mesh catcher that works comfortably for your cold brew coffee prep setup, where the coffee filter fits in easily.

Rest the mesh catcher to then rest on top of the bowl.

Set the coffee filter to sit in the catcher as flat or parallel to the table surface as best it can, so you don’t have coffee and water in the filter dripping or tipping over. Then you have your bowl setup.


Simple items you need for homemade cold brew coffee from scratch when your power is out: a deep bowl, strainer, and paper filter.

Or…

Pitcher: You can put your filter/catcher ontop of a wider-opening pitcher. If you use a pitcher, you want most of the bottom half of the catcher to sit inside the pitcher so your coffee brewing doesn’t spill over in the sides.

This is a setup example of how to make homemade cold brew coffee from scratch with a large jar that becomes filled with coffee.

So then you have your setup from one of the options above.

Good job!

Next thing, you can bring on the ground coffee grinds. See what I did there… ground grinds. 😊

I like to make homemade cold brew coffee from scratch in the morning to get a good whiff of the coffee grounds, and as a sensory experience and relaxing mindful activity. 🧡

You can even pull out your setup the day or night before if you just want to make a cup in the morning or a batch for a couple days.

Mind you, the fresh-made coffee will be room temps warmer than when you refrigerate, but that’s actually better for your stomach in the morning when you’re getting your day started.

The stomach prefers room temperature liquids, and preferrably a big glass of plain water first.

And then in choosing coffee types, use ground coffee types. It’s easy to get enamored by coffee flavors, packaging, and brands, but be sure it’s “ground” otherwise they’ll be “whole” and you’ll need to make the grounds.

It’s better to use a mix of superfine ground coffee and a coarser ground coffee so the grounds don’t fall through the filter. Or find one that is just perfect for you and stick with it.

They stay grounded 😉

Now, here’s how to make homemade coffee from scratch:

To start making cold brew coffee, pour your ground coffee mix (about 1/2 cup to ¾ cup coffee grounds total for a large batch) in the filter. Every coffee grind is different. You can use less if you just want to make a cup.

You can start with 1/4 cup coffee grounds to make a cup or two of coffee. These will be the strongest cups from the grounds.

With a spoon, mix the ground coffees up a little in your catcher-filter setup before you pour in water to possibly prevent fine ground coffee from falling through the filter.

Pour cool water over the coffee grounds. Filtered water is good. The cold water is the process secret to keeping the coffee from becoming more acidic (healthy benefit). You can use room temperature water and it will be fine.

After you refrigerate, it will be served “cold brew.”

In the beginning, the water will go through the filter fast and you will get a light brown/caramel trail of coffee water in your pitcher or bowl.

That won’t be the final coffee you’ll be drinking.

But if it does, start over. In other words, get another vessel (or mug of any kind), and pour the cold brew made through a second time. This usually does the trick (or else add more coffee grounds). You’ll get the hang of it with your favorite coffee grinds after a few tries!

When you keep pouring into the catcher-filter, then the darker coffee color comes out that you were probably expecting.

Troubleshooting: If your ground coffee mix sends some of the grounds through the filter or you accidentally spill some grounds in your ready-made coffee, then you can simply start over with a new coffee filter in a second bowl.

The second bowl can catch the second round of cold brew coffee being made that sometimes can turn out better. Pour your first setup coffee and coffee grounds into the filter of the second.

So back on track… from time to time, take a spoon and stir the coffee ground and water in your filter, trying not to have coffee water overflow.

Keep pouring water as it filters down. And if you pour into a cup, watch it drip  darker coffee after the first half of a cup or so.

More Cold Brew Coffee ideas and tips…

You can make and enjoyed iced cold brew coffee that’s different than iced coffee.  Learning the difference between cold and ice is in the preparation and process of making a cup of coffee even thought they can be the same coffee beans and grinds.

And with your coffee grinds, when you’re thinking ahead for tomorrow…

If you want to prepare a cold brew coffee batch for tomorrow and possibly the next few days, add more ground coffee to your setup.

This less potent coffee is good for lighter coffees.

You can make lighter cappuccinos with foam froth after the first two cups of stronger cold brew coffee that you can enjoy as black coffee if you like.

Or add a dash of healthy cocoa, cinnamon, pumpkin spice, or cardamom to change the coffee flavor.

If you make homemade cold brew coffee from scratch, you’ll never again be without coffee on-hand with flavor of your choosing if a coffee machine doesn’t work! And the power goes out. 🔌 It’s a backup plan too.

You can always make your own instant coffee without a machine as a coffee insurance policy 😉

As a planner-at-heart and former catering planner, this gives a sense of relief and keeps the relaxed vibes soaring and the panic anxiety down.

You can also pair your plant-based coffee habit to some great plant-based breakfast ideas to break away from the sugar breakfast habits or adding sugar to coffee. Sugar we know accumulates and works to destroy the biome.

So learning how to make homemade cold brew coffee from scratch and healthy eating together can be a better morning and daily habit. ☕️ Enjoy!

cold brew coffee
Print

Easy Cold Brew Coffee - Without A Coffee Machine (Good for When the Power is Out)

Course beverages
Cuisine American
Prep Time 10 minutes
Servings 2 cups
Author Brandy @ Healthy Happy Life Secrets

Equipment

  • 1 regular paper coffee filter
  • strainer for filters
  • pitcher or large deep set bowl

Ingredients

  • ¼ cup ground coffee for 2 cups of stronger coffee
  • water

Instructions

  • After you have your cold brew coffee setup, pour water through. The first 30 seconds of water pours will go right through. Examine if you're getting the medium to dark brown coffee color (if not, pour the watered down coffee into a temporary glass and then pour through again). If the coffee is too finely ground or too coarse, this can happen. If too fine, add/blend about a tablespoon of a slightly coarser ground coffee to the filter. This should even out the coffee grinds.
  • Keep pouring water and pour your first cup of coffee (will be the strongest). You can keep going until the cold brew coffee is weaker strength or turning lighter color.

Pizza Crust Recipe (How To Easy Step-by-Step Make)

Pizza crust is easy and fun to make as homemade pizza dough. And it can be made with any gluten flour like bread flour that I love as more universal to use. You can make other bread types and not just pizza like with 00 flour.

Home oven made Neapolitan style pizza crust with mushrooms.
Neapolitan style pizza crust that looks wood fire oven charred, but is baked in an apartment oven.


Below you can learn step by step how to get the pizza crust you want including a Neapolitan style crust that’s popular in restaurants with wood fire ovens… but that you can make even from an apartment oven! 👇

…Without waiting for one to be delivered.

This is impressive to your friends and learning how to make your own pizza crust is rewarding. 😋

…Pizza can be a healthy meal that’s filling for all ages. I have a homemade pizza recipe you can try along with all the detailed steps from scratch below…

And you can learn techniques from me, a once-upon-a-time  pizza maker teenager for 4 years who worked at the busiest Domino’s Pizza store and franchise in the world 😊… yes, in the world. 🌎

Back then, we would crank out over 200 pizzas an hour on any given Friday or Game Day Sunday. This was when the 30 minute guarantee still existed and then became a well-known business case study.

It was the funnest job I ever had… and very memorable decades later where I use my pizza learned skills to make home pizza today. Like these thin crispy or regular chewy pizza crust styles.


Crispy cracker pizza crust example.
Thin and crispy cracker-like crust.
Thick, soft chewy pizza crust.
Thick chewy crust more like a pan-pizza style with a toasty bake.

And which btw you can make your own special pizza masterpiece from start to finish, faster than you can order a pizza and have it delivered.

So let’s begin…

First, you don’t need a pizza kit.

To make homemade pizza, you just need two essential simple ingredients (flour and water) you already have in your house (or can easily get) to make the dough.

Plus 4 ingredients if you want a bigger crust rise (flour, water, instant or active yeast, and salt). Or you can let room temperature act as the growing yeast (like in sourdough).

Homemade pizza needs no long prep time like pulling out ingredients in advance, like in other baking recipes. So it can be making and baking EASY.

It also has an advantage over breadmaking: you don’t need to wait for hours for the pizza dough to proof.

Making homemade pizza dough needs only a few minutes. You can simply prepare, bake, and enjoy in less than an hour.

If you’re not a planner this can be a winner.

But then again, you’d probably buy store-bought or order delivery. …but then that would be no fun, and you wouldn’t get the healthy, homemade pizza.

So I’ll assume you’ll give it a try at least at some point. You’ll be glad you did! 🎉

Here’s how to make homemade pizza…

Before you do anything, there is one area to plan. You should consider what you’ll add on top of your pizza crust.

If you load with gobs of cheese, then you’ve added fat and dairy (…that isn’t always a bad thing as cheese has vitamins, calcium, other minerals, and satisfies cheesy craving…).

For a healthy recipe, use fresh shredded mozzarella cheese or sliced buffalo mozzarella like on a Margherita pizza. It’s one of the healthier (less greasy) cheeses if your stomach is sensitive and end up sopping up the cheese grease.

Now you’re ready to start and pull out all your homemade pizza dough ingredients.

Instant yeast. I buy the small Red Star packets. The yeast balls look like microscope-tiny, perfectly round khaki brown color beads.

Water. 1 cup warm or room temperature tap water is fine. You may want to experiment as you know what they say about the famously delicious New York pizza crust (the rumor is that it comes from the water).

I’ve used seltzer and filtered water for pizza crust, and I find tap is still the best all-around.

Flour. You have options. Bread flour is the one for Neapolitan-style airy pizza. You don’t need special “00” flour even though you’ll find many recipes with this.

With bread flour you can use for other breads and it’s generally less expensive.

And if you aren’t doing an airy crust, other options are:

You can use a mix of regular or all purpose flour with whole wheat flour (that has a higher bread protein content). Whole wheat flour dough will be less sticky.

And if you use semolina flour for your bench flour, then that will help your dough from sticking to the metal pizza pan you use.

Another reason to choose whole wheat flour is the slightly higher, healthy fiber content. There are also gluten-free options.

In total, use about 2-1/2 flour total, but you will need more when you’re working with the dough.

You get better with practice and experience. You may be able to later eyeball how much you need.

Salt. 2 teaspoon table salt. You can use a little more salt if you use sea salt or if you plan to use fresh mozzarella (or buffalo mozzarella) that doesn’t have as much salt as some other cheeses. Kosher salt or a coarser salt will work well.

Optional: 1 tablespoon EVOO (helps with adding taste and less sticky dough).

Here are the 5 easy homemade pizza crust steps (broken down in detail):

Step 1: Make the pizza dough.

Add the yeast to water and let it settle/dissolve for about 5-10 minutes. The mixture will have a milky color and consistency. Set aside.

Separately, add the flour or mixed flours of choice to your mixing bowl (I like half and half whole wheat and regular or all-purpose flour). Add 1 teaspoon salt or you can use 1-½ teaspoon sea salt (if you want to use non-iodized salt as I use). Then add EVOO if you’re using, and the water-yeast mixture.

Dough by hand method: You can make the dough by hand, and if you do it that way, I’d recommend creating a neat flour mountain on a shallow baking pan where the flour won’t stick to everything.

Using semolina flour as a lightly floured surface is a preference.

Then add a dip in the middle of the mountain where you would add the liquids, like you may have seen or done at home making pasta the old-fashioned way (except there are no eggs needed in pizza making).

Dough with machine (recommended): It’s easier to use a mixing machine with the dough hook, like the Kitchen Aid mixer (I have a pink Cadillac color one… Paris Hilton and I have something in common, lol).  

With a machine, in a few quick minutes, the dough should be ready. You’ll know when it’s done when it’s not too dry, and not too wet, and has some good elasticity. Pizza dough is forgiving and is only part of the pizza pizzazz (say that 10 times).

Remember to scrape down the flour from the sides of the mixer. As you’re waiting for the dough to finish mixing, generously flour your pan.

I recommend a mix of coarser semolina flour and regular all-purpose flour for the bench flour.

When it’s ready, pull the dough out of the bowl. You’ll be able to form a small ball with the dough, and you may need to add more regular flour on the outside if it’s too sticky.

Form a dough ball and let it rest on the pan you’ve floured. Leave it sitting or resting at room temperature for 10 minutes.

Note, you don’t even need a plastic wrap or another container you’d have to clean like in bread making!

Step 2: Prep the toppings and the sauce.

While the dough is still resting, I get the topping ingredients ready.

I open the tomato sauce can (many restaurants use San Marzano tomatoes that I recommend), and I add finely chop anchovies with a serrated knife to the sauce as my secret ingredient (that’s not a secret anymore).

It adds salt and another flavor dimension (or you can just add a teaspoon of salt to the sauce if you prefer a saltier-tasting pizza).

Tomato sauce will add sweetness back. You can make your own tomato sauce but since it’s not the star of the dish, canned will work just great.

If you want a chunky style, Marzano tomatoes are plum tomatoes which are the kind commonly used in Italian restaurants. Or else use any tomato sauce or paste.

If you are using fresh cheeses like buffalo mozzarella, slice the cheese into smaller bits.

And if you use basil leaves, wet them a little like with a wet paper towel as they will settle a little better on the pizza. Alternatively, you can use spinach leaves like I use as healthy-alternative inspiration.

For any other wet ingredients like black olives, drain any excess liquid and dry them with a paper towel if you need to (as that would be a damper to your pizza… sorry, I couldn’t resist. Today is a fun day.).

By the time you finish this step, your pizza dough should be ready to work with.

A quick back story: I used to be a pizza maker (or pie maker as they referred to) as a teen before I could drive, and for the busiest Domino’s Pizza… not in the country, but in the world (yes the world! that is becoming smaller every day). 

I stuck around for 4 years until I took on other food-related jobs in college.

So, I still make the dough the way I learned from the modern pros!

We used to crank out 300 or so pizzas in an hour as a team during the busy football nights, and during the 30-minute guarantee years (you probably don’t remember!).

Our heads were down but it was fun energy in the shop![OK back to the business of making your homemade pizza]…

Equipment you need:

-Pizza pan. Any metal pan will work.

-Pizza cutter or pizza wheel (optional)

You don’t need a pizza peel.

Step 3: Flatten the dough into the pizza pan, to get it ready for the oven.

You can turn the oven on to pre-heat or you can wait if it’s your first time or so baking pizza.

Regarding temps, if you want to use 425 degrees (Fahrenheit, just to clarify for my Brit friends), that will give you a crispier bake like a pizza oven would.

If you prefer to cook under 400 degrees because it’s a hot summer day or your fire alarm can go off in apartment living, then you can bake with standard 350 degrees/180°C.

So anything in between 350/180°F and 425/218°C degrees will work. Remember pizza crust is forgiving (and I dare say easy).

OK, so here’s how to make the crust…

Fancy hand way: Take your dominant eating hand and place ontop of your weaker hand. Put your dominant index finger and middle finger below your weaker hand index finger and middle finger (crossing your thumbs). 

Or…

Simple hand way: Place your hands side-by-side, index fingers touching.

Either way, using your fingers, put pressure into the dough as you’re making hand imprints. Use enough pressure to make a dent, but make sure you’re not making holes in the dough, and it’s thick enough to hold the amount of sauce you plan to use.

If you get a hole in your dough, simply start over like you would with Play-doh. Roll the dough back into a ball and then flatten the ball with the palm of your hand (that you can coat with a little more flour as needed).

Push down on the dough and make handprints on every part of the dough.

Keep turning the dough 90 degrees while you move along and your hand is at a 90-degree angle (or at 3 o’clock clockwise or 9 o’clock counter-clockwise if you like clock descriptions).

For a right-handed person, you can turn the dough clockwise (and counterclockwise for a left-handed person).

Then flatten down the middle of the dough with your fingers and palm of your hand to get out all the trapped air bubbles.

Do this once and then flip the dough to the other side (back side), and do the same process. Add more bench flour underneath the dough as needed.

Keep working with it until it’s the right crust size for your pan or toppings.

If you want a super smooth dough crust without your handprints or blemishes, turn the dough with your gentle palms while lightly kneading, smoothing, and stretching the dough with palms (like you’re sanding it down).

I skip that part as a handmade-looking pie to me is part of the fun.

For basic round or irregular shapes, making the dough can take one minute or less with practice.

I know my instructions are descriptively long, but once you get the hang of it, it can be fast and easy!

In the beginning, take your time learning. It can be fun and maybe even a ‘lil therapeutic especially if you have some good music going on!

And, then here’s another important step/option that I recommend:

When you’re satisfied with your pizza dough that will be your topping base and crust, pre-bake the pizza crust first (without toppings) especially if you are using lower baking temps.

This is necessary if you are using lower 350-degree temperatures, but you can skip this step if you want if you use much higher temperatures.

I use the prep-baking crust waiting time to clean off my dough hook, mixing bowl, and other supplies I’m finished with, so I have minimal cleanup later.

After 10 minutes (a magic number for pizza step waiting times), pull the slightly toasted pizza crust out of the oven.

Let it cool for a few minutes, but you don’t have to wait until it’s room temperature again.

Then you can add your sauce with a spoon or ladle and spread evenly starting in the middle and applying less and less pressure towards the crust.

That’s the way we use to do it in the pie shop 😉

Btw, you can make other sauces like pesto, barbecue, or balsamic (that are other personal favorites of mine)! Maybe you too as you get to be a pizza pro?

…But here I’ll keep it super simple with the tomato sauce.

Wheat pizza crust example.
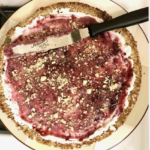
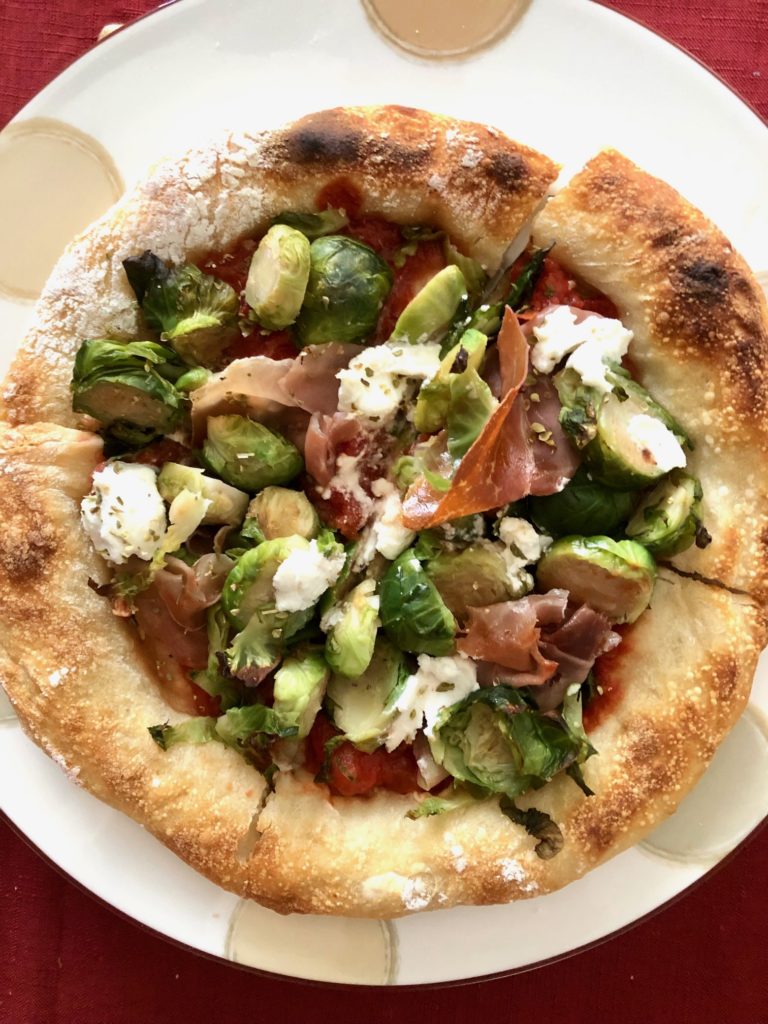
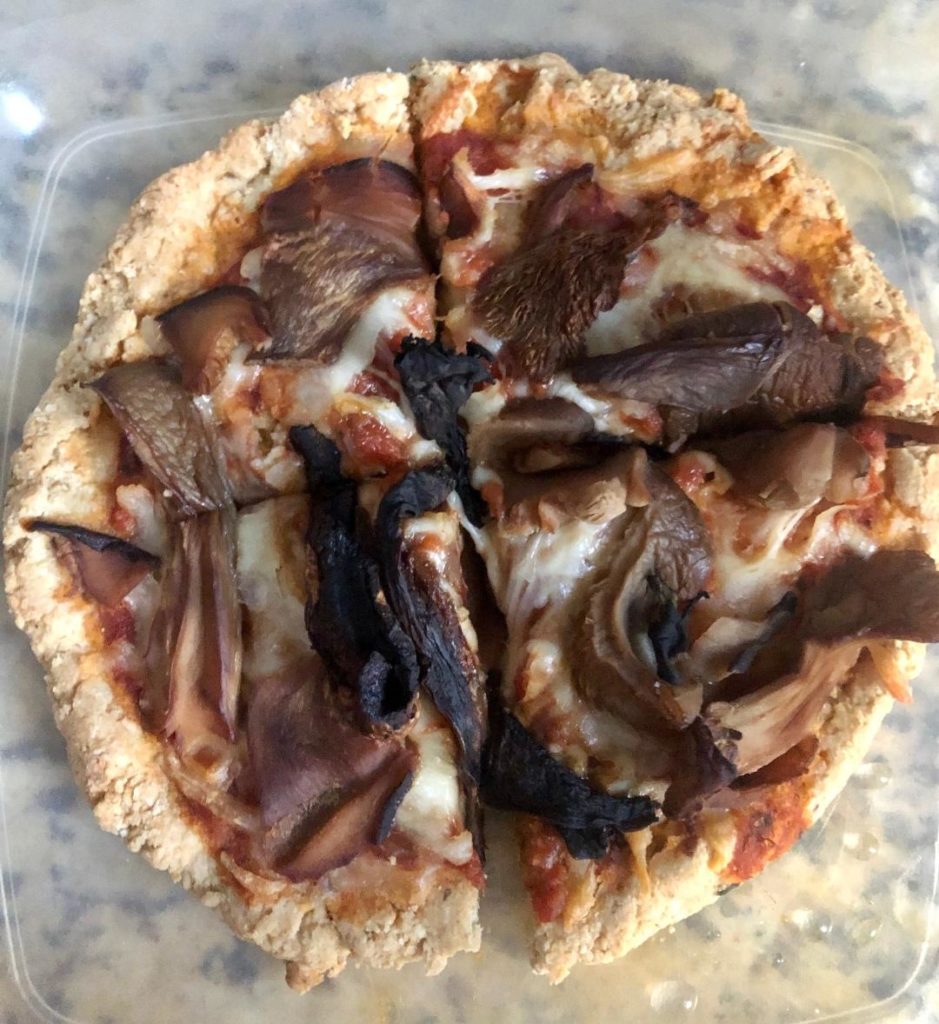
Step 4: Then lay your toppings on.

The secret for better baking through is to put the quickest to cook items on the bottom. So any thin, flat veggies (like black olives and mushrooms) and flat meats like anchovies, and then add the lumpier foods on the very top layer.

If you use buffalo mozzarella (the white ball kind), treat it like a topping instead of cheese. For shredded cheeses like regular mozzarella cheese, add as the first layer over the sauce.

If you want to use tomatoes that aren’t finely diced (tomato concasse in fancy Italian restaurants), bake them on the side in another pan as they could be too wet and create a mess on your pizza in the oven or prolong your baking time (sundried tomatoes are ok on the pizza).

For any meats, cook them through in advance especially if you’re baking your pizza on 350 degrees.

Now you’re in the home stretch! You just have one more step.

Step 5: Bake your pizza (or cook your pie 😉).

When you’re happy with your fully loaded Picasso-pizza art, put it back in the oven on your lowest or medium rack, and if you’ve pre-baked the dough then you don’t need the pizza pan anymore if you want.

You can just set your pizza right on the baking rack. Sometimes I leave the pan baking just depending on the crust I want. Try it both ways.

And then bake for another 20 minutes to your crispy done liking (all ovens are different and depend on your dough thickness, ingredients, etc.).

Check the crust bottom to determine doneness and if it’s not yet done, but toppings are done or shriveling/drying up, then add a piece of aluminum foil on top and keep baking until the crust is done.

Don’t leave the pizza in there after you’ve turned off the oven, like you could in baking other goods, as this can dry out the toppings and the fiery heat will be gone from the crust which usually takes the longest to bake.

When done, pull out of the oven. Presto! Let it cool and then cut and enjoy.

If you want to add individual flavors, like if you’re feeding a larger group, you can have side parmesan-reggiano cheese, oregano spice, red pepper flakes, garlic, drizzle or olive oil, or caper ingredients (just to name a few ideas)!

…And then you will have 100% impressed your friends with your rock star homemade pizza baking skills ⭐️

The sky’s the limit! And while you’re waiting on your baking oven, you can do a few baking yoga moves, if you’re so inclined.


shittake mushrooms homemade pizza.
Shiitake mushrooms and apple cider vinegar cracker pizza crust.

And then when you’ve made easy pizza crust, you can make your own mushroom neapolitan wood fired pizza from your home oven.

homemade wood-fired pizza with mushrooms recipe.
Print

Neapolitan-Style Pizza Crust

You can make this Italian style pizza crust at home with mushrooms or any of your favorite toppings.
Course lunch, Main Course
Cuisine American, Italian
Author Brandy @ Healthy Happy Life Secrets

Ingredients

  • 1 cup bread flour
  • 1 tsp salt (coarser kosher salt works well)
  • water (start with 1/4 cup and add more)
  • 1/4 tsp instant yeast
  • toppings (e.g. mushroom, buffalo mozzarella cheese, and sauce).
  • 1 tbsp extra virgin olive oil
  • bench flour (e.g. semolina flour or bread flour)

Instructions

  • Make the dough. Add flour, water, salt, and yeast ingredients to a mixer bowl or bowl if you are making the dough by hand. You will use about 1/2 cup water per 1 cup flour.
  • Knead the dough, until a cohesive pizza dough ball can be formed. With a bread dough hook on a mixer, this will be about 5 minutes on high, 7 minutes on a medium setting (and about double time by hand).
  • Add some olive oil to a plastic container with a lid.
  • Place dough in container and let proof for at least 2 hours. Can be left overnight in the refrigerator and be sure to not let the dough dry out.
  • Then add some bench flour to your pan to prevent sticking (semolina flour is classic for Neapolitan pizza but any flour will do). I suggest a baking pan with a Silpat setup ontop to prevent the pizza crust from sticking to the pan.
  • Flatten the dough into the shape you want with your hand and fingers. Avoid the crust edges to create a more airy crust.
  • When you're happy with your pizza shape pre-baked, then place in center of the oven bottom rack and bake for about 20 minutes on 350°F/180°C oven. The pizza crust will not be finished but it will be hard enough on the crust bottom to be able to broiled without a pan.
  • Add sauce, cheese and pizza toppings.
  • For the airy crust and charring pizza crust marks, broil your pizza. For preparation, remove Silpat (if using)and your baking pan, and slide the pizza to the top oven shelf at least 6-8 inches away from the top of the oven where the oven heat will be coming from (not the bottom like baking settings). In most common ovens, the 2nd rung down for the top adjustable metal rack works well.
    Turn on the broil (caliente hot!) setting for 2-5 minutes until crust is slightly charred giving the wood-burned fire "effect." You'll see the heating source from the oven lines above that could take a minute to heat up (indicated by the top red heating element).
    Safety tips: Be careful and watch the broiling the entire time with the oven light "on," so you can be fully safe. Do not open the oven door at any time that the broil setting is fully heated or turned on. And do not turn your pizza without turning the broiling setting off and waiting for the oven to cool down before opening the oven door (and then turning back on). Test your oven for the best broiling time for your pizza crust, and do not overcook.

Notes

You don't want your dough to dry out, so be sure to add enough water so it's more like an elastic smooth skin versus stringy dough. And be sure to cover the dough.