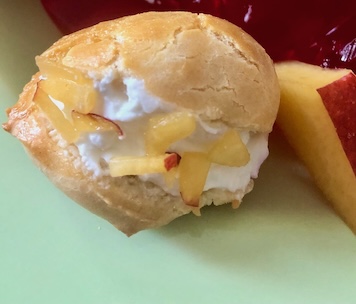
Peach profiterole like this low-sugar one is one way to crush the day.
…And sometimes our pride is bruised, but not this peach bite that’s delicious, filled with Greek yogurt, and easy to make.
Along with a happy peach profiterole recipe below, I share some encouragement so you can crush life’s negative situations.
Life doesn’t have to be peachy. It can be filled with a joyful bowl of peaches.
…As life should get better as our perspectives get better if and when we grow.
When we were younger, we didn’t know what authentic joy meant. A joy ride had a different meaning (than today’s joy in life’s ride). And we didn’t know the magnitude of pride’s powerful grip.
Especially if things feel heavy today.
…Like the world is against us and we’re pushed up against a wall sometimes.
That’s part of the process in our growing, and gaining wisdom in our individual life journeys…
Wisdom is a choice and its growth is fed one choice at a time.
With wisdom we know we’re empowered and have much more of a say in what happens to us than our circumstances.
When we let go of some things, we are in more control.
We can speed up our growth by removing the inner rocks and blocks that stand in our way.
…But not these ‘lil peach profiterole bites!
Today, smoother sailing and small pebbles in those same areas can become our new normal if we allow in the better perspectives, attitudes, and higher thinking ways.
And we make new habits.
Often our ego pride protects us from believing that we could be holding ourselves back.
That’s when we can refer back to allowing in our loving and higher thinking ways.
When we create space in our minds, we can form new self-serving ways.
And maybe a distraction like making these cutesy peach profiterole bites are just what we need?
Low-Sugar Peach Profiterole 🍑
1 cup total flour (a mix of bread and all purpose flour are recommended)
1 tbsp butter
1/4 cup milk
1-2 eggs
1 ripe peach
thick plain yogurt or Greek yogurt
On stovetop, turn on medium heat. Add flour, butter and milk and make into a ball.
Let cool for about 10 minutes and add in egg.
Bake on 350°F/180°C for about 30-35 minutes.
Let cool and fill profiterole with peach and yogurt (a delightful pairing combination!).
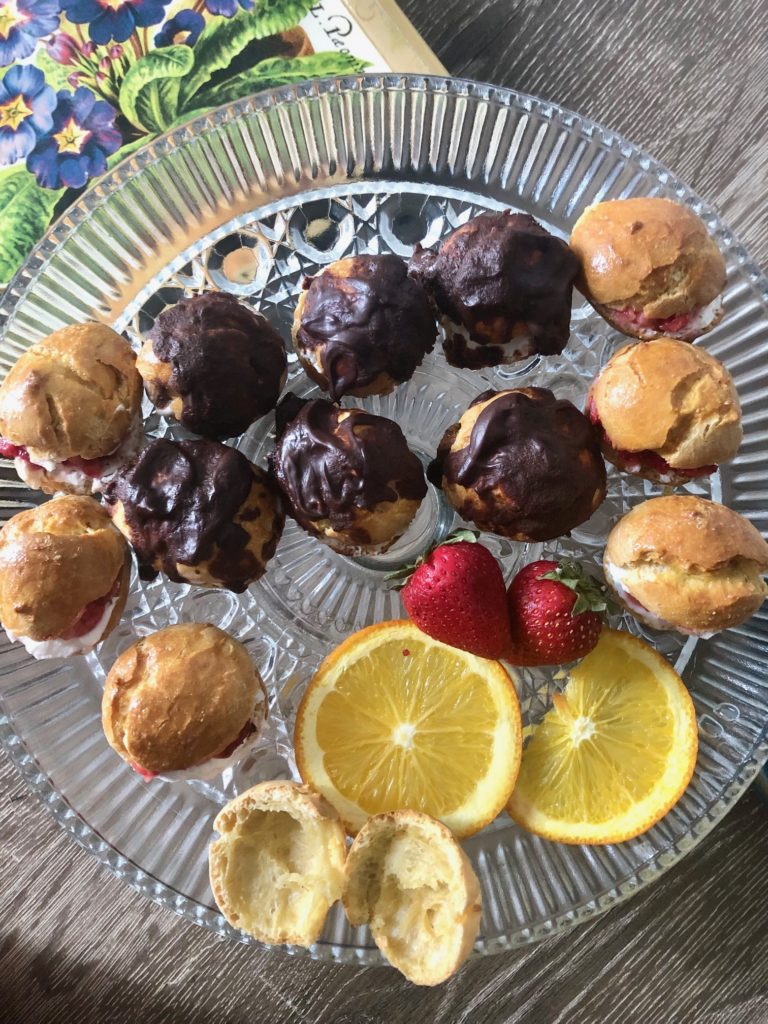
This is a tasty profiterole bite that you can watch pop up in the oven, and then on a plate and in your mouth.
Course Dessert
Cuisine American
Author Brandy @ Healthy Happy Life Secrets
Ingredients
1cuptotal flour (a mix of bread and all purpose flour are recommended)
1tbspbutter
1/4cup milk
1ripe peach
1egg
thick plain yogurt or Greek yogurt for filling
Instructions
On stovetop, turn on medium heat. Add flour, butter and milk and make into a ball. This should take just a few short minutes.
Let cool for about 10 minutes and add in egg. Tip: if the batter looks liquid/runny and does not hold a soft shape for a profiterole, add an additional egg or a fraction of another egg.
Bake on 350°F/180°C for about 30-35 minutes until a warm brown.
Let cool and fill profiterole with peach and yogurt (a delightful pairing combination!).
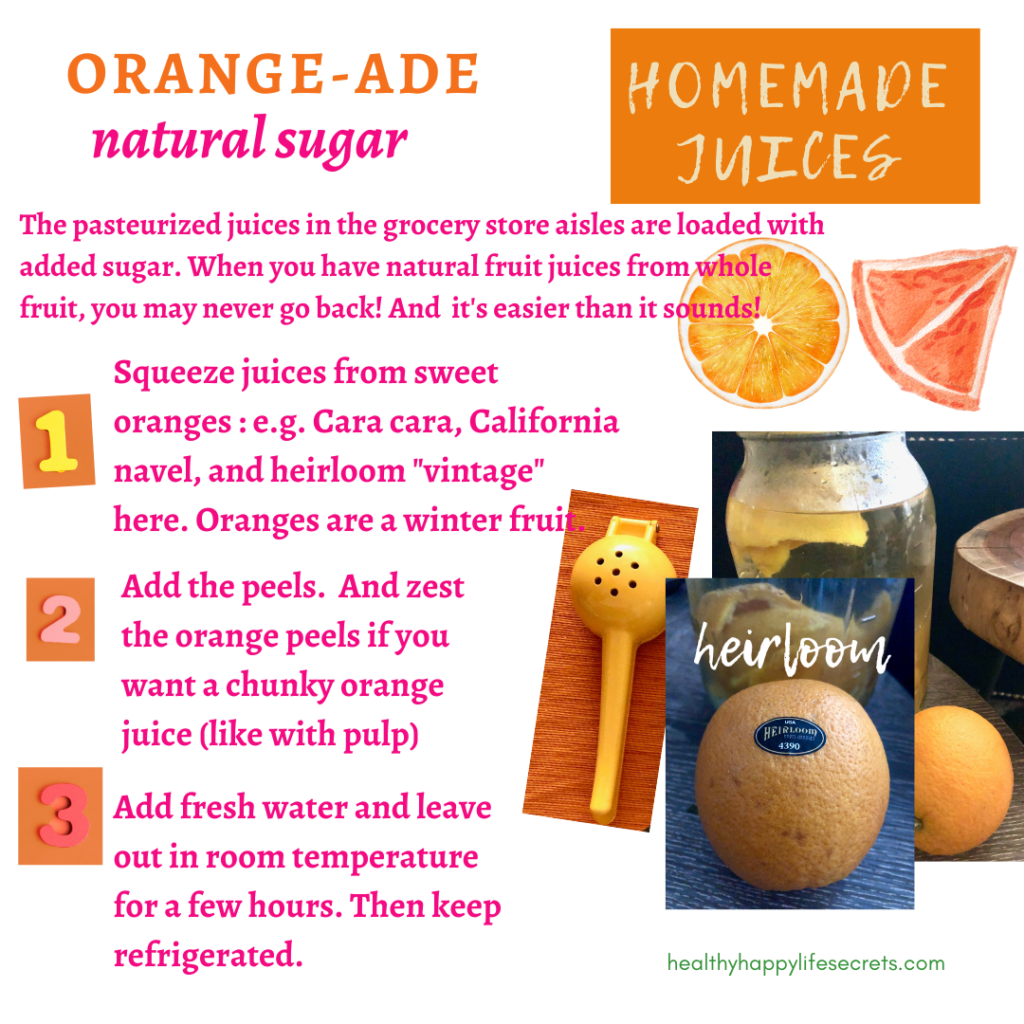
Homemade orange juice is a healthy OJ option without refined sugar, a plastic bottle, or wasting any part of the orange that attracts fly critters… this could be your new way – o-range you glad!? 🧡
Morning meditation thoughts matter! And, if you tuned in last week, I gave a calming idea for night meditation to doze off to. To keep the balance this week, I have a morning meditation routine idea to empower and inspire your healthy mindset and emotional well-being.
The morning meditation begins when you have those first few awakened thoughts… and maybe your body hasn’t caught up yet. Like, we haven’t stretched our wings yet, even though we know the early bird catches the worm. 🐦⬛
We can blame that on our morning head that often comes with messed up bed head hair. If you don’t have those assets, then consider yourself blessed in the morning. 🧢
But if you do (that’s most of us), then changing attitude is the way up. We know what’s up from down even if we can’t yet think or speak logically.
…And considering some of us (Kaphas) are naturally Sleepyheads or (Vatas) inconsistently wake up feeling tired or awake with no rhyme or reason.
…Tired or not, you want to rewrite the negative thoughts especially if you woke up on the wrong side of the pillow.
And in my early meditation years wayback in the time machine when Y2K was in our sights, meditating was thinking thoughts and seeing how those thoughts feel. ❣️ …decades later, that’s still how I meditate.
The goal is to come out with better ideas to implementsolutions and workout my creativity genes… and not so much focusing on stress-reduction and wellness that meditation today has primarily become.
…And btw, that Pitta and Kapha minds are naturally better at this than the Vata minds.
…And epic ideas also lead to less stress if you wanna look at it that way in attitude. 😉
Your Attitude
Because attitude is everything!… it’s a choice, not a feeling.
You decide that you do X or Y that have very different decisions. And if you choose the first choice, there is X consequence (and choosing Y has the Y consequence). Different consequences and results is what you have to live with mid-week and in your night meditation. So it snow balls with compounding effects.
Beginning with the end in mind (…thank you, Steven Covey!), focus on your outcome consequence so you can show your mind at the moment how different life can be by your thought choice, especially in those groggy early morning moments.
The best choice is always the positive and loving responses in any meditation method you choose.
Even if the situations you faced in your past life weigh heavy, today you rewrite what wasn’t right and that you aspire your future to be. And that gives you a new today and future.
You have everything you need to be happy.
And your attitude will steer your decisions and outlook that determine your future.
Choose to restore your thoughts starting with morning meditation.
Do it consistently every time as best you can. We’re all imperfect. Don’t you wish everyone in your life with expectations would say (and mean) these 6 magic words: just do the best you can. That should take the pressure off.
Say that to yourself as your deepest critic.
Come out peaceful.
Then develop a better mindset belief today that creates better habits.
Consider that even if you don’t know what that is, you believe it so because you’ve consistently pulled a rabbit out of the hat in those areas, so today is no different. Believe in yourself.
As part of our morning meditation routine, we can change our beliefs starting with ourselves.
You can do this with positive messages you listen to, uplifting music, and quote inspirations.
You won’t hold onto a positive and a negative belief for the same idea at the exact same time (as our brains won’t allow the confusion), so we have a small time gap to make a choice.
In the gap, make the positive up-choice easy.
And we delay our lesser knee-jerk thoughts and responses. And if we need to take action like write an email or message back to someone, we wait until we can re-write with the positive emotional undertone.
We can’t take back our words ever, and when they’re written (especially). These days on the whole, we’ve become a kinder more sensitive society, so we’ve been trained to be more thoughtful.
And re-wording to a positive narrative helps us receive kind back in kind.
Lessons are a Learning Opportunity
And if self-control in any shade is a struggle today, think of the X and Y consequences I mentioned earlier.
Fast action thinks there’s one consequence, but that choice is a gamble…
Remember times when acting fast backfired, and if a timeout would’ve been called, that second thought would’ve given a better play (consequence).
Slowing down the ball play in your life, you may have discovered this. And in mine, I accidentally missed a work beat to a problem at hand and learned it was ok, and: leave a problem long enough, it solves itself.
That sounds reactive, and not proactive for productivity. But choosing to not do anything until you know what next step to do is the wiser decision with a better outcome.
Offering a quick fix can require cleanup.
So stick to your inner wisdom.
Don’t be in such a hurry to put fires out (unless there’s a real fire 🔥).
Make your stamp of approval mean something aligned with your thoughts… and maybe ones you’ve noodled out in morning meditation…
Let your session permeate the day as the theme of the day.
Listen and weigh your thoughts as a learning opportunity. Build on permeating better thoughts one day at a time. 💭
Night Meditation for Healthy Mindset Growth with these starry night and dreamy cloud pop tarts may be what you need. Recipe below.Print Recipe
Night meditation inspiration with starry clouds and pop tart food inspiration bites ⭐️ ☁️ Recipe below…
Growing up, we learned wrong ideas that didn’t help us (that wasn’t our fault)… and today we can rewrite those thoughts with starry night meditation ⭐️ (…I have a bright mind reset idea below).
It’s good for us to know where all the muck began in childhood. If our caretakers or parents were part of the Lost Generation or older Baby Boomer generation, we know they didn’t have the self-aware knowledge we have today.
…They didn’t grow up with vulnerability as an acceptable way of life, so their lack of evolvement in those passed on areas is not their fault. Weakness used to be frowned upon and taking unacceptable initative and action (that’s acceptable today) would have been seen as scandals and drama back then.
Often growing up in those zeitgeists, people stayed close-minded and endured to their mental health demise. And what hurt mental health in individuals back then would still hurt today, but now we have society awareness and acceptance to be grateful for. 💝
And maybe your parents, grandparents, and caretakers still live with that mindset that they won’t shake off.
One book example that shares how trauma affects a family’s history is Maya Angelou’s Why the Caged Bird Sings. There we get an inside glimpse at understanding how toxicity can impact a person and influence others. .
So, we know where it comes from in passing generations, but that doesn’t help us navigate our next steps in our own complicated mind mess baggage.
In our today lives, we can only be in charge of our awareness. And in doing so, we forgive others and we don’t let those old ways infect us. We live our new normal way because life is meant to be joyful and rewarding even with the bumps.
And for today’s generation, we know that holding onto personal trauma in any form is self-destructive (and sabotaging at the least). It hurts us and in the relationships we have by what we intentionally and unintentionally do.
Unintentional damage can be done at any moment. Until we confront and restore what’s not working well… oh, and even better finding out the wound root cause… that’s when we lift our hovering clouds. And that gives us new life. Bringing light to darkness is the way out.
We work on healing our old brain that doesn’t forget or quit even after we’ve long moved on.
And if you didn’t have a perfect childhood (...yes, that’s most of us) or if you did live in one you want to relive, you’re still living in an imperfect world around you.
The imperfect reality is freeing because then you know that you lost something in translation that can be uncovered (inside you ❤️), once you breakthrough, that will make life even better in the mind-body connection. And then when you’re sensitized, you can get in the healthy habit of restoring your mind-body every time you feel your thoughts are off.
If you haven’t discovered your hidden sides hindering you from your best, this week is your time to explore. Put down the usual tasks or at least a few hours.
Making self-discovery a priority in your life saves you time from making the same mistakes. You improve your quality of life without having to spend a dime.
And with an inward deep-dive plunge, you can do this anywhere on this planet. Everybody has access.
🗝️ Reminder: you only get to do this life once and the sooner you uncover the hidden spots created by wounds, the more you get to live free for the rest of your life.
…So often we seek ways to gain external freedom away from our current life or work life, and for a better future, and we ignore what’s closest to us that’s also the most impactful… our mind freedom that we can change at any moment if we wanted to and know how.
And if we want to and don’t quite know how, night meditation is one of, if not the BEST time. 🕦
Because as you’re about to drift off or when you’re tired, you get closer to the Theta relaxed brain waves. Your conscious mind is less active… and your automatic and subconscious brain is more receptive. And we want to influence our back office brains as much as possible. 😉
So… to mind reset with night meditation:
Start with witnessing your thoughts and note when you felt inferior or less than during the day. Some call this the Impostor.
On any day, by midday, chances are you’ve come across self-sabotage thoughts already. And by night, you can scan for the thoughts in retrospect that you had in the day.
Think of what you have to gain if the worst did happen… maybe it’s more time on your hands or you allow space for new opportunities to come in as closed doors are shut.
…That’s mind freeing. Doze off with those positive and meditative-worthy thoughts. Get into your night meditation jam as a healthy habit that calms you to sleep.
And you can let that night meditation be your every night where you re-write your thoughts one day at a time. ✨
Make your pastry dough. use light ingredients (low sugar and butter) for a lighter pastry.
Roll our pastry dough to about 1/4 inch to 1/3 inch thick.
Use cookie cutters to cut out shapes. Cut out two per pop tart.
Add filling like raspberry jam or crushed fruit.
Add the second cut out dough pieces to the top and for "a filling sandwich." Use a fork to imprint and clamp down around the edges.
Bake at 350°F for about 25 minutes or until golden brown.
Prepare your glaze. Mix fresh raspberry and a 'lil jam to make more smooth consistency. Get your raspberry jam on! When pop tarts are cool, smear glaze on tops and add a mint leaf or your favorite green zhugh element.
If you like these, I invite you to check out the healthy whole wheat raspberry pop tarts and peach profiteroles
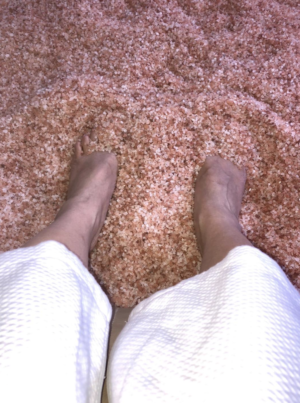
Pool meditation is underrated. And so is sea salt therapy especially for cooling Pitta.
Pink Himalayan sea salt therapy for cooling.
One of the intentions of Meditation is to quiet the mind that’s always running. And that’s how I came to discover pool meditation.
In any meditation, the peace is in the silence. And I have a pool meditation idea that worked for me… and I’m passing on to you in case you want to give it a try!
BTW, I am the first to admit I’m not a good half-conscious meditator. I prefer to silence my mind awake fully conscious and eyes open. And whatever works for you, works!
Specifically isolating the mind’s ego is a good goal for your meditation 🎯
…Because we’re stuck with our ego for life, and good or bad, whether we’re meditating or not.
And our ego is a good part of why life goes back to the way it was after the recent meditation effect gradually wears off. Even if that’s just ennui (boredom) that the ego can turn into woes-me.
When we go back to our lives from peace and meditation, the ego snaps right back into active mode. And it wants to be right (not necessarily happy).
So it’s a great idea to enhance the calming meditation effects and have it last longer.
I tried this for the first time years ago when I was practicing how to be conscious of the mind-body connection.
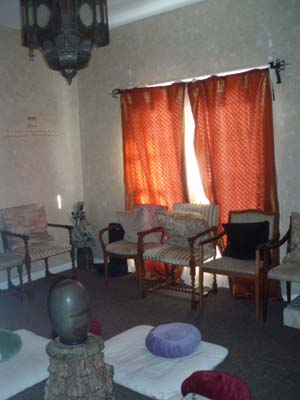
…Long before my first meditation experiences (when photos were fuzzy and taken from snap cameras 😉). Like traditional meditation, we could sit still in a chair or Indian-style sitting position on the floor.
Meditation Room at the Chopra Center
And today for any of us, ongoing calm can be the day and every day when focused and engaged in the moment (that’s part of our modern day self-awareness movement).
And long before my first meditation experience, I stepped into this calm discovery decades ago in an indoor swimming pool… 💭
In one temporary corporate job I held many moons ago, there were two great job benefits. The first one was leaving at 5 pm that was not a common occurrence in any modern work in the Western world. You probably know what I’m talkin’ about!
And the second benefit (and first ever perk for me) was use of the indoor pool attached to the conference center I worked in.
That summer, every weekday at 5 pm on the dot I got excited about my day change. I jumped into my swimsut and I transformed into my meditation calm.
The first few minutes in the pool cooled me off (both in mind and body). And the longer I stayed in, the more calm I felt. Even on the drive home I could feel the stress of the world melt away.
I still felt alive when I got home, that’s not the usual feeling from an exhausting work day around work people. And on some days I had a second job to go to. I had caught my second wind in the pool environment.
I didn’t need any special breathing techniques or calming meditation narration. The pool created a naturally calming effect on the Pitta summer side of things that’s heightened in the heat.
When you step into a cooling pool, it does your body good. Your body recognizes the environment as healing. Yes, it’s a healing pool of water. And our bodies are mostly water, so it’s natural osmosis.
You cool down with the shimmering body of blue water around you, and take yourself out of the usual dry earth we’re mostly around. Your mind can travel a million miles away from your life.
So it’s also an escape. 💭
And that’s how calming pool meditation can be for you where you dip your toes in this tranquil setting. You slip away from the earthly troubles and enter a new realm. Not to mention the blue ripple color is mesmerizing, serene, and good for eye-open meditators like me (…and maybe you too 👀).
You get a part two in your day like you’re starting a new day in the same day. And sometimes a start over if the first half wasn’t so good or relaxing.
Some cool pool meditation tips:
Sit by the pool steps to start with so your body is partially in the water. Then gradually enter the pool water. For indoor pool meditation, I like to hang along the pool’s edge like I’m reading a book, but I’m actually reading the calm in myself. I’m just chillin’ and forgetful of time. 😊
You not only cool and calm from stress, you work on letting go of those negative thoughts that your ego feeds you non-stop throughout the 9-5 day. So you do yourself healthy good.
Also, pool meditation only works well in a quiet pool setting. Not an outdoor pool with splish splashing kids playing or a pool class with instructor and a headset.
You’d be better off under the shade of a tree or in a cool spot inside, but it won’t be the same as an inside pool. Hotels usually have these indoor pools that are almost always quiet.
…Then when you get back home, capture the way you felt.
This is an amazing power and tool that you have control over. You don’t have to wait until the next free day or moments you have. You just reset yourself in that pool calm place in your imagination.
Your body may even cool down just from the thought. That’s the healthy power of the mind-body. 🌱
You may even want to have a blue wavy color or pool photo in front of you as a reminder. Visual cues are so powerful to empower you. 🎉
In contrast, a bright photo or retro Barbie colors in front of you invigorates, that can just heat things up in your mind. Bright red is even more alarming than the color of hot chili peppers and fire trucks (but BLUE is a soothing color in all shades).
…If you’re a bit Kapha minded these days, maybe that’s what you need! 💕
We had a neon pink light outside the meditation room that looks like a photo developing room (…maybe you remember those where the negatives 🎞️turned to positives 📸?).
And from this room, we came out as transformed half-asleep meditated beings 😉
You may never have this glowing experience that I had, BUT you can do your own meditation wherever you are… or test pool meditation and see if that’s your meditation jam. 🧘🏻♀️
And from there you can get your creative personal essence back in case you’re having a creative mental block or dry spell season of ideas… or searching for your life’s purpose. And this is just one of many techniques that can get your cool-calm-and collected swag back as a first step. 😎
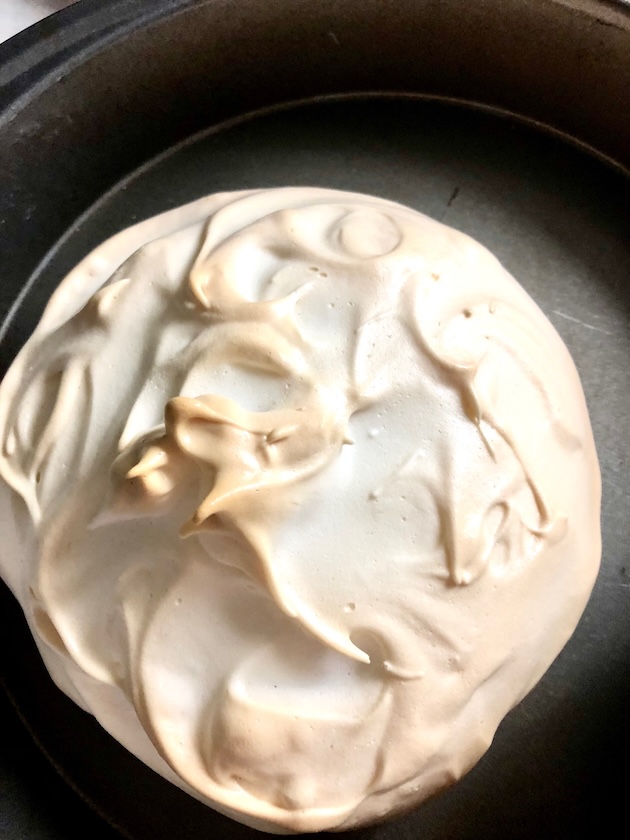
For Pavolva, whip egg whites to make meringue base. Add to a pan that will be your presenting dish/pan or use a Silpat for easy transfer. Alternatively you can make a grits pie base that's quicker to bake, with grits, egg, and coconut oil that complements tropical fruit flavors. Alternatively, you can grind oats and bake them to use as the base.
Bake in 200°F oven until it feels solid and formed (like packed snow).
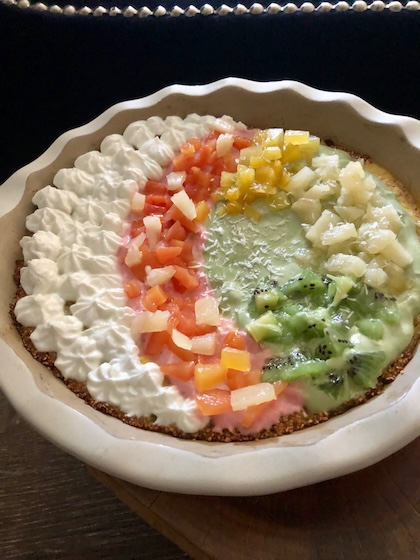
Decorate with fruit (dragonfruit, pineapple, passion fruit, and guava). If you want to use less fruit sugar or for a breakfast Pavlova, you can alternatively add berries and green bananas.
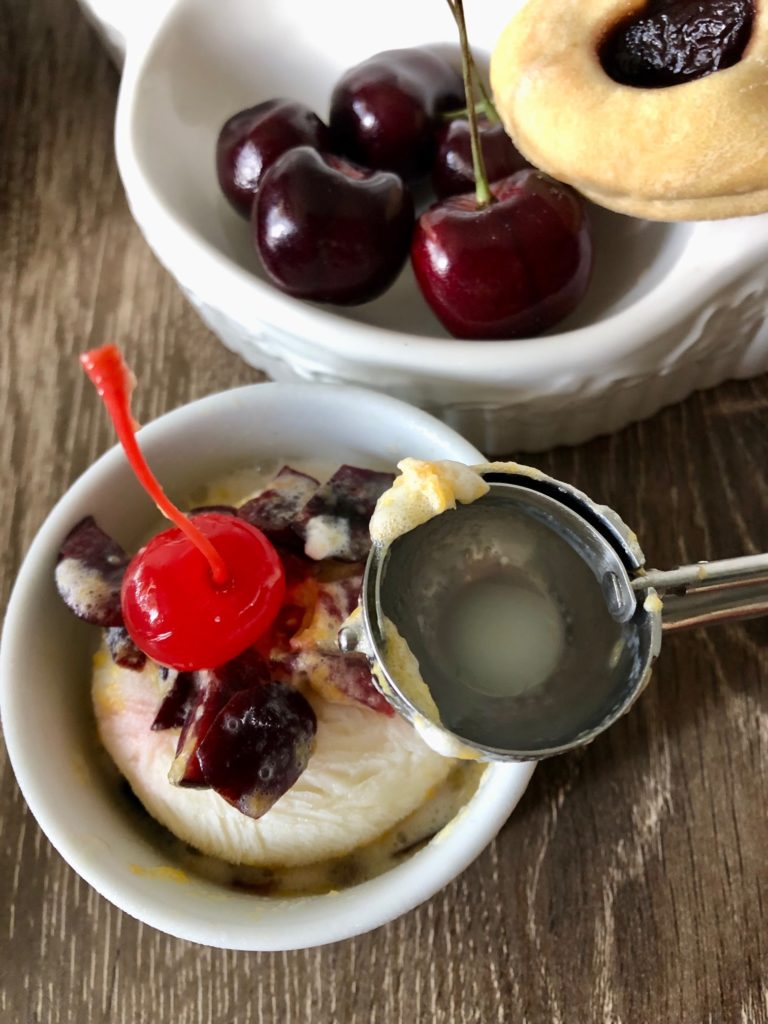
Peach and cherries are summer fruits that pair well together in a bowl. 🍒
Do you experience forgetfulness regularly or daily? Before you start freaking out that you have cognitive decline or dementia running in your veins… or even brain fog that gets described as a common daily symptom… realize that if you worry about this often, then you’re panicking for no reason… as those who aren’t aware are the ones to be more concerned with.
There’s no person out there who has never experienced short-term memory loss or forgetfulness. That’s why we setup reminders so we don’t forget. And why we use calendars to write or type on.
So if you forget easily and often these days, most likely you’re busy, stressed, or not getting enough sleep. And maybe that’s your natural way, as is for Vatas who have this built-in DNA feature along with worry. 🧠
BTW, forgetfulness can sometimes work to your advantage as you recall the important things, and let go of the unimportant ones.
Lists help sometimes and have their place: e.g. grocery store lists, important to-do’s, and details. But lists can also be distractions from priorities.
And some priority items calling you today could lead you to your life of meaning, if that’s important to you. When you focus on the things that matter most in the moment, that’s when you get to experience the best use of your time. You don’t get mired down in what you ought-to-do minutiae that can often turn into negative moods as your good hearted spirit isn’t there.
In balance, daily re-routing your thoughts is healthy along with some planning.
If you’re in the balance flow already allowing in some daily breathing space changes, below are 7 good habits to intake so you never miss anything important!
Plus, the tips (below) can be practical prevention for forgetfulness. You don’t want to leave a bag of groceries or umbrella behind if you can avoid the inconvenience.
You probably don’t remember the first time you forgot something small, but you do remember some of the momentary forgetfulness you experienced in the past as long-term memory is different than short-term blips. It’s just part of the human quirks. None of us are perfect.
When we forget to do something, often the thoughts vanish into thin air or get lost. But instead of beating yourself up, it’s better to think it must not have been important. Because unless it’s a safety hazard, in the grand scheme of things, it’s not important and that helps us with daily contentment and joy.
And sometimes those thoughts reappear later when they are no longer needed. They can confirm how unimportant and no big deal the forgotten is or teach us a lesson to learn about how we can let it go.
Even better, is to set up consistent habits no matter how much you rely on your memory to serve and save you. Consistency will serve you will well in your life, where it’s more important than what you don’t say. And it helps with not forgetting.
Putting focus and energy on being consistent with healthy habits lead to your successful outcomes one (consistent) step at a time.
So here are some habit builds you can make for common important items.
Habit #1: Use a timer for the important items.
For a stove or oven, this can be a matter of safety. There are always interruptions, so setting a timer for your cooking not only gives you perfectly cooked meals, it can save you from burning up the kitchen. And if you’re a Great British Baking Show fan like me, ya know how critical that can be!
And for anything you want to be reminded of you can set a timer. It’s like the trick of tying a string around your finger that some did.
Habit #2: Use a timer when you have a 10-minute break.
Set an egg timer or the timer on your phone when you have minutes until the next activity. More likely than not you will distract yourself in those minutes on your phone or doing something that takes longer than a few minutes. So setting your timer on 9 minutes for a 10-minute break is a good idea to make use of that valuable time and keep track of the minutes. ⏲️
Habit #3: Reminders – write or type reminder notes that you check regularly.
Using the available reminder tools on your phone or tablet is a good habit. Let the reminder ping you on that date/time so you can be in the moment. And that can be a life saver for not missing important events and things to do.
Once you start, reminders are a hard habit to break. When you have a few minutes, you can go over your past and future reminders and sometimes you even pick up new ideas from old reminders. 💭
Habit #4: For your email inbox, use the snooze feature (on some programs, it is represented with a clock icon 🕓).
Snooze reminders are especially good for monthly reminders that are very easy to forget because the habit isn’t frequent enough for you to automatically do. And if forgetting calendar dates is one of your challenges, then this could be a life saver.
When you use a snooze feature, after you complete the task, set the snooze for the next month date. As a bonus, then you won’t doubly forget later whether you competed the task this month as you already set a new future date.
That’s genius… and an assistant assurance better than any AI tool can do! 😉
Habit #5: Have a backup calendar reminder.
Besides your natural memory, a backup reminder like a second calendar to rely on is a best bet, which btw… is s not askng another human to be the calendar. They can just as easily forget, get distracted, or never have prioritized you lists.
It’s a burden when you say: remind me to ______. Unless someone else asks to be used as a calendar or timer, don’t get in this old-fashioned habit that can be disappointing to you and annoying to others in this day and age.
Habit #6: Improve your memory with cardio exercise.
Getting oxygen to your brain helps energize your brain to function better. The more energy you have, the quicker your reaction time is, and sometimes that allows a little break for your brain (like witnessing a break in the clouds) to remember something important.
Plus, walking improves memory, but it won’t necessarily jog your memory. And lowering blood pressure is a good idea that taking a nature walk can help achieve.
Habit #7: Habit stack often.
When you do the activity that you already have a formed habit with and then add your new habit to, it’s proven to be a quicker way to form a habit. It works your automatic memory reflexes that takes less energy.
Animals in the wild do this well. They are natural habit stackers through instincts. They bypass forgetfulness, remembering to stick to what’s simple, natural and essential for survival and thriving in their habitat. Just a thought.