Anxiety vs. nervous feelings can be better calmed with deep breathing but they show different body symptoms…

With back to school air and a new season, we can easily get out of balance. In transitions, we can have a Vata anxiety vs. nervous complex happening in our connected mind-body.
But we can lean into restoring our natural balance whether we’re naturally and mostly Vata mind-body. And below I share some valuable tips for your work, school, arising family situations, and other transitions you may be facing.
When we prepare for Vata season, our Vata runs the ship if we’re naturally mostly Vata or if Vata is our dosha balance we need to restore.
Naturally Vata bodies feel at home with outdoor cooler temps and leaves changing and falling. But external situations and transitions in a new season can especially cause anxiety and wreak stress havoc on our bodies keeping score.
And that can add to a strong Vata worry mind to stir up the Vata complex situation. If you’re naturally a Vata mind-body (that is, mind and body), all things equal, you’re naturally better with change than a Kapha mind-body who resists change.
But any of us can get the wind knocked out of our sails in life’s complex situations that shows us and our ever changing bodies what we’re made of.
And life has shown us young and old if we’re naturally Vata, by how we react with uncontrollable symptoms of panic or anxiety. These are classic signs of high Vata.
And if we keep that internal to us, then we can be high functioning but still Vata is our natural way.
And since this Part 2 week of the Ayurvedic series is about Vata, being aware of the obvious problematic anxiety characteristics below can save your from a season of aches and unenjoyment.
Some are more subtle. For example, one that can happen to any of us humans (with any dosha profile), is getting a headache even if it’s harmless and temporary.
One friend I was recently talking to said she had a specific headache feeling that she had experienced before. My first reaction thought was, did you drink enough water today? I know Vatas are on the dry side, and I know this person is a Vata.
…which by the way, I know everyone’s Vata, Kapha, Pitta (dosha) natural and imbalanced dosha current profiles based on a few simple answers, that’s 100% much easier to diagnose than a headache.
…unless it’s just lack of drinking water, which is what we discovered in this friend’s case that was immediately solved.
But some people won’t research these small body signs or they just pop a pill without thinking twice…
To me, as a health nut 🤪 in a sensitive body, knowing a snapshot dosha profile (balance and imbalance) is a lifesaver because some things are easily restored from that perspective that need no pills or medical intervention. But most Western world people aren’t daily Ayurvedic aware, and certainly not at a preventative level.
And in our lives, if we choose healthy and happy ways for our primary doshas, then we prevent less than optimal daily living. Joy could be ours sooner and everyday with an awareness in our lifestyle choices as culprits.
We’re creatures of habit programmed to do the same even if it’s to our detriment, unless and until we’re aware there’s a better proven formula or something worth making the change for.
And when we’re aware in this moment (and every waking moment), we get to feel sensitized and as best we can. And that takes us to a creative place! We ‘re running on a higher, conscious energy frequency. And that just makes me want to sing 🎶
I’ve grown in deeper spirituality, but I couldn’t tap into these higher places until I got out of the daily, imbalanced culture and corporate work lifestyles I was repeating in my life, that didn’t agree with me.
…It was like, I was air and earth mingling with oil and fire. It was only after I took some life risks that I could see I needed to run to fresh air to thrive. I had to step out from some of the proven ways and do things my way that didn’t have a guide.
And before that I saw signs that showed up as stress, anxiety, and worry. And if I didn’t remind myself of how those feelings felt when I had a good season, I would easily get roped back into those incompatible situations staring me in the face as my surrounding opportunities.
And I’m sharing this because I know that’s how it is for many of us who don’t want to turn down opportunities or fight what culture teaches us is respected (and sounds good on paper), or disappoint people who have influence in our lives.
Our feelings toward letting down is temporary, but our regrets in unhappy life choices is permanent. Maybe that’s just the encouragement you need to make a leap.
If we listen and say yes! to ourselves to taking higher risks, then we’re fulfilling our highest calling. And I don’t know what’s higher than highest… where if these were our last days on earth, we would still be showing up in those fulfilling areas that ease stress.
Occasionally feeling stress and nervous is healthy and means you’re trying in life. If you had no stress or life hurdles, that means you’re leading a life where there are no challenges or growth. And that would eventually become a dull life, leaving so much purpose-filling potential on the table.
Our goal is to have joy and not to have everyday stress (or in every fiber cell of being).
If it’s a season of anxiety vs. nervous situations, then finding an exit would be your better bet.
The difference I like to describe between anxiety and nervousness is that with nervousness you have a new opportunity ahead of you.
Many go into an interview with sweaty palms or a presentation with butterflies or summersaults in the stomach.
Those nervous feelings often disappear in the first few minutes after breaking the ice or at the start of the event, and then your body gets back to its normal rhythm.
Nervous situations get you one step closer to something bigger. You grow because you’re putting yourself in situations that looking back become your memorable lessons learned experiences. It gets easier over practice.
With anxiety, your anxiety doesn’t improve each time you are encountered with a similar situation. You aren’t meant to be in that situation and your body is screaming to get out, as though a bear were chasing you. 🐻 Sometimes your body is reacting to your old brain signals, and when aware you can rewrite those thoughts.
Your anxiety vs. nervous feelings are a good way to remind yourself next time you’re put in those decision moments of do I do this again or do I change course?
And here are some more characteristics to consider…
Vata Anxiety vs. Nervous Feelings
Anxiety intensity and duration: anxiety takes over (e.g. anxiety or panic attack). It can last for minutes, hours, or days, and settle in longer if no measures are taken to improve the situation. For example, if you’re in a new social situation, often the nervousness goes away after you find someone comfortable to talk to that’s different than high-functioning social anxiety feelings where you can’t wait to exit.
Anxiety feelings: there’s nothing good in anxiety except seeing that it’s a warning. The healthy goal is to get away from what’s triggering the anxiety, and not trying to overcome anxious feelings that are naturally pointing you in another direction.
Anxiety lingers uncomfortably in the foreground or background of the mind-body until the threat is completely gone.
Unlike a threat, a nervous response often turns into obvious relief and/or joy for putting yourself in the situation after it’s over. And leads to excitement or thriving on another favorable opportunity level.
Anxiety and Worry
If you have anxiety and worry running at the same, then that can be debilitating in daily functioning, like a physical symptom can.
Awareness is the first step to get you out so you don’t suffer a season. Re-shuffle your life, change route, or take bold risks.
But if you can’t get out of your situation, think of what you could gain out of the situation when you’re on the other side. Use your past situations as a reminder to what positively can come out of an anxiety vs. nervous or worrisome situation after the fact. 🌈 And use your anxious situations to victoriously learn how to be calm and get joy in any season.
✅If you want to see what your body is trying to tell you this season, take the 2-minute Body Balance Quiz. And if you recently did that or need more, a next easy 10-minute step you could do, is to get your personalized mind-body calm recipe.
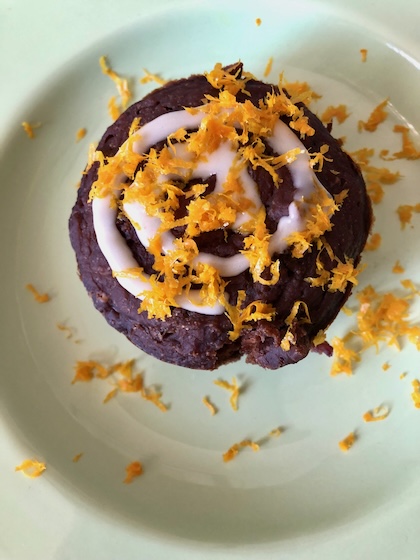
One-Bowl Orange Date Muffin For Calming Anxiety
Ingredients
- 3 finely chopped dates
- 3/4 cup flour (can combine with gluten-free flours) + 2 tbsp flour
- 1 egg
- 1/4 cup milk (or almond milk)
- orange zest from an orange
Instructions
- Combine ingredients. Bake on 325°F for about 25 minutes or until set.
- Add orange zest for zhugh.