UA-141369524-4

Fruit Roll Up – Homemade with Applesauce

Fruit roll up is a happy memory from when I was a kid. 💭

They were a sweet and light snack from the grocery store that melted in the mouth.

It was (and is) a cross between fruit + candy.

They came wrapped up in their own packaging and were attached to cellophane that I liked to play make things with when I was young. They were rolled up like scrolls.

Almost like the Dead Sea Scroll minus the ancient writing.

…And not that far back, my young days was when posters were the rage so anything rolled up meant happy entertainment or enjoyment.

Playing around, I haven’t had a fruit roll up like those until now as an adult. 😋

Decades later and these parchment paper looking treats are naturally preserved…

These were like the ones that ruined me to never want any other fruit roll up wannabes. 😅

A homemade fruit roll up cut up like the ones I had as a kid.

These are the REAL DEAL.

Making these fruit roll ups bring me joy (...and maybe for you too?) because they resembled packaged old-fashioned fruit roll ups that you would buy at the store… minus additional sugar that’s not needed for these.

As thin as they are like sheets of music, these stack up nicely! 🪵…

Thin as paper and pretty as rice paper too.

They’re as durable as leather.

Technically they fall in the leather fruit category but are as smooth and supple as suede.

My mom was a dressmaker, so she played a role in influencing my fabric choices where I learned lighter materials are usually higher quality.

And I’d agree about that with this light leather fruit material…

These feel light and feathery (not leathery) and are very apple healthy! 🍏

This fruit roll up is light.

Plus, they last for weeks at room temperature.

Made with apple they are a great fall snack that can be made year round.

It’s almost like wrapping paper… or maybe it’s an old map or a key to hieroglyphic history. However you want to call it, it’s a SWEEET fruit roll up.

Oh, and kidding aside, the BEST part is (…can you tell I’m getting excited that it just gets better? 😊)…

You can make these in your home oven in one hour and 20 minutes with just 5 minutes of prep time.

How’s that for predictability?

…Seriously it’s that easy!

They are fun (and dare I say relaxing) to make and everyone of all ages will love them! 💕

They make a great sweet snack without any artificial ingredients.

And actually just 2 sweet and natural ingredients that make a perfect duo. 🍏🍯

Using applesauce, you don’t even have to turn the stove on to cook down apples and de-core them… and they will turn out even better. Because for one, the apple fruit roll up will be more even.

…The first time you make them, don’t freak out because they turn transparent on a baking sheet.

Don’t worry, it’s there. 😀

…I tried that once with Aquafaba because I heard you could make meringues that way… and POOF! I wish I could say that was magic, but it was more like a trick. 🪄

They dissolved into thin oven air… but I digress.

These fruit roll ups will turn out… I promise.

These are the proof…

fruit roll up scrolls.

I’m so happy to share these with you through the screen. And I hope they make your day like they did for me the first time I made them. 🍥

(And maybe this will keep the kiddos staying happy and cavity-free as low-sugar goodies with plenty of sweetness… that are substitutable for a certain candy holiday 🎃).

And if you’re into experimenting (like I am gladly doing with sweets), you can try other flavors.

Keep in mind they will take longer to bake with more complex ingredients.

You will know when you touch or look at the baked fruit roll up whether it’s dry and done, or half-baked and almost there….

In this one, you can see here that the dry section is on the upper right area and the rest of the fruit roll up is not done… simply pop it back into the oven.

Change the time but don’t mess with the temperature.

This one took another 20-25 minutes to finish… and was worth the wait. ⏲️

Pumpkin apple fruit roll up

Ready to make these? 😋

homemade fruit roll ups like the ones I had as a kid.
Print

Easy Apple Fruit Roll Ups

These are no fuss-no muss apple fruit roll ups you can bake in under 2 hours. This will make 4 - 4 inch roll ups that are about 9 inches long.
Course Snack
Cuisine American
Author Brandy @ Healthy Happy Life Secrets

Equipment

  • Silpat silicone baking mat on sheet pan

Ingredients

  • 2 4 ounce applesauce cups, unsweetened
  • 2 tbsp raw honey (high quality)

Instructions

  • Thoroughly combine apple sauce in a bowl and add honey. Tip: use a high quality honey with a smooth consistency.
  • Smear the mixture into a thin layer on a Silpat (silicone sheet) laid out on a baking pan. Tip: Use different light to check that there are no "holes" that show up with shadows.
  • Bake on 200°F/100°C for 80 minutes. Tip: if you add or experiment with other more vibrant colors and flavors, they can take significantly longer. You'll know it's completely done, when the fruit roll up is one uniform color and dry throughout to the touch.
  • Let cool completely and then start to peel at one corner and then slowly peel up the entire fruit roll up. Roll up, slice, and enjoy!

Apple fruit roll ups that remind me of my childhood.

Wheat Crackers For Fall Vata Season

Wheat crackers are so easy to make and a nice fall backdrop to decorate a food table.🍁

It’s a perfect rustic add. And if you’re feeling the pinch of shinkflation, these crackers can certainly help your wallet.

…Or baking any of your own salty cracker snacks (as low-calorie carb choice meal accompaniments).

They’re an easy baking challenge. ⏲️

You game?

…And even easier when you’re already cranking up your oven.

I do this baking move while I’m prepping my 350°F bakes, that are mostly rising cakes and breads… and anything that’s needing dry heat.

To start, I turn the oven on a low 250°F or lower. That also works well on warm days where you can feel the heat in whatever season you’re experiencing. 🔥

And while the oven is warming up, is when I bake the crackers, tortillas, or toast depending on season or mood. It’s a good use of oven energy. ⚡️

And also baking effort… where prepping cracker paste for a sheet of crackers takes seconds.

All you need is an even flour-water mix, and then spread with a little balancing salt on a baking sheet.

That’s it.

…It doesn’t get easier than that for the basics.

But I have some useful tips below with ancient flours that can enhance your wheat crackers, and making-baking experience.

Plus there are so many flour varieties and cracker taste options to consider and get into for your happy wild-free self… maybe Wild Thing or Wheel Pose. Just sayin!  🎡

You can use any ground flour for cracker making which is a great way to clean out your pantry. You can ground your own gluten-free and seed versions. Grounds reminds me of coffee since I make my own cold brew daily. 💭

And like coffee, if you add anything else as ingredients besides your grounds, water, and flavor adds or seasonings to your cracker mix, then you’ve prepped another food… but not crackers.

K.I.S.S. (keep it super simple). 💋

…that means no oil or yeast as tempting as it can be.

The essence of crackers is dry, salty, and flat crunchy. That’s why it’s a good Vata season balancing snack.

Great for anyone in fall season or leaning into their Vata body.

For me, that’s a double score. 🧘🏻‍♀️…maybe you too?

…I didn’t make up these rules 😊

The ancient people were the inventors.

Flat breads still exist as precursors to our modern day crackers.

(See Ezekiel 4:9 in the Bible that mentions several grain flours for baking bread: “But as for you, take wheat, barley, beans, lentils, millet and spelt, put them in one vessel and make them into bread for yourself…”).

And fast forwarding to today, the flour is still the star ingredient for bread and crackers.

…So, choosing a healthy flour is a smart choice.

Making homemade crackers is a good opportunity to use your healthy gluten-free flours and whole flours like whole wheat.

Whole grains rule because they keeps the entire kernel that has all the nutrients like extra B-vitamins that refined grains do not have.

Refined grains are also deprived of fiber that’s not added back even if the grain is enriched.

Keeping it simple, remember the fine print “whole” as a top ingredient when you’re looking through the shelves deciding which is the healthy good choice, all things being equal.

Whole is also a good intention for all us healthy intentional peeps to eliminate holes in our diet.

Some of the whole goodness comes in gluten flours (yes, gluten!) that can be used to make wheat crackers.

Whole wheat grain flours have more fiber, so if you can eat gluten it’s good to keep some higher quality whole wheat in your diet.

And ancient wheats like Einkorn, spelt, and emmer are good choices.

Einkorn has less gluten than the other two so it makes for a great cracker that doesn’t need proofing.

The proof is in the cracker recipe below. 🧡

…You can add your flavor touches and textures like chia seeds or Everything Bagel spices for crunch and vitamins.

Btw, chia seeds are loaded with some B-vitamins, magnesium, calcium, iron, and other minerals.

Chia vary from poppy seeds even though they look like twins and are both carbs. 👯‍♀️

…And when I hear people say that they don’t eat carbs, that saddens me.

Carbs include veggies AND also healthy grains that don’t wanna be missed. Veggies are usually low calories in case those points are added up.

And next to protein, grains support the body in B-vitamins that we need a lot of to work together.

They also help to lose weight along with fiber. 🎉

So if healthy eating is one of your goals too (and a good one since you’re eating for the rest of your life), building good habits that keep your weight the same or consistent year-round makes sense.

A rainbow variety diet with food as medicine works. 🌈

Yo-yo diets that I grew up around don’t support that.

And eating food like rustic wheat crackers can fill the gaps.

Since fresh baked are not preserved (with preservatives) like the crackers you could buy in grocery stores, they will change texture over time and days.

It’s best to enjoy them the same or next day after baking (and that helps to get us to bake or cook more, if that’s another goal initiative you’re trying to make).

You can leave your baked crackers out for a few more days but they will likely become more dry.

So you could add a little olive oil or keep a moist towel over them.

You can also bag and seal them when they’re still warm out of the oven and that will create some heat-rising condensation in the bag that will help them stay hydrated… a little cracker TLC.  😀

…Wheat is plant-based afterall 🪴

And if they dry out, you can still save and revive them.

You can add a little water back and let them dry out for a few hours and then enjoy again. Then they’re as good as new again!

The wheat cracker taste factor will be the same because remember water is the next inherent star ingredient. ⭐️

How’s that for fall-ing in love with wheat crackers? 

Print

Wheat Crackers

Wheat crackers are so easy to make. You can make them and bake with your other bakes.
Author Brandy @ Healthy Happy Life Secrets

Ingredients

  • whole wheat flour and einkorn flour
  • seeds (flax, chia, or sunflower)
  • salt to taste
  • water

Instructions

  • Mix ingredients until you get a paste. Spoon out dough and make about 1/8" thin wit a knife. If you use more flour, you can alternatively roll out into a thin even paste. It will come out the same as a cracker.

Mango Lassi Smoothie Spiced Drink

Mango lassi was a drink I discovered working for a Lebanese restaurant chain planning parties where they sold lassi drinks in a market.

…And this inspired drink is a cross between a yogurt drink and a smoothie great for breakfast starters that you can make! 🥤

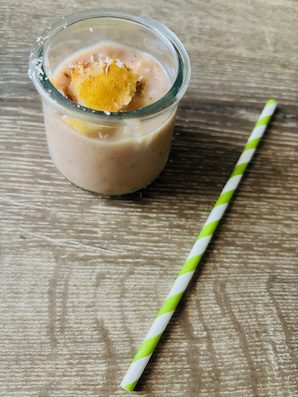
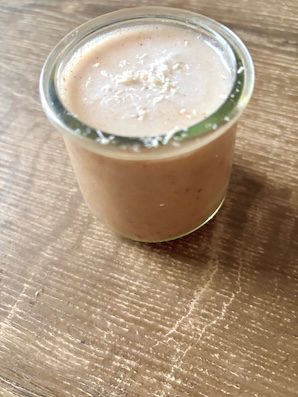
mango lassi smoothie.
Mango lassi smoothie with Ayurvedic spices. 🥭

While lassi was a new drink for me at the time, it’s known as “the original smoothie.” It has been around for centuries in the Eastern hemisphere.

Whether it’s new to your senses or not, it’s an Ayurvedic beverage that can balance your senses.

What makes mango lassi different than other fruit smoothies is the Ayurvedic balancing spices… like the 3 C’s.

Traditionally, cumin, cayenne, and cinnamon are balancing for Pitta, Kapha, and Vata.

…But not all combined together as fire, wind, and earth is one big storm!

You can make your own special blend that’s good for your body and the season you’re in.

This lassi recipe is geared toward balancing Vata, so it’s a sweeter smoothie and the spice choices reflect that. 🧡

You can save the cayenne and cumin for cooler and warmer days, and for Pitta and Kapha drinks.

Or adjust the subtle spice blend to your today’s balancing tastes.

One taste that stays the same in any mango lassi is the tangy flavor coming from the yogurt ingredient.

Plus, to lean into the tart taste, a unique new ingredient added here is tamarind that’s one sour fruit… like think 5x lemons. 🍋

Wheww… and it’s good that sour is another balancing Vata taste where sweet and sour balance each other.

You can purchase tamarind in a paste form and it will last longer. With the sticky paste form, you can cut and smooth out the paste with a knife, or pull out small sticky pieces that’ll give you sticky fingers.

It’s a deep maroon crimson color in case you’re looking for the ingredient and don’t know what to look for.

…Or you can use the tamarind spice or powder versions that won’t be as potent-concentrated, but will still change your drink experience to a new one you may not have had before.

You can even douse on your sweet mango.

With any extra mango, you can opt to make mango juice which is one of my faves. Single mangoes can be easy to find in grocery stores and inexpensive compared to other fruits like oranges that usually come in a bigger bag.

And if you’re comparing healthy fruit juices, mangoes in mango juice vs. orange juice is higher in beta-carotene and still high in Vitamin C. So it’s a good and healthy alternative. 🥭

Print

Mango Lassi Smoothie

A balancing morning yogurt drink with tangy, fruity, and sweet spice flavors.. a new old twist on a smoothie.
Course Breakfast, brunch
Cuisine Indian, middle eastern
Author Brandy @ Healthy Happy Life Secrets

Ingredients

  • 1/2 cup Greek yogurt,
  • 1/3 cup mango, cut
  • 1 tsp cinnamon
  • 1/2 tsp cardamom
  • water
  • 3 tbsp tamarind, paste into small pieces

Instructions

  • Pour the liquid part of the yogurt container into your blender tool. The liquid will sink to the lowest yogurt level. Add semi-solid yogurt and water to consistency. Blend with mango chunks, tamarind, and spices.


Apple Galette with Lemon (Low Sugar)

Apple galette is a gala event with Gala Apples like these… or any organic red apples you can get your hands on apple picking!
apple galette table with Gala apples.

Below is an easy apple galette pastry recipe that need no proofing. And the proof is when you make them (…and in photos below 😊).

They are made even more tasty sweet tart good with baked lemon.

If you’ve never had a baked lemon, you’re ready to be taken to a whole new lemon experience from the juicy bright citrusy one to a cooler weather vibe… but still prepare to pucker up! 🍋

So this occasion is a zesty candied lemon and apple event all-in-one. 🎉 And once-upon-a-time I spent my entire week dreaming up event tables with clients… and now I’m doing the same for you.

You can lean into the stuffed candy apples that are fun, easy, and healthy snacks to make that take less effort than apple bobbing… that’s an old apple water in a barrel game like juggling🤹

For this snack apple making craft, be sure to source organic apples for these desserts with the skin-on… where the skin stays on and you get all the fiber and anti-inflammatory vitamin benefits.

…Plus, there’s no waste to handle that’s good for our world that isn’t daily compostable just yet (Debby-Downer wah-wah-wah). 

…But hopeful it’s in the works… I believe. 🙏  And we have workarounds today like eating all the edible parts that’s not hard to do.

Which btw, you can do this sustainability move with fresh homemade juice too.

And for these apples, add some cinnamon to your apple-lemon (sweet and sour) for an irresistible zingy pairing. Add a douse of cinnamon that’s good for anxious energies. And cardamom if you want energy-energy. ⚡️

And when it comes out of the oven baked and spiced, you get to be transported a happy nostalgic mood through your senses. 💭

…Do you remember your first apple pie? I remember the apple pie 🥧 store where I grew up. It was out a ways that’s now a bustling town and part of the area I grew up in.

baked apple galette with lemon.

And in those happy memory vibes, you can make your own apple galette dessert in the shape you like 🥧, comfort of your kitchen and do no traveling… and have a cozy home and enjoyable experience no matter what the weather is outside.

As the Danes say, Hygge! 🎉

Print

Easy Apple Galette (No Proofing)

If you want to lean into apple vibes with sweet and tart, then this is a good easy bake.
Author Brandy @ Healthy Happy Life Secrets

Ingredients

  • organic medium apples (red)
  • cinnamon
  • 1 cup flour of choice
  • 1-1/2 cup dry oats
  • lemon, cut in wedges
  • lemon curd
  • honey or maple syrup to shine
  • 2 tbsp cold butter
  • cold water

Instructions

  • This will make a galette for 3 rows of medium sized apples.
  • Prepare lemon curd on the stove. I low heat warm two eggs, lemon juice and zest, 1 tbsp butter and 1 tbsp flour stirring constantly for a few minutes until flour is fully blended in. I purposefully leave out sugar, but you can add some if you choose. Honey can be added at the end as shine. Let curd cool and refrigerate to help thicken while you prepare the rest of the steps. Save 2 thinly sliced lemons cut in half moons for decoration and taste.
  • Prepare oat flour: pulse or grind oat into fine flour.
  • Make the pastry shell: hand blend flours, cold butter, and add enough cold water to create a dough disc. Roll out onto your baking pan and create the pastry shape you like.
  • Cut two sides of the apple up to the core so you get the arch sides. Cut into thin strips and keep each side intact. Add to the pastry shell along ith lemon slices.
  • Add cinnamon on top and brush lemon curd throughout your galette.
  • Bake at 325°F/165°C for about 75 minutes or 350°F/180°C for about an hour until deep golden brown. I usually turn the oven off around the hour mark and leave in oven another 15 minutes.
  • About 15 minutes before turning off the oven heat, brush honey or syrup on pastry top and sides for additional shine and sweetness.


Microgreens Are Growing Healthy

Microgreens have been around longer than our modern culture. 

It was a way of food survival during the winter months of the oldest civilizations on our planet… a lot like how modern squirrels have preserved the foraging acorn traditions. 

Baby arugula microgreens are tasty for a salad.
Baby arugula microgreens are tasty additions to a salad 🥗

Which btw… is outdoor entertaining to watch Rocky the flying squirrel in his purposeful scurrying meal prep moves. 🐿️

How they actually feel about their work we’ll never know, but it has kept their species around.

…And to keep ours going, modern food planning is something we do. 

In human life, that’s how it can look with us daily running around in our busy lives… and for me, that’s how it sometimes looked behind-the-scenes as a food service professional in organized chaos prepping and planning weekly catered event challenges in hotel ballrooms and for restaurant parties celebrating Mediterranean food styles.

And even with all the variety of food available to our planet we can be bored with our food sourcing options. 🥬

Daily, we open the fridge and pantry cupboards thinking: “what’s for dinner?” or “what can I have for a little snack?”…sometimes coming up short for a good answer. 🤔

Microgreens can be part of the answer as a healthy and tasty choice.

Here are 5 points that make microgreens a smart choice:

Point #1: Microgreens are food like-able and tasty good.

…Because if they weren’t, why bother?

Children seem to love them as some of the pickiest green eaters on earth.

Many microgreens are smaller, cute kid-size bits and bites like baby arugula, so it’s easier to get a handful of the finger foods than the adult version. 

The young greens also add interest, taste, and texture to any plate.

…And why they’re not more commonly known today is unknown. Maybe like their shape-forms, they still have a wild-like reputation… 🌿

Like, I remember alfalfa sprout microgreens from a school age where I once saw the jungle wild-looking tangly-fine weeds in a friend’s lunch box that made me curious…

And now as an adult, thinking it’s a good idea. 🎉

You grow into new perspectives and healthy ways and today is a great way to spruce up 😋 and vertically beef up a light protein mustardy salad sandwich or the like (…einkorn finger sandwich idea below 🧡). Or to garnish a bowl of beets… 

Point # 2: Microgreens are less bitter.

Microgreens have the reputation of being less bitter that is good news for some people’s tongues who avoid the taste.

That reminds me of green tea…

If you don’t love bitter green tea tastes that can grow stronger if brewed too hot or you picked the wrong flavor for you, then you probably don’t lean toward preferring many bitter tasting superfood veggies and plant greens.

And that’s why certain veggies 🥦🥬 don’t end up on the plate (like green tea in cups)… or in a diet despite their healthy goodness.

…Green teas 🍵 come from the same Camellia Sinensis plant as common black, white, and oolong teas but differ in process where they’re not oxidized like common black teas. 

And what makes the difference for microgreens (and similar to green teas) is the process from the same plant.

Microgreens are harvested early, coming from the same plants as the adult version we see mostly on shelf space in grocery stores. 🌱

So they’re fresh and have different tastes worth trying, often more mild tasting and welcoming to all.

Point #3: Young greens are replenishable, sustainable, and abundant.

…Just like other foods from the soil, nature provides and delivers over and over again..

When we think “fresh” we immediately think of the produce aisle in a supermarket, farmers market, or our backyard garden that produces fastly perishable foods that the soil can replenish. 

If you’re a green thumb growing your own mini-market, you can have microgreens planted, harvested, and eatable within foreseeable weeks (and not months or seasons that is the time most produce take). 🧑‍🌾

That makes microgreens more productive… and where you can have more than what you know what to do with! A good problem to have. ✔️

That would be too easy for getting a meal on the table. 

And that ideal IS microgreens.

When you choose the micro-world of microgreens, you too help our community and local farmers. 

…Those are baby plant little steps that you can take for your health and to support the world. 🪴

Point #4 – Microgreens are often organic without pesticides. 

So much of our plant-based foods are exterior sprayed with pesticides to deter mostly bugs, and that offsets the healthy goodness of the healthiest skin parts of the food. 

We throw away the skin that could have been healthy edible parts. 

And today, reusable composting ways are not yet available for the common household. 

So then we end up creating more waste that adds more plastic bag waste that also attracts unwanted critter nuisances to our community. But what if composting machines were as common as house dishwashing machines? 💭

But that not being today’s standards, with organic microgreens we can eat those problems away as the end consumer. And our bodies are healthier for our choice.

Point #5 – Microgreens are low calories and high in nutrition.

There are few (if any) green plant-based foods 🌱 that aren’t low in calories compared to plant-based (as in factory) foods. 🏭

Fresh microgreens from nature come packed with vitamins and minerals, along with some eat-from-the-rainbow 🌈 polyphenols that make you excited to color your plate and palette with anti-inflammatory food ideas! 🎨

And, mighty microgreens can have 4x (and up to 40x!) more nutrients than their full-grown version.

🎯 Final Points:

Microgreens fit in our consumer micro cultures where we are becoming more customizable specific in food diet preferences that impact food growing ways, and where our farming culture impacts our world. 

Sustainable food and young microgreens are sprouting interest in our fast climate changing world searching for longevity answers where eating anti-inflammatory foods fit.

One way you can be part of the anti-inflammatory solution is by growing your own portable microgreen micro garden that can be indoors (good for those with outdoor allergies or without garden space).

Plus, so many viable options to bring in more microgreens from dream to  life… yasss!

…That’s something to be excited about today. If this resonates with you, could you PLEASE HELP share this message with others so they can join the MICROGREEN movement that’s healthy here to stay.🎉

Go micro GREEN 🌱

🎉🎉 Discover and support local microgreen farms for fresher produce and healthier living.

Oh, and heres’s an easy whole wheat or einkorn (ancient wheat) sandwich in a modern recipe you can use to make finger sandwiches that was an idea I grew up with in the catering party world… and you can use for lunch, brunch, or an afternoon party.

To gain smiles, simply add delicious microgreens like baby lettuce, cucumber, radishes, carrot, and tarragon.

And for dessert 🍥, some sweet herbs and spices are microgreens like anise that you can add to a creme anglaise for pancakes or sweet brunch waffles.

Print

Einkorn Sandwiches with Microgreens

I have fond memories of tea sandwiches from catering menus, and that are part of English afternoon tea events and traditions. Tea sandwiches are usually bite-size and made of spongey-soft bread where the crust is cut off. And flat crunchy bread like these add plate variety. They work well to celebrate the sandwich ingredients in the middle that can be light and/or all veggies.
Course Breakfast, brunch
Cuisine American, british
Author Brandy @ Healthy Happy Life Secrets

Ingredients

  • einkorn flour, salt, and water for the sandwich bread.
  • cottage cheese
  • cucumber
  • scallions
  • carrots
  • beets or radishes
  • lettuce
  • asparagus or favorite veggies
  • spices: dill, tarragon, black pepper

Instructions

  • Prepare the sandwich bread. You can make the bread in advance. Let dough proof: develop air pockets and double in size for for at least 2 hours. Then bake dough in oven in a small sheet pan about 1/4" thick until toasted. Tip: Einkorn wheat flour is not a high gluten (rise) flour, so it won't rise much and will lay more like a flat bread when baked. You need not knead long and can omit yeast. Let bread cool and slice the toast with a serated or bread knife.
    Alternatively if you use regular whole wheat flour, knead a few minutes longer and add about 1/4 tsp of instant yeast (easiest) for a bread that rises. You can cut horizontally into the vertical bread about 3-4 slices to get a similar flat bread effect. Optional: You can turn this into paninis by grilling or baking on a grill pan.
  • Prepare the raw veggies. Thinly slice into flat or close to flat pieces.
  • For the sandwich paste, mix cottage cheese, dill, tarragon, and black pepper. You can processor blend the cottage cheese if you would like a smoother paste.
  • Add paste to the bottom of the sandwich and then layer lettuce, cucumbers, carrots, and others veggies. Add the sandwich bread top. For catering-style zhugh, you can add a toothpicked cucumber slice, or radish and beet and then plate. These easy, new old-fashioned touches show you put in extra detailed care.