UA-141369524-4

Virgin Blue Curacao Drink – Healthy and Light

Virgin blue curaçao drink is a light beverage that reminds me of the tropics and warmer poolside and beach weather, that seems to drift earlier and earlier. Or maybe, spring break that’s more of a calendar planned event.

virgin blue curaçao light healthy mocktail beverage drink.

The virgin drink is a citrusy sweet vibe that you can infuse with coconut water, pineapple juice (and orange juice).

Or you can give a tropical boost with passionfruit (less sweet), mango (more sweet), or both.

Fun fact: coconut water comes from baby coconuts and coconut milk comes from mature coconuts. And you can make your own homemade coconut milk from mature coconuts.

Because coconut water comes from baby coconuts, it has young, pure tastes… (a lot like when we were young coconuts 🥥). And it’s a hydrating water with electrolyte (minerals) that will help boost. It’s definitely a healthy substitute, instead of sodas.

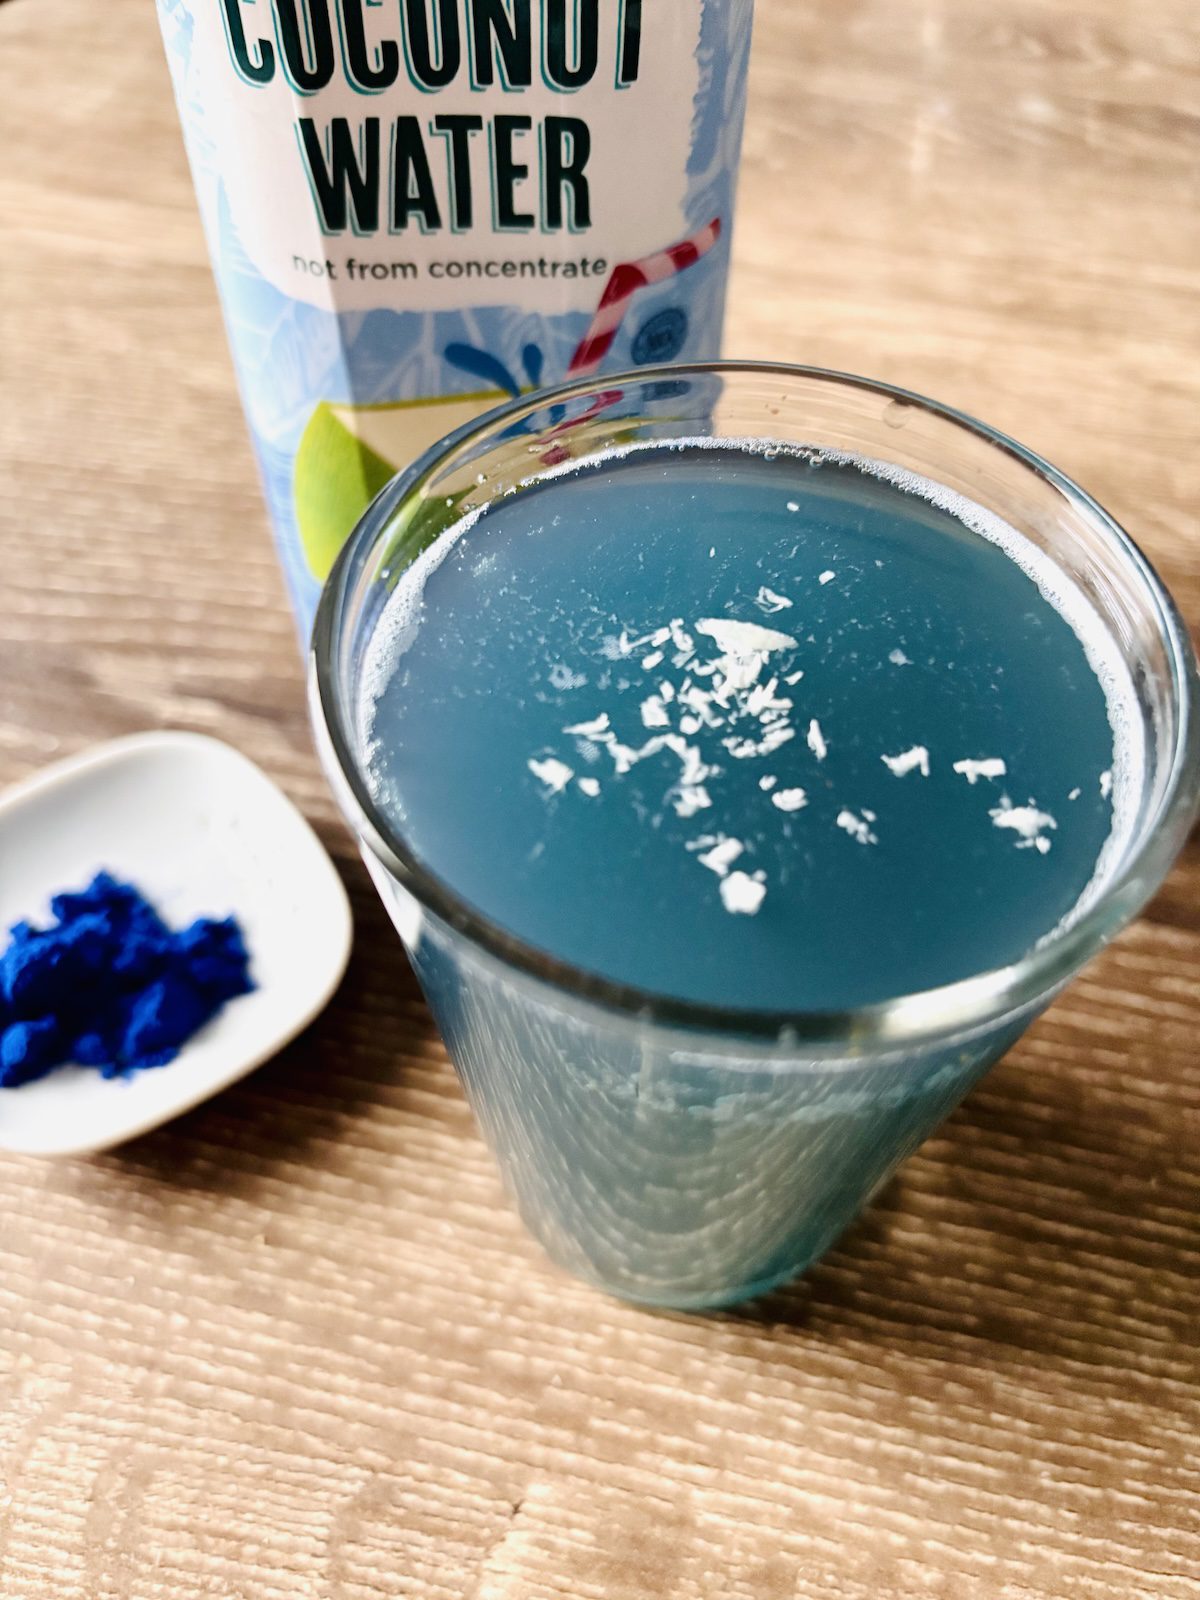
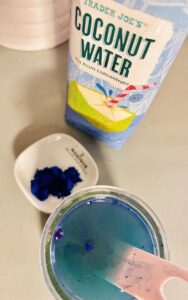
To make the healthy blue virgin drink, blue spirulina is added as a super healthy antioxidant (anti-inflammatory) food. It’s also a natural blue food color that will give the turquoise blue in the virgin blue curaçao drink.

I first discovered the ingredient in a smoothie bowl that was called the Mermaid bowl. And it turned heads. It turned my head. Never thought a smoothie without a mermaid could do that. 🧜‍♀️

And you can source the blue spirulina ingredient online. It’s much easier now than it was 5+ years ago, when it wasn’t as common an ingredient.

You can also use butterfly pea tea, but it will give you more of a greenish hue, because it’s lighter and less concentrated. Whereas the blue spirulina is more concentrated and you want to use very little… maybe less than a pinch, but I wouldn’t touch the powder with your fingers.

Also, you don’t want to wear white in case it ends up on you, and then you can end up with a light blue or tie-dye blue and white shirt. 👕

But the azure blue spirulina color is amazing and the healthy benefits too, so the ingredient is worth the fun effort. 💙🩵

For 5 ounce drinks or larger, you want to add about 1/8 tsp (or just a wee bit of the powder that you carefully portion out that’s hard to measure).

An easy way: What you can do is dip your smallest teaspoon you have and tap it back in the bag. And then use what’s left on the teaspoon and stir.

That’s actually the first method. But it won’t dissolve the blue spirulina powder completely…

virgin blue curaçao refreshing mocktail drink.

So the second technique, is shaking. You can do this with a Magic Bullet blender capsule. Or any kind of shaker…where you shake over your shoulder like a champ.

Either way will do the job.

But I like the Magic Bullet because it’s easy and one less tool cup to have to rinse and clean.

Then when it’s fully mixed up, pour in your drinking glass.

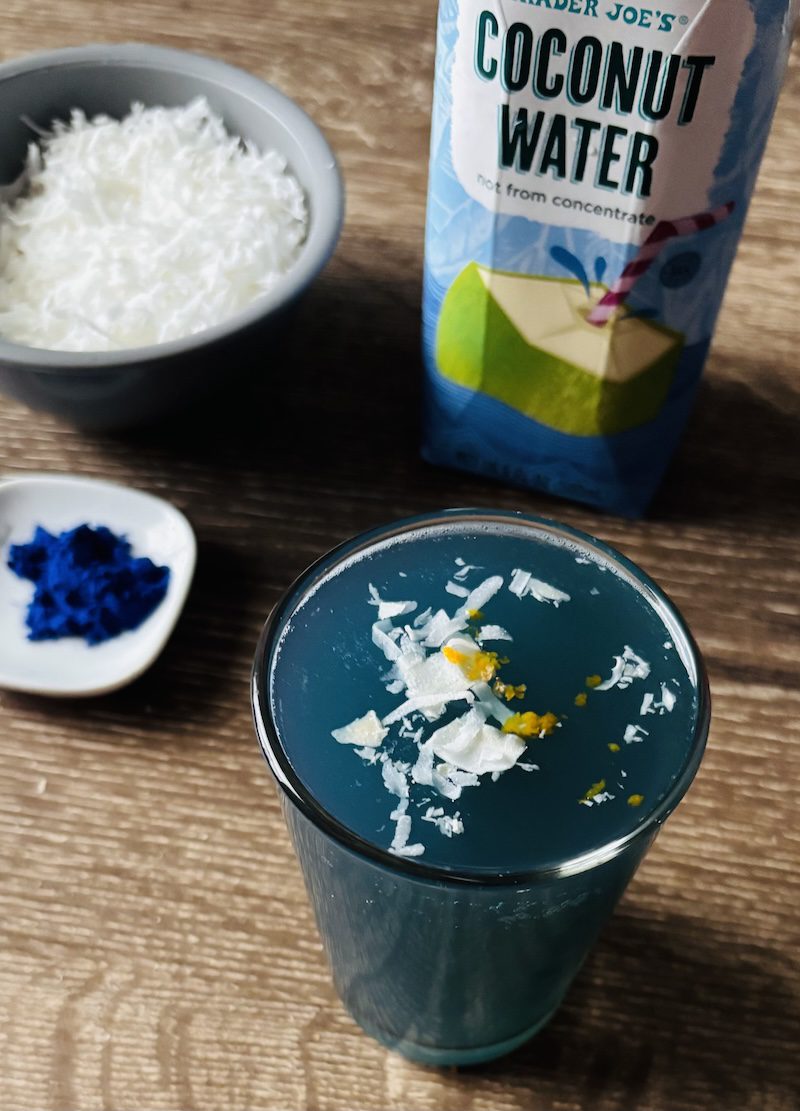
You can add a little seltzer water or club soda if you want to give a fizzy mocktail finish. And of course, a zhugh like orange zest or coconut shavings… and voila!

virgin blue curaçao drink ingredients is coconut water, blue spirulina powder, juice, and regular or seltzer water.

This is one Virgin Blue Curaçao ocean-inspiring drink that’ll have you dreaming. 🌊 Curacao btw comes from the Spanish word that means heart ❤️💙 If you like this, you may like a light no-cream (but delicious) Virgin Pina Colada. 🧉Or a virgin pretty in pink mango blueberry mocktail. 💕

Print

Virgin Blue Curacao Beverage

This is a healthy and refreshing virgin blue curaçao mocktail beverage that can be enjoyed by all ages.
Author Brandy @ Healthy Happy Life Secrets

Ingredients

  • 1/8 tsp blue spirulina powder
  • 5 oz pineapple and orange juice combined
  • 2 oz coconut water
  • 1 oz water or seltzer water
  • shredded coconut and orange zest zhugh (optional)

Instructions

  • Stir in spirulina powder to juice and coconut water.
  • Shake in a Magic Bullet blender capsule or in a shaker.
  • Add additional water, or fizzy water.
  • Zhugh with coconut, orange zest, and/or cherry on top.

Anti-Inflammatory Recipes – Get FREE Guide

Anti-inflammatory recipes help you practice daily meal prep and healthy eating habits, that pay off in your long run toward longevity. Below are  recipe links from this blog to inspire your year, no matter what season you’re in. To your anti-inflammatory life! 🎉

anti-inflammatory recipes.

Because an anti-inflammatory diet helps protect against inflammation in the body (skin, joints, teeth, vital organs) that are health warning signs.

And preventing inflammation flare-ups help protect against and prevent chronic diseases, such as cardiovascular diseases that are still among the highest causes of mortality.

Chronic inflammation is linked to tell-tale body signs that can also lead toward certain cancers and cognitive decline.

And type 2 diabetes (or lifestyle diabetes) is the one of the fastest growing diseases on our planet. No matter what genes you were bestowed, anti-inflammatory habits help fight against what’s stacked up against you in the  environment that you don’t have control over.

You can read about my inflammatory journey signs and preventative anti-inflammatory lifestyle ways that dodged flareups.

Anti-inflammatory foods were and are a leading source of prevention, where anti-inflammatory spices are a big deal. Adding more spice in your life and to your diet helps support better health and longevity.

And sticking to an anti-inflammatory diet is also a remedy from following Diet Culture of some kind. It’s a long-term healthy eating strategy.

Where whole and minimally processed healthy food and ingredients in meals and bakes you eat are at the core of anti-inflammatory foods and your health eating. Anti-inflammatory foods are real (nutritious) foods that the body recognizes as healthy

And this includes plant-based foods, so eating plant-forward helps the body. And foods on a Mediterranean diet, which is a type of anti-inflammatory diet that includes healthy proteins and healthy fats, such as wild fishes and olive oil.

👉 To learn more, grab my FREE Anti-Inflammatory Diet Food Guide with printable food lists to help you make more healthy decisions for grocery food shopping. And get insights about an anti-inflammatory diet in the free guide.

And here on these pages of Anti-Inflammatory Lifestyle (Winter/Spring edition), you’ll discover simple and easy recipes you can make weekly. And get inspiration about anti-inflammatory living and seasonal foods you can lean into (that are more abundant and coins per ounce). To turn the pages forward/backward, click on the arrows at the lower corners of the pages. ↪

Turmeric Soup

Mushy Peas

Healthy Chicken Salad

Salmon Salad (No-Mayonnaise)

Radish Salad

Sourdough Bagel

Healthy Mayonnaise  (Egg yolks)

One of my favorite meals is weekend brunch. 😊 You can make your own no-butter bearnaise for a lower-calorie and anti-inflammatory-infused olive oil brunch sauce to pair with delicious savory meals like Eggs Benedict (with French bistro vibes🍽️). You can make this recipe and other healthy-conscious (but always tasty) waffle iron recipes.

And low-sugar desserts where the sweet tooth list is growing (variety is the spice of life! 🍥)

🍴You can also get more anti-inflammatory recipes and food ideas for the table from the Summer/Autumn anti-inflammatory food recipes. 🥄 That for some may be the season you’re celebrating and living out (literally or figuratively!).

Blueberry Muffin – (Low-Sugar) One-Bowl Easy in 30 Minutes

Blueberry muffin is one of my favorite breakfast morning starts. I remember when I was a tween who made blueberry muffins from a box and they were a hit. It’s hard to mess up a mix! Blueberries in a can came in the mix and I remember enjoying draining them as part of the experience.

Blueberry muffin made easy and delicious.

Little did I know that a blueberry muffin is so simple to make with a few ingredients you probably already have in your kitchen pantry! This wild blueberry muffin recipe is a delicious, low-sugar and healthy-ingredient one. I think you’ll go wild over it if you give it a try! 🫐

With flour, milk, and blueberries, you can bake muffins. And below I tell you how to get the most out of what you have in your kitchen or pantry already, and use healthier ingredients than what you find in a mix/box.

Of course… organic wild blueberries are the super star anti-inflammatory healthy ingredient. Frozen blueberries work great and also go well with a blueberry smoothie with peachy cheesecake tastes.

For the muffins, to improve the muffin texture, an egg yolk and rising agent (baking powder and baking soda) with do the trick. A box of baking soda is usually in your fridge already to prevent odors.

Then add in a little lemon juice or vinegar to activate. And if you don’t have those ingredients, you can also add honey. Yes, honey! Or maple syrup that’s in this recipe for sweetness (to go with the blueberry muffin morning theme). How sweet! 💕

And if you don’t have milk available, you can make your own oat milk from oatmeal or nut milk from nuts and even a pecan latte to go with your blueberry muffin in the process. So you don’t have to keep shelf-stable milks in your home anymore. And coconut milk too is an option on the table!

How nuts… that milking (a plant) is so easy with ingredients you may already have at home! 🥛

Oh, and this easy blueberry muffin recipe starting from the time you gather home ingredients, combine, and bake in your oven… all-in, is 30 minutes!

Blueberry muffin that's made in 30 minutes.

Ready for your blueberry morning? You may also like to add a blueberry cobbler (made with applesauce), buckwheat blueberry scone, and/or a blueberry muffin with chocolate chips and Greek yogurt.

Blueberry muffin made easy and delicious.
Print

Low-Sugar Blueberry Muffin - 30-Minutes and One-Bowl Easy

This is a healthy low-sugar breakfast staple that can be made from wholesome ingredients. This recipe makes 2 muffins.
Course Breakfast, brunch
Cuisine American
Total Time 30 hours
Author Brandy @ Healthy Happy Life Secrets

Equipment

  • muffin or cupcake tin

Ingredients

  • 1/4 cup blueberries (organic and wild suggested)
  • 3/4 cup almond flour (or gluten free flour of choice)
  • 6 Tbsp whole wheat flour (or all purpose flour)
  • 1/2 cup milk of choice
  • 1 large egg yolk
  • 1 tsp neutral oil (light olive oil or coconut oil)
  • 1/4 tsp baking powder
  • 1/8 tsp baking soda
  • 1 tsp maple syrup (or raw honey)
  • pinch of salt

Instructions

  • Prepare your muffin tin. You can use cupcake holders or use baking spray so they don't stick.
  • Combine the dry and wet ingredients in one bowl. The batter will be wet and thick and pour-spoon-able.
  • Spoon batter into cupcake tin or holders.
  • Bake at 350°F/180°C for 20-25 minutes.
  • Let cool and enjoy!

Sourdough Bagel – with Healthy Matcha

Sourdough bagel made with matcha is hard to match-ah when it comes to the healthy matcha marble effect you can swirl in. Someone already took an irresistible bite out of this one, backside up.

Sourdough bagel made with healthy matcha at home.

In this bagel recipe, you’ll not need to cut around a bagel. This bagel comes already halved out of the oven. The benefit is you don’t have to do extra slicing work. 🥯

Sourdough bagel halves with matcha and poppy seeds.

..AND you can make the topping side toasty brown and crunchy if that’s what you like. That’s what I’m talkin’ about! 😋 But for a softer side, bake about 5 minutes less than the recipe time calls for.

To make this sourdough bagel, you probably have all the ingredients you already need in your kitchen pantry.

If you have flour, you can make this!

Since it’s made from sourdough, you won’t even need dry yeast. Time and air will do the heavy (sour bread dough) lifting.

…That results in light and airy pockets inside the bagel bread. And sourdough is more digestible than regular bread or store-bought that can have sugar, so you’ll possibly feel better (and lighter).

And with this recipe, you may never go back to store-bought processed bagels 🥯

While warm and fresh, after baked, the sourdough bagel is best eaten same day, 2-3 days after, or you can freeze them.

But straight from the oven when it’s piping hot, and ready is delightful!

To make the sourdough bagel:

Knead the dough as you would (instruction in recipe below).

Then let the sourdough proof (and turn sour) in room temperature for 2-3 days.

(In case you’re wondering about the step order.)

And after sourdough proofed (see the sourdough bubbles), as you shape your dough for your baking, you can add in (lightly knead in) your matcha powder just before it goes in the oven.

Proofed sourdough with matcha powder.

Matcha Sourdough Bagel Heathy Points  

Matcha is a green tea and you can find it in powder form along with other tea types, these days. It has healthy ECGC, an antioxidant. And an amino acid that’s known for calming anxiety and stress. That also naturally supports sharpening your cognitive abilities like mind focus. Who couldn’t use more of that, some days (or daily)?

Also your sourdough comes with a lower GI (as in glycemic index that most breads are higher in). Basically, sourdough is more of an anti-inflammatory bread food vs. processed white bread.

Then after baked, when you pile on lean protein and healthy fat ingredients like wild salmon lox (with Omega 3s for more anti-inflammatory goodness), you’re actually getting a healthy meal and not just mostly high carb calories… that’s not ideally what your body wants to start with in the morning.

And maybe also add fermented cabbage or an avocado (source of macronutrient) that are other types of greens that pair well with matcha and savory meals. And maybe an avocado smoothie to break a fast?

This sourdough bagel is hard to match-ah!

Print

Matcha Sourdough Bagel

Use one cup of flour per regular size bagel (with two halfs).
Course Appetizer
Cuisine American
Author Brandy @ Healthy Happy Life Secrets

Equipment

  • Baking pan
  • Silpat silicone baking sheet
  • container with a top or cover

Ingredients

  • 1 cup bread flour
  • 1/2 cup water
  • 1 tsp coarse salt
  • 1 Tbsp matcha powder
  • 1/4 tsp olive oil (optional)
  • poppy seed (optional)

Instructions

  • Make the bagel dough: Add flour to bowl with water and salt. Start with 1/4 cup of water and add enough water for the dough to all come together and is slightly sticky (but not soaking with water). Knead the dough for about 7-9 minutes by mixer machine (or by hand) and form a small dough disc (shape won't matter as your dough will expand and spread in your container).
  • Proof (and sourdough) the dough: Add dough to a container with a lid or cover with plastic wrap. You can drizzle olive oil at the bottom of the container if you like for flavor (optional). Leave out for 2-3 days in a shaded/cool room temperature kitchen spot. If you want to speed up sourdough, bring out to a warmer room temperature spot. You will know it's ready when you see dough bubbles and the dough has a fragrant aroma (not too sour). If it gets too sour for your liking, put in the refrigerator for a few hours and it will calm down. When you add bench flour also, it will do the same.
  • Shape the bagels: "Pour" and scrape out the sticky-ish dough all-in-one from the container onto the baking pan. Roll in a little bench flour (like bread or semolina flour). Split into two long bread dough strands. Add dashes of random matcha powder to create a marble effect. Optional (for rolls): you can pour (onto baking pan) in one layer into a rectangle shape for a bread loaf you can cut up.
    Tip: For a traditional bagel round ring shape with a hollow middle: pour the sourdough around a small circular object -- (like a smooth small oven-safe cup or metal piping tip) and onto a Silpat lined baking sheet pan that will leave a hole (in the ring center) -- until the dough ends meet. Make 2 bagel half shapes. Add poppy seeds on tops, or any flavor adds you want to make.
  • Bake at 350°F/180°C about 35-45 minutes or until edges and bottom are golden brown and depending on the "toast" type/soft vs hard bagel you like. Let cool and remove the circular object. Tip: Between the grip of the thumb and forefinger on one hand, shake the object back and forth until it loosens and then push through to loosen.

Easy Berry Tea Scone – Low-Sugar

An easy berry tea scone can be a low-sugar healthy dessert. When I don’t know what to bake, and have a sweet craving, it’s a scone!

Whether you pronounce it sgonn or scone, it’s a score that will be gone soon!

…Like this raspberry lavender scone plate that’s irresistible during heart month and for a Galentine’s dessert 💕

Pair heart healthy raspberries and dark chocolate (with flavanols that improve blood flow) for a tasty anti-inflammatory effect.

Easy berry tea scone with raspberries for heart healthy.

And if you’re wondering what separates a scone apart, here’s my take…

A scone is a breakfast pastry, a sweet snack like a cookie, and more elevated than a bar. It’s also an EASY bake you can make low-sugar and healthier with your delicious flavors!

Cut round like a pie, but looks flat like a pancake (before the oven)… a scone comes out of the oven wedge heel-raised elevated, puffs up in the center, and crunchy inside and around in all the right places.

You can be creative and dream up your own easy scone flavors to life. This is the new food wheel… with berry and white chocolate. 😊

And if you cut the wedges before it goes in the oven, like this…

An easy berry tea scone can be a low-sugar healthy dessert that's easy to share.

…You’ll have less crumbs on the baking board and more in your mouth.

Plus with cut wedges, whether you share or not, you’ll know how many wedges are left… before it’s sgonn. 😋

That I’m sure is fast. It’s a good idea to go ahead and make 2 scones side-by-side to anticipate its appeal.

And if you have an event you need or want to bring a dessert to, a scone is a smart, foolproof one!

You can’t mess it up, and it will be a hit 🙌

On that note, the reason I really like a scone is you don’t have to do any prep work.

For starters, the few, small pats of butter you use can be straight from the fridge  or freezer and works better.

Because cold keeps the fat separate with small pieces in the dough, so that when it goes into the magical oven, steam happens and creates air pockets so you get an airier scone like you expect in breakfast pastries.

That’s the fascinating baking science part.

And with the texture working for your easy berry tea scone, you can add almost any sweet food ingredient that inspires you.

Think of the variety of tasty, healthy anti-inflammatory flavors (aka flavanols).

…Like spices, healthy smoothie powders, extracts, berries, honey, tea, and fruit. And for the wet ingredients, you can use tea like Early Grey bergamot or lavender that I added.

Perfect pairings for weekend Sunday brunch or afternoon tea! 🫖

A technique I like: in a mug, add warm tea water to honey to liquefy, plus the tea all together. Let it cool and then add to the dough mixture.

You can also shredded coconut or zest like in a low-sugar orange scone  (that’s like confetti 🎉).

Think also of healthy cake ingredients you can use.

…But without any egg or milk (if you choose).

Which means a easy berry tea scone can live longer if you want it to last on a room temperature plate.

All in all, this is a delicious dessert for any occasion that no one will know there is very little sugar (and no table sugar) if you choose.

Shhh!… unless you tell ’em.

Because honey and butter alone are a delicious pairing that is enough for a delicate and decadent pastry.

But why leave it there? Healthy tea and fruit in an easy berry tea scone adds an elevated taste.

Easy berry tea scone plate for afternoon tea or everyday desserts.

And while I pulled 13 pantry and fridge ingredients in total (in the recipe), you can make this with half as many ingredients or less if you want to keep it simple… starting with some flour, butter, liquid, and sweet.

And to keep it healthier, use a healthier flour blend (e.g. almond or gluten-free flour), less butter, honey, and brewed tea. Up to you!

One thing in common is your easy berry tea scone will be delicious. See what you can come up with using my recipe as inspiration. 🍥

Enjoy your berry scone tea tasting!

Easy berry scone with raspberries for heart healthy.
Print

Easy Berry Tea Scone

This is a berry tea scone that you can make your own flavors and ingredients with the instructions provided
Course afternoon tea, Breakfast
Cuisine American, british
Servings 8 pieces
Author Brandy @ Healthy Happy Life Secrets

Ingredients

  • 3/4 cup almond flour
  • 1/2 cup all purpose flour
  • 2 Tbsp butter, cold small pieces
  • 1 tsp lavender tea (brewed and cooled)
  • 1-2 tsp raw honey
  • 1 Tbsp blueberries
  • 1 Tbsp raspberries, dried or fresh
  • additional berries for tops
  • 1/4 tsp cinnamon spice
  • 1/4 tsp salt
  • 1/2 tsp baking powder
  • 1 Tbsp white chocolate (optional)
  • 1 tsp vanilla extract

Instructions

  • Fully hand mix ingredients into a 4" dough disc. If you find that the scone dough is too dry (and won't stick together), add a little inspiring liquid that can be water, or flavored teas to get a dough that sticks together and slightly moist to the touch. If you find the scone is too wet or sticky, add some dry ingredients like spices, almond flour, and/or healthy powders.
  • Press additional sweet ingredients like berries randomly to the tops.
  • Cut 4" scone into 8 pie wedges.
  • Bake at 325°F/165°C for about 35 minutes (or until browned all around).